How to choose the correct seatpost clamp size
Measure the frame's seat-tube outside diameter—not the seatpost—then match the clamp design, slot position, fit, and exact torque instructions.
 Field guide / how-to-choose-correct-seatpost-clamp-size
Choose a conventional external seatpost clamp by the outside diameter of the frame’s seat tube where the collar sits—not by the diameter printed on the seatpost. A bicycle with a 27.2 mm or 30.4 mm post needs a larger clamp because the frame tube surrounds the post. Confirm the frame maker’s specification first, then measure the bare, round clamping surface with a caliper if documentation is unavailable.
The short answer: identify the exact frame, check whether it uses an external collar or proprietary internal wedge, and find the published seat-collar diameter. For an external collar, measure the seat tube outside diameter at the clamp seat in several directions. Match the clamp maker’s stated fit range and follow the lower applicable torque limit among the frame, post, and clamp instructions.
Seatpost diameter and clamp diameter are different
A current r/bikewrench post asked what replacement clamp to buy for a bicycle with a 30.4 mm seatpost. The post size alone cannot answer it.
Think of the parts as nested layers:
- The seatpost sits inside the frame.
- The seat tube wall surrounds the post.
- Paint or finish may add a small amount outside the frame.
- The external collar surrounds that finished seat tube.
Manufacturers therefore list seatpost and seat-collar diameters separately. Surly’s published frame specifications, for example, pair a 27.2 mm post with a 30.0 mm collar on some frames and a 30.9 mm post with a 33.1 mm collar on another. Those are examples, not a conversion formula.
First identify the clamp design
Do not buy a round collar until you confirm the bike uses one.
Common arrangements include:
- a removable external collar around a round seat tube;
- a welded or brazed frame clamp with a binder bolt;
- an internal wedge hidden under a cover;
- an aero or D-shaped proprietary post and wedge;
- two-bolt or model-specific clamping hardware;
- an integrated seat mast with a dedicated topper.
Proprietary systems must use the frame maker’s approved parts and assembly procedure. A generic external collar cannot replace an internal wedge merely because the measured diameter seems close.
Find the published size before measuring
Search the bicycle or frameset support page using brand, model, year, frame size, and frame material. Look for:
- seatpost diameter;
- seatpost clamp or seat-collar diameter;
- clamp part number;
- bolt and washer part numbers;
- maximum torque;
- grease, carbon assembly compound, or dry-assembly instruction;
- minimum insertion and frame-specific maximum insertion.
Used bikes may have replacement parts, so compare the documented design with the frame in front of you. If the frame serial number identifies a running change, use it.
Measure an external-collar frame correctly
If the frame maker cannot supply a specification and the frame genuinely uses a round external collar:
- Remove the old collar only after marking the saddle height and supporting the post.
- Clean loose dirt from the collar seat without scraping paint.
- Check for cracks, distortion, burrs, corrosion, or a damaged seat-tube slot.
- Use a vernier caliper across the outside of the seat tube where the collar sits.
- Measure in more than one direction without squeezing the caliper hard.
- Record the largest repeatable dimension.
- Compare it with the clamp maker’s actual fit range, not only the name on a marketplace listing.
Wolf Tooth’s measurement guide explicitly says to measure the frame, not the post, and notes that paint and manufacturing tolerances can affect the reading. Its tolerance applies to its clamps; do not copy that range to another brand without documentation.
Avoid measuring over a flare, weld bead, damaged edge, removable shim, or decorative cover. Do not sand the frame or spread a clamp to make an almost-right size fit.
Match more than diameter
Check the replacement collar’s:
- internal lip and whether the frame top allows it to sit flush;
- height and clearance from welds, bottle bosses, and post features;
- bolt direction and access;
- slot alignment required by the frame and clamp maker;
- material and suitability for the frame;
- included bolt, washer, and thread treatment;
- maximum torque and tightening procedure.
A clamp’s instructions may require its slot to sit over the frame’s seat-tube slot. Other systems may specify a different relationship. Follow the exact combination in front of you.
Torque is a system limit
The number printed on a collar is not permission to exceed the frame or seatpost limit. Use the lowest applicable maximum from:
- frame instructions;
- seatpost instructions;
- clamp instructions;
- any model-specific service bulletin.
Prepare threads and contact surfaces only as instructed. Grease, dry assembly, and carbon friction paste are not interchangeable universal treatments.
Tighten with the correct torque wrench. If the post still slips at the specified torque, do not keep adding force. Diagnose diameter, contamination, surface preparation, insertion, post compatibility, frame damage, and clamp condition using the seatpost-slipping guide.
Check the installation before riding
After assembly:
- Confirm the collar sits fully and evenly on its intended seat.
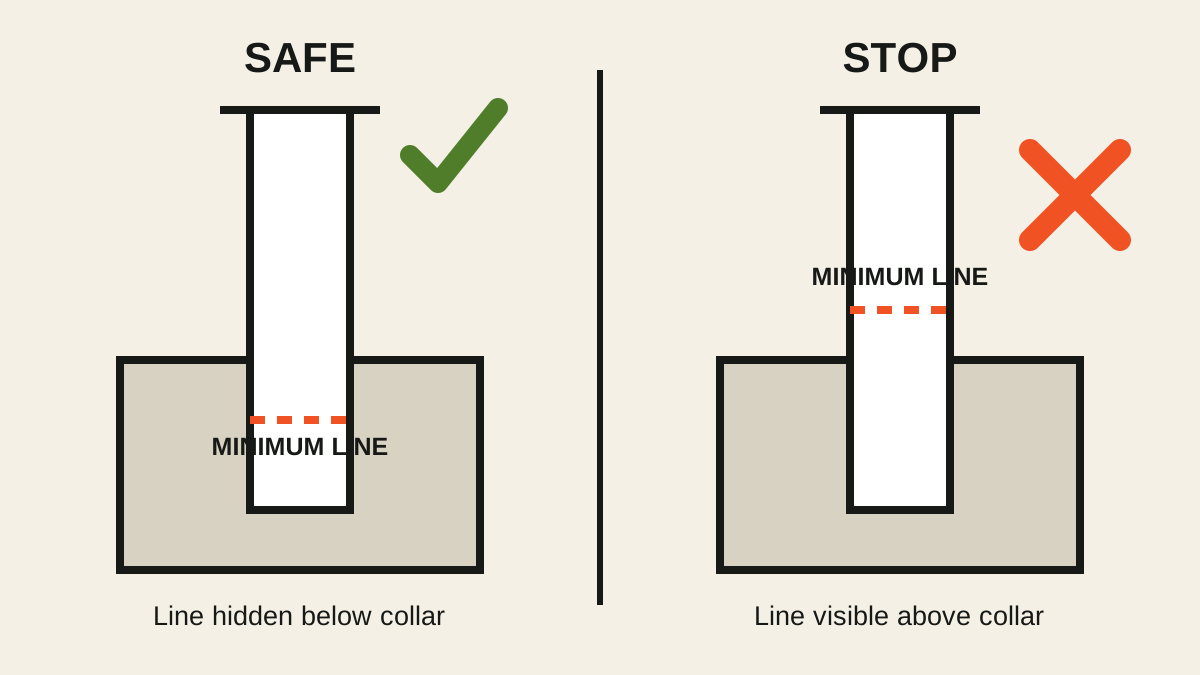
- Verify the post remains above its minimum-insertion line and within any frame maximum.
- Check the saddle height and alignment against your marks.
- Tighten to the documented torque.
- Apply modest twisting pressure to the saddle; the post should not move.
- Inspect the frame slot and collar for uneven closure or distortion.
- Take a short smooth test ride, then recheck for movement.
Stop if the collar closes completely but the post remains loose, one side of the slot deforms, or the frame makes cracking sounds. Those are not invitations for another turn of the bolt.
Your next step
Write down the frame model, year, seatpost diameter, and published seat-collar diameter as four separate facts. If the clamp size is missing, measure the frame’s external collar seat with a caliper and confirm the result with the proposed clamp maker before ordering.
If you are also changing post length or height, read seatpost minimum insertion explained before loosening the old clamp.
Sources and further reading
- Wolf Tooth seatpost-clamp measurement and installation guide
- Surly Instigator specifications showing separate post and clamp diameters
- r/bikewrench reader context: replacement clamp for a bike with a 30.4 mm post — used as an editorial question signal; the photograph was not used to identify a replacement remotely.