Why is your heel rubbing the bike chainstay?
Inspect heel-rub damage, find whether shoe position, cleat setup, stance width, or loose parts cause contact, and protect the frame only after restoring clearance.
 Field guide / heel-rubbing-bike-chainstay
Your heel rubs the chainstay when the shoe’s path overlaps the frame during part of the pedal stroke. The cause may be harmless shoe shape or natural heel-out posture, but it can also be a moved cleat, loose shoe, wrong pedal hardware, excessive bearing play, or an unsuitable attempt to change stance width.
The short answer: clean and document the mark before covering it. Confirm the bicycle is mechanically sound, then reproduce the contact at easy effort and identify which shoe surface touches. Adjust only within the pedal, cleat, shoe, crank, and frame instructions. Protective film prevents cosmetic wear; it does not create clearance or certify damaged carbon.
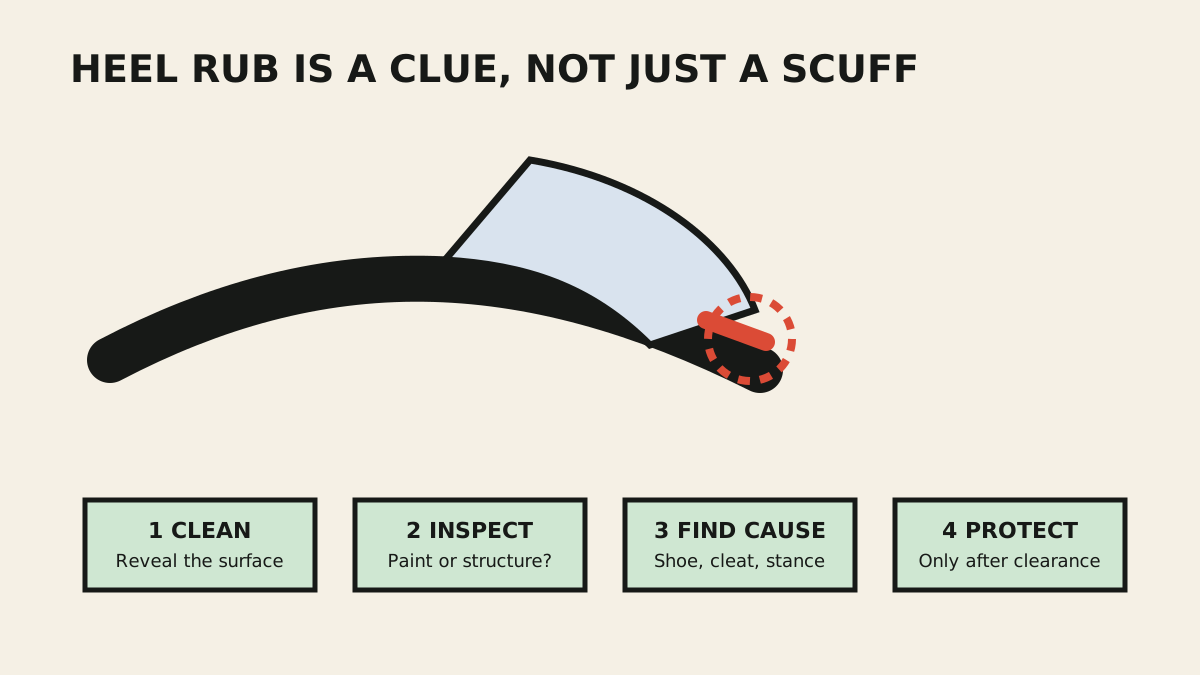
Inspect the frame before changing the fit
Wash dirt from the chainstay with a bike-safe method and dry it. Photograph the whole stay and a close view with a ruler for scale. Inspect in bright, changing light from several angles.
Look for:
- transferred rubber, fabric, dirt, or polish on top of intact paint;
- paint or clear-coat loss with a smooth, stable surface beneath;
- exposed fibres, a cut edge, crushed material, a dent, crack, bulge, or separation;
- a line that continues around the tube or into a weld or joint; and
- clicking, movement, or a changed shape when the bike is gently handled.
Do not sand the mark to “see how deep it goes,” press hard on suspected carbon damage, or use a coin-tap video as a structural verdict. A frame maker or qualified carbon repair specialist needs the model, material, location, clear photographs, history, and often an in-person inspection.
If you are evaluating a used bike, ask when the mark began, whether it is growing, which shoe caused it, and whether the frame has been assessed. Price uncertainty as uncertainty; the used-bike condition checklist gives the wider inspection order.
Eliminate loose or incorrect parts
Before treating this as a fit preference, check the mechanical system:
- Confirm the rear wheel is secure, centred, and free of side play.
- Check the crank for side-to-side movement or a loose fixing system.
- Check each pedal for looseness, damaged threads, or bearing play.
- Inspect the shoe sole, cleat, adapter, and bolts for movement or wear.
- Confirm washers, pedal extenders, cleat shims, and axle parts match the exact product instructions.
A heel that suddenly starts touching after months of clearance deserves investigation. Protective tape is not the first response to new crank play or a sliding cleat.
Identify where and when contact occurs
Use a stationary trainer only if the bicycle is installed correctly and stable. Have a helper observe from behind while you pedal easily, or film a rear view with the camera centred and level. Keep loose clothing away from the drivetrain.
Record:
- left, right, or both sides;
- seated or standing;
- easy and stronger effort;
- flat pedals or clipless pedals;
- shoe heel, closure, upper, or sole contact; and
- one brief brush or repeated pressure on every revolution.
Also inspect the shoe. A protruding heel tread, loose overshoe, buckle, or wide winter upper can touch even when the foot itself has not moved.
Adjust cleats without forcing the body straight
Do not rotate a cleat until the heel looks perfectly parallel to the crank. Feet and lower legs do not all point straight ahead, and locking a rider away from a natural angle can create discomfort elsewhere.
Shimano’s road-pedal instructions provide model-specific fore-aft and lateral cleat adjustment and require provisional tightening, one-shoe-at-a-time engagement practice, and final specified torque. Other systems have different float, hardware, and limits.
If the cleat has safely moved, restore its documented position or use the first-time cleat setup process. Mark the starting position, change one variable, tighten correctly, practise release while stationary, and repeat a short easy ride.
Moving the cleat laterally changes shoe position relative to the pedal, but the available direction depends on the system. Pedal washers, longer axles, extenders, or stance-width changes may affect thread engagement, crank clearance, bearing loads, cornering clearance, and fit. Use them only when the pedal and crank makers approve the complete combination.
Protect paint after clearance is restored
Once the cause is controlled and the frame is confirmed sound, apply a clean, compatible protective film to the likely contact zone. Round the film’s corners and avoid trapping grit beneath it. Inspect through or beneath the film regularly.
Protection is working only if the shoe no longer presses the frame. A guard that is being cut through, displaced, or polished quickly shows that contact remains. Remove it, reassess, and do not stack thicker material into an already narrow moving gap.
When the bike shop or fitter should take over
Use a qualified mechanic when contact began with mechanical play, replacement pedals or cranks, unexplained wheel misalignment, or uncertain hardware. Use a competent fitter when clearance changes create knee, hip, foot, or release problems, or when the rider’s natural foot angle conflicts with the available setup.
Persistent pain, weakness, numbness, swelling, or one-sided movement can have causes beyond the bicycle. Stop trying to diagnose a body from a frame scuff and seek an appropriate healthcare professional.
Your next step
Clean and photograph the mark today. Check wheel, crank, pedal, shoe, and cleat security before the next ride. Then make one short, easy observation ride and record exactly when contact happens. Protect the frame only after you can demonstrate reliable clearance.
Sources and further reading
- Shimano SPD-SL pedal instructions: cleat adjustment, practice, and bolt torque
- Canyon road-bike guide: inspect carbon for notches, cracks, dents, and discolouration
- r/bikewrench discussion: visible chainstay wear attributed to repeated heel contact — used as an editorial question signal; photographs and comments cannot certify another frame.