Handlebars turn but the front wheel does not: stop and fix the stem
If the handlebars can twist away from the front wheel, park the bike, inspect the stem and steerer system, and use the exact tightening procedure before riding.
 Field guide / handlebars-turn-but-front-wheel-does-not
If the handlebars can turn while the front wheel stays put, stop riding. The stem is not clamping the fork steerer securely, or another steering part is damaged or incorrectly assembled. Straightening the bars by eye is not a repair.
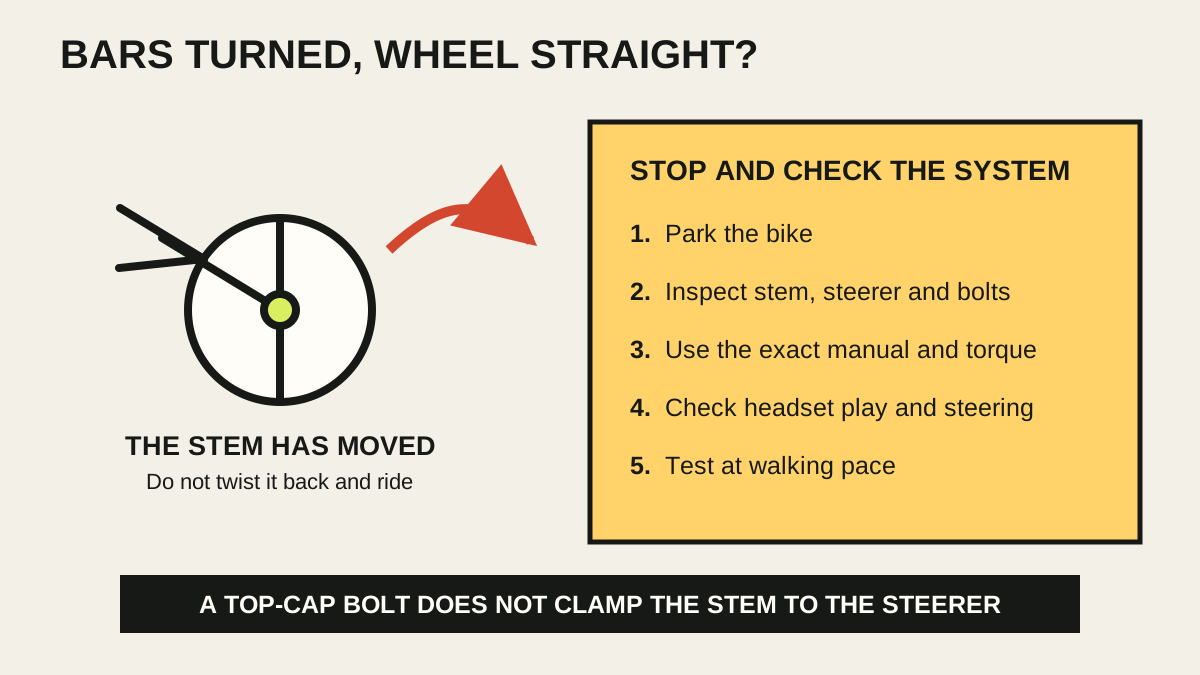
The short answer: park the bike, identify the stem and steerer system, inspect the clamping area and fasteners, then follow the exact manufacturer’s assembly and torque procedure. If the stem still slips, the correct torque cannot be reached, or carbon may be damaged, use a qualified mechanic before riding.
Why this fault is different from a loose headset
A current repair discussion describes a stem that repeatedly slips so the bars and wheel point in different directions. The suggested shortcut was adhesive. That is the wrong starting point for a safety-critical clamp.
On a common threadless system, the top-cap bolt adjusts headset bearing preload while the stem’s steerer-clamp bolts secure the stem to the steerer. Tightening the top cap harder does not make the stem grip the fork. It can instead overload the headset or compression hardware.
A loose headset usually creates play between the fork, bearings, and frame. A slipping stem lets the handlebar rotate independently around the steerer. Both faults can exist together, especially after incorrect adjustment, so check both.
Stop before trying a roadside correction
If the slip happened while riding, walk or arrange transport. Do not realign the bars, tighten an unknown bolt with a multi-tool, and continue at road speed. That may temporarily hide:
- an under-tightened or unevenly tightened stem clamp;
- the wrong stem or steerer diameter;
- insufficient steerer support inside the stem;
- an incorrectly positioned compression plug in a carbon steerer;
- contaminated or wrongly lubricated clamping surfaces;
- a cracked stem, fork steerer, spacer, or damaged bolt thread;
- a stem whose instructions require a particular bolt sequence;
- a faulty low-quality or counterfeit part.
After a meaningful slip, the clamping surfaces may also be scored. Treat recurrence as evidence that the cause remains.
Identify the system before touching bolts
Most modern road bikes use a threadless stem with one or more pinch bolts at the rear. Older bikes may use a quill stem that inserts into a threaded fork. Integrated cockpits and hidden-cable systems can use proprietary hardware.
Record the bike, fork, stem, and handlebar make and model. Photograph the spacer order and every printed torque marking. Find the current manuals for all mating parts. If the instructions conflict, stop and ask the bicycle or component maker which limit controls the assembly.
Carbon steerers need particular care. Generic instructions cannot confirm whether the compression plug is long enough, positioned behind the clamp, or approved with the stem. Do not assume a setup is safe because it resembles another bike.
Inspect without adding more force
Before loosening anything, use bright light to check:
- Fasteners: look for rounded heads, corrosion, bent bolts, missing washers, unequal gaps, or threads that never become secure.
- Stem: inspect the clamp slot, bolt bosses, edges, and body for cracks or distortion.
- Steerer support: confirm the visible stack resembles the exact fork and stem instructions. A carbon steerer often requires support through the full stem clamp and a spacer above, but the model manual decides.
- Contact surfaces: look for grease, oil, paint transfer, grit, scoring, or an improvised shim.
- Headset: check for play, roughness, binding, or a top cap bottomed against the steerer instead of preloading the stack.
Do not sand a steerer, add a drinks-can shim, coat the interface in threadlocker, or exceed the printed torque. Those actions can conceal incompatibility and damage the fork.
Use the correct assembly sequence
For a conventional threadless system, the broad sequence is:
- Support the fork so it cannot drop from the frame.
- Loosen the stem clamp as the instructions specify.
- Clean and inspect the stem, steerer, spacers, and compression hardware.
- Establish the correct spacer and steerer support arrangement.
- Set headset preload with the stem clamp loose.
- Align the stem with the front wheel.
- Tighten the stem clamp bolts in the specified order and stages to the exact applicable torque.
- Confirm free steering, no headset play, and no independent stem movement.
This is a map, not a substitute for the model instructions. Park Tool describes typical threadless-stem pinch-bolt values, but component markings and manufacturer instructions take priority. Some clamps require alternating passes; some integrated systems use a different sequence entirely.
Use a torque wrench that works accurately in the required range and the correct undamaged bit. Read how to find the correct bike torque specification before combining values from unrelated internet tables.
Do not use threadlocker as a friction patch
Threadlocker may be specified on particular bolt threads, but it is not a general remedy for a stem slipping on a steerer. The clamp faces, bolt threads, and bolt heads can have different lubrication requirements. Applying a chemical in the wrong place changes friction and therefore clamping force for a given torque.
Follow the manual. Trek’s general guidance, for example, distinguishes bolt-thread preparation from carbon clamping surfaces. Another maker may specify its own assembly compound or dry interface. “More grip” is not a universal instruction.
Test the repair in layers
After correct assembly:
- hold the front wheel between your knees and apply only a moderate hand force to the bars; there should be no movement;
- squeeze the front brake and rock the bike gently while feeling the headset junctions for play;
- lift the front slightly and turn the bars through their range; steering should be smooth and cables or hoses should not pull;
- verify front-wheel retention and brake operation;
- perform a walking-speed steering and braking test in a traffic-free area.
Do not escalate the twist test into a contest. A huge lever force can damage an otherwise correct system and proves little about road safety.
Stop if the stem slips once, bolts will not hold torque, steering binds, the headset loosens again, or any mark appears in carbon. A mechanic may need to measure component diameters, inspect threads, verify the compression plug, or replace damaged parts.
Your next step
Keep the bike parked and locate the exact stem and fork instructions. If you cannot positively identify both parts and their assembly requirements, book a steering-system inspection. After a verified repair, add the alignment and headset checks to the five-minute pre-ride bike check.
Sources and further reading
- Park Tool: threadless stem removal and installation
- Trek: stem and steerer lubrication and threadlocker guidance
- Trek: handlebar and stem alignment in the quick-assembly guide
- r/bikewrench reader context: a stem that repeatedly slips — used as a current question signal; replies were not treated as a repair specification.