Why does a road-bike shift cable fray inside the lever?
Spot a fraying mechanical shift cable before it snaps inside a road-bike lever, then replace it without losing broken strands in the mechanism.
 Field guide / frayed-shift-cable-inside-road-bike-shifter
A mechanical road-bike shift cable can fray where it bends around the mechanism inside the brake/shift lever. The first warning is often not a visible broken cable: shifting becomes hesitant, the lever needs an extra push, or one click stops producing a clean gear change. Inspect it then. Waiting for a complete break can turn a cheap cable replacement into a fiddly extraction job.
The short answer: shift the cable to its fully released position, expose the cable head using the exact lever manual, and inspect the first few centimetres for separated strands, flattening, rust, or a kink. Replace a damaged cable immediately. Do not spray blindly into the lever or keep clicking a broken cable deeper into the mechanism.
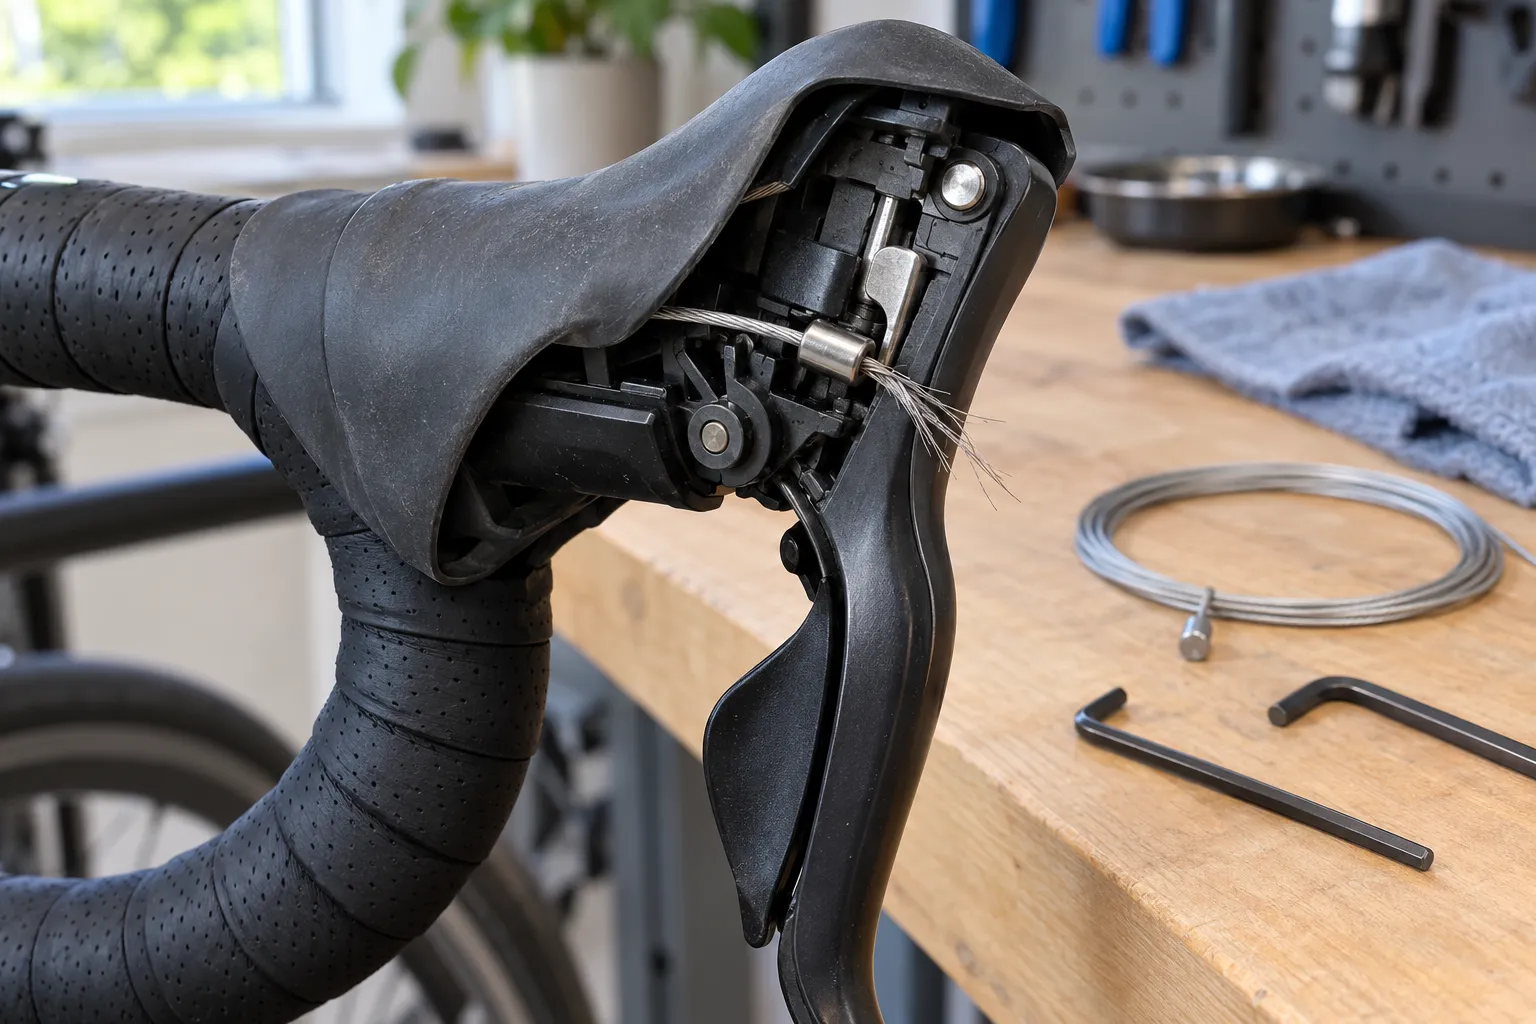
Why the cable frays there
The cable changes direction as the lever pulls and releases it. Repeated bending can fatigue individual wire strands, especially where the cable leaves its head or passes a tight guide. Water, sweat, contamination, damaged housing, a rough guide, incorrect cable type, or poor routing can increase friction and accelerate wear.
That does not mean every lever destroys cables on a fixed mileage. A recent r/bikewrench discussion produced reports ranging from frequent preventive replacement to many years without a failure. Treat that variation as a reason to inspect your own system, not as proof of a universal replacement interval.
Warning signs before the cable snaps
Check the lever and cable when you notice any of these changes:
- a click at the lever produces no shift, then the next click moves two positions;
- shifting becomes heavy even after the derailleur and chain are clean;
- indexing changes repeatedly after apparently correct adjustment;
- the rear derailleur reaches some gears but not the full cassette;
- small wire strands appear under the hood or near a cable port;
- the cable feels notched, flattened, rusty, or kinked when removed;
- the problem returns quickly after using the barrel adjuster.
Do not diagnose every poor shift as a frayed cable. A bent hanger, dirty housing, loose anchor bolt, worn drivetrain, badly routed chain, or incorrect derailleur setup can feel similar. The inspection is useful because it confirms or rules out one hidden wear point.
Inspect the cable without making the problem worse
- Identify the lever model. Look under the rubber hood for the model code, then find the manufacturer’s dealer manual. Cable ports and cover removal differ between generations.
- Shift to the cable-release position. For a typical rear derailleur, operate the release lever until it will not click further. This removes cable tension and places the head near its service position—but follow the manual, not a generic assumption.
- Release the derailleur anchor. Note the original routing before loosening it. Photograph the cable path if you are new to the job.
- Expose the cable head. Roll back the hood or remove only the cover named in the manual. Do not dismantle the ratchet mechanism.
- Pull gently. If the head will not move, stop. Broken strands may be hooked inside the lever.
- Inspect the full removed cable. Pay special attention to the section that lived inside the lever and to every housing exit.
If the cable is already broken, keep the lever still while you locate the head and loose strands. A magnet will not reliably collect every stainless cable fragment. Fine tweezers or a small pick may help when the manual provides access, but force can push the fragment farther into the ratchet.
Replace the cable as a system
Use the cable type and diameter specified for the lever. Brake and shift inner cables are not interchangeable. Some systems also call for a particular coated cable, housing, small-tongue ferrule, or short flexible housing section.
Before threading the new inner cable:
- inspect the housing ends for crushed liners or sharp burrs;
- replace cracked, rusty, contaminated, or high-friction housing;
- confirm every ferrule is the correct type and seated fully;
- copy the original routing around the handlebar and through the frame;
- keep any factory coating or lubricant unless the manual says otherwise;
- cut housing squarely with cable cutters and reopen the liner carefully.
After anchoring the cable, set the high limit and cable tension using the derailleur procedure. The barrel adjuster corrects small indexing errors; it should not be used to hide a cable that is failing or housing that is dragging.
Choose an inspection trigger, not a magic distance
Usage matters more than the calendar. A rider shifting constantly on steep roads, training indoors in heavy sweat, or riding year-round in wet conditions may need to inspect more often than a dry-weather rider on flat routes.
A practical habit is to inspect the lever-end cable during major drivetrain service, whenever bar tape is changed, and at the first unexplained change in shift feel. Record the date and condition in a condition-based maintenance log. That creates evidence from your own bike instead of importing another rider’s replacement interval.
Your next step
Find the model code on each mechanical shift lever and save the manufacturer manual. Then shift to the fully released position and inspect the cable head under bright light. Replace any cable with broken strands; if the cable will not withdraw cleanly, stop before the lever swallows the fragments.
For the broader service decision, use when to replace road-bike cables and housing.
Sources and further reading
- Shimano technical manuals search — use the exact lever model rather than assuming all cable paths are alike.
- Shimano ST-R7000 exploded view and specified cable set
- r/bikewrench discussion about cables fraying inside mechanical road levers — used as an editorial demand signal; individual replacement intervals and diagnoses were not treated as verified facts.