How to keep a condition-based bicycle maintenance log
Track inspections, measurements, symptoms, service, and verification so mileage informs maintenance without becoming a blind replacement rule.
 Field guide / condition-based-bike-maintenance-log
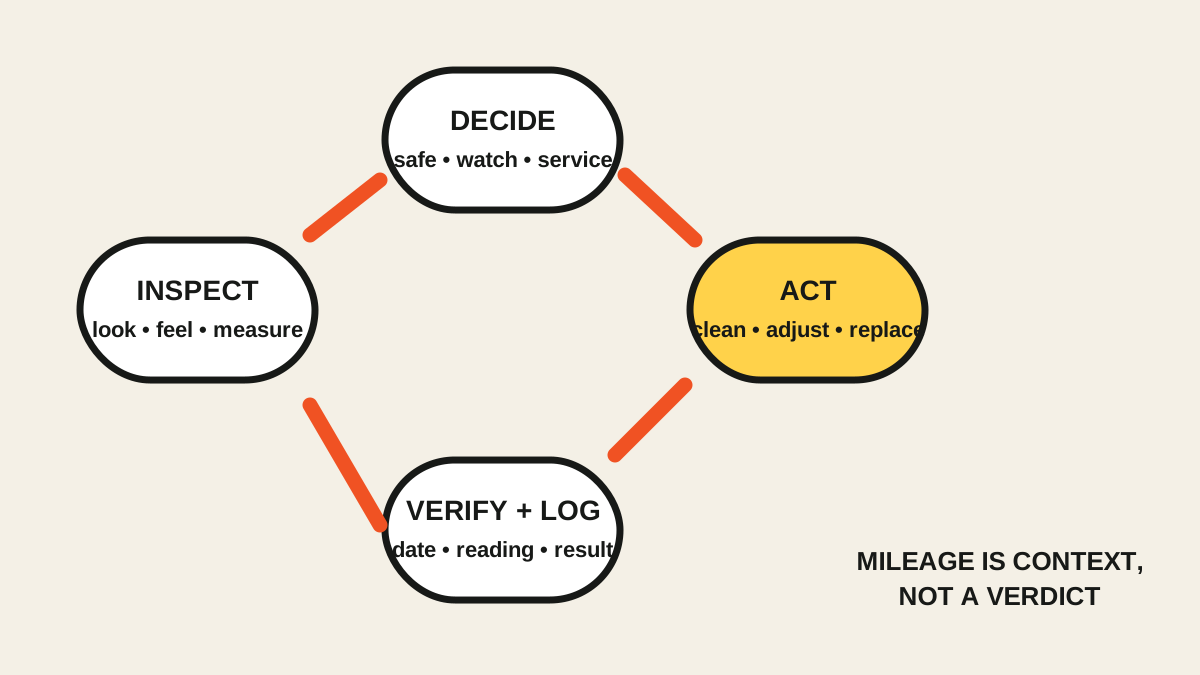
A useful bicycle maintenance log records condition and action, not just kilometres. Mileage tells you when to inspect; measurements, symptoms, environment, manufacturer limits, and the result of the inspection tell you what to do.
The short answer: record the date, bike, component, distance context, observable condition, measurement method, action, parts used, torque or pressure source, and a post-service test. Set reminders for inspection—not automatic replacement—unless the manufacturer specifies a hard interval or limit.
Why a mileage-only schedule fails
Two recent public discussions exposed the same problem from different directions: riders asked where basic maintenance should begin and how long road tyres should last. The replies contained widely different lifespans because riders, roads, tyres, weather, pressure, loads, and maintenance differed.
A calendar or mileage reminder is still useful. It prompts you to look. But “replace every X kilometres” can replace a healthy part early or leave a damaged part in service too long.
The Trek owner manual makes the same distinction: maintenance frequency depends on use, and a malfunctioning or damaged part should be serviced immediately rather than waiting for the interval.
Start one record for each bike
Use a notebook, spreadsheet, or app you will actually open. Create a bike header with:
- make, model, size, year, and serial number;
- purchase date and proof-of-purchase location;
- wheel, tyre, tube or tubeless setup;
- drivetrain and brake models;
- links or filenames for current manuals;
- important manufacturer limits;
- shop contact and last professional service.
Do not place secrets or access codes in a shared maintenance file. A serial number may help ownership records, but choose storage appropriate to your privacy needs.
Record observations in a repeatable format
For every inspection or service, capture:
- Date and distance context: total bike distance if known, plus component distance if tracked separately.
- Trigger: scheduled check, new noise, crash, wet ride, wheel removal, poor shifting, or visible wear.
- Condition: what you saw, felt, heard, or measured.
- Method: tool, reference points, and manufacturer threshold used.
- Decision: safe to use, monitor, service now, or stop riding.
- Action: cleaned, adjusted, lubricated, torqued, repaired, or replaced.
- Parts: exact model, size, compound, and batch where useful.
- Verification: static check and controlled test result.
- Next check: date, distance, or condition trigger.
“Fixed brakes” is not a useful future record. “Rear pads measured near maker’s limit; shop replaced pads, cleaned rotor using maker-approved method, bedded in, lever firm and brake tested” is.
Use different triggers for different parts
Before every ride
Keep this brief: tyre condition and pressure, wheel security, brakes, steering, obvious looseness, and anything disturbed since the previous ride. Shimano’s inspection guidance also asks whether shifting is smooth, parts are loose or damaged, components are secure, and abnormal noises are present.
Use the five-minute pre-ride check rather than opening a spreadsheet for every normal observation. Log only exceptions or meaningful changes.
After unusual conditions
Create an inspection trigger after:
- a crash or hard impact;
- a deep pothole;
- transport with wheels or cockpit removed;
- prolonged rain, salt, mud, or trainer sweat;
- a new noise or handling change;
- a repair or component installation.
The event matters more than the odometer. A nearly new tyre with a sidewall cut needs attention now.
At planned intervals
Use the maker’s schedule as the baseline for bearings, suspension where present, hydraulic systems, electronic components, and warranty service. Shorten intervals for severe conditions. Do not copy another rider’s schedule without checking whether the hardware and use match.
For beginner road-bike tasks, the realistic maintenance schedule provides a starting rhythm.
Track measurements that support decisions
Only record measurements you can take consistently and interpret from the correct manual. Examples include:
- chain-wear reading with the named checker and orientation;
- disc rotor or pad thickness against the exact component limit;
- tyre pressure measured cold with the same gauge;
- tubeless sealant inspection date and amount added;
- torque applied using the component or bicycle specification;
- battery charge and firmware work where relevant.
Avoid invented universal thresholds. A rotor’s minimum thickness, a reusable quick-link rule, or a service interval can differ by model. Save the source beside the record.
Log symptoms before adjusting
When a bike develops a problem, write down:
- when it happens: seated, standing, braking, coasting, or shifting;
- which gear, wheel rotation, or crank position;
- dry or wet conditions;
- changes made immediately beforehand;
- whether the symptom is repeatable;
- whether it affects safe control.
This stops random adjustment and gives a mechanic better evidence. If a symptom involves braking, steering, frame or fork damage, wheel retention, or sudden instability, stop the test and seek qualified help.
Verify every maintenance action
The log entry is not complete when the bolt is tightened or the pad is installed. Record the verification:
- Visual check against the manual.
- Static function check.
- Low-speed controlled test away from traffic.
- Re-inspection after the test when the instructions require it.
Never use a public road to discover whether a brake repair works. Complex or safety-critical work outside your training belongs with a qualified mechanic.
A copyable log entry
Use this template:
- Date / bike / distance: 2026-09-29 / road bike / 2,140 km
- Trigger: repeating scrape after rear-wheel removal
- Condition: rotor rub once per revolution; axle was recently disturbed
- Source: wheel and brake manufacturer manuals
- Decision: do not continue normal ride until wheel seating and brake operation are verified
- Action: wheel reseated and axle tightened exactly as instructed; no caliper adjustment required
- Verification: wheel secure, brake operates, no repeating rub during static spin and low-speed test Next check: before next ride and after 10 minutes
The value is the sequence, not the sample diagnosis.
Your next step
Create one record for your current bike and enter its tyre setup, brake model, chain, last known service, and manual links. Then schedule a condition check using the beginner maintenance schedule—not a shopping list of automatic replacements.
Sources and further reading
- Reddit: recent basic-maintenance discussion and road-tyre lifespan discussion — editorial demand signals only; anecdotal intervals were not treated as verified service limits.
- Trek bicycle owner manual: maintenance frequency and inspection
- Shimano: regular inspections before riding