How do you find the minimum bike-tyre pressure when it is not listed?
Do not invent a minimum from the printed maximum. Check the exact tyre, rim, tube or tubeless setup, total load, and underinflation signs before testing pressure.
 Field guide / find-minimum-bike-tyre-pressure-not-listed
Before you buy
Check the starter kit first
Print the one-page buying brief for helmet, lights, water, phone, and repair compatibility before comparing upgrades.
A maximum pressure printed on a bicycle tyre does not let you calculate a safe minimum by taking a percentage. The lower limit depends on load, tyre volume and casing, rim width and type, tube or tubeless setup, terrain, speed, and the manufacturers’ instructions.
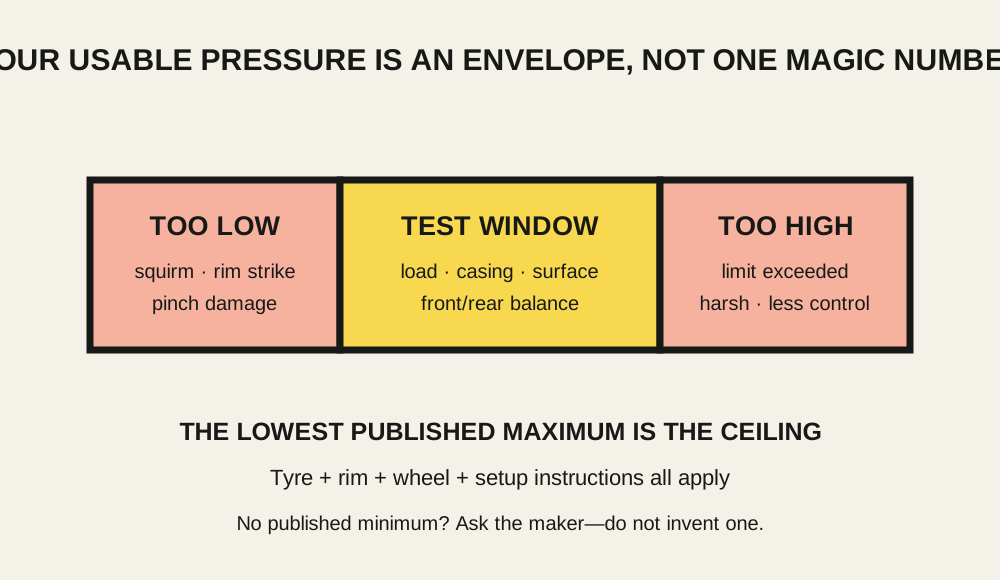
The short answer: find the exact tyre and rim documents first. Use a credible pressure calculator only as a starting point inside every published limit, then test in small steps while watching for squirm, rim strikes, pinch damage, bead movement, and poor handling. If the maker publishes no minimum and you cannot get one, do not present an invented number as a safety limit.
Confirm the system before choosing a number
Record:
- exact tyre model, construction, and ISO/ETRTO size such as 28-622;
- actual measured tyre width on the installed rim;
- rim model, internal width, and hooked or hookless construction;
- inner tube material and stated size range, or approved tubeless setup;
- front and rear load, including bicycle and luggage;
- surface, speed, and impact risk;
- tyre, rim, and wheel pressure limits.
The ISO/ETRTO tyre-size guide helps identify the system. Do not choose pressure until tyre and rim compatibility is confirmed.
For maximum pressure, the lowest applicable limit wins. Continental’s current guidance gives the example of a tyre limited to 6 bar on a rim limited to 7 bar: the usable ceiling is 6 bar. Hookless systems can add tyre-size and pressure rules that differ from a conventional hooked rim.
Look beyond the sidewall
Check the tyre packaging, product page, downloadable manual, and regional support site. Then check the rim and complete wheel manuals. Sidewalls sometimes show only a maximum even when a technical document contains more detail.
Use the exact version. A tubeless-ready tyre and a similarly named tube-type tyre may have different instructions. Limits can also differ by size.
If the documentation is genuinely silent, ask both manufacturers this precise question:
What operating pressure range is approved for this exact tyre size on this exact internal rim width, with an inner tube/tubeless, at my front and rear wheel loads?
Save the answer. “People online ride 20 psi” is not approval for your combination.
A calculator gives a starting point, not permission
SRAM’s pressure guidance asks for ride type, surface, bike and rider weight, tyre dimensions, and setup. That is useful because it models the variables instead of deriving pressure from the sidewall maximum.
Enter honest values:
- total system weight, not rider weight alone;
- actual measured tyre width if requested;
- correct casing and tube/tubeless choice;
- realistic surface, not the smoothest section of the route.
Treat the result as a starting pressure to compare with all manufacturer limits. It cannot approve an incompatible tyre and rim, override a hookless maximum, or inspect a damaged casing.
For road bikes, the beginner tyre-pressure guide explains front/rear load and the practical setup process.
Learn the signs that pressure is too low
Too-low pressure is not defined only by the tyre feeling soft in the garage. Under load it may show as:
- tyre squirm or delayed steering response;
- the casing folding in a corner;
- rim contact on potholes, roots, or kerbs;
- pinch cuts in a tube;
- tyre or rim damage after impacts;
- burping or sudden air loss in a tubeless setup;
- bead movement or an uneven witness line;
- repeated sidewall abrasion or fatigue.
Schwalbe warns that permanently low pressure can cause premature wear and sidewall cracking. Continental says extreme underinflation can affect handling and lead to tyre, rim, or puncture damage.
Do not keep lowering pressure until one of these appears. A test is meant to retain a margin, not discover the failure point.
Test in controlled steps
- Inspect the tyre, rim, tape, tube, valve, and bead.
- Inflate to the calculator or manufacturer starting point within all limits.
- Measure with the same gauge each time.
- Ride a short familiar route below maximum speed.
- Include representative corners and roughness without deliberately hitting obstacles.
- Change one end at a time in small recorded steps.
- Stop lowering at the first loss of support, precision, or impact margin.
- Recheck pressure and bead position after the ride.
Front and rear pressures do not need to match. The rear wheel usually carries more load, but measure or estimate your actual distribution rather than applying a universal difference.
Temperature matters too. Continental notes that pressure rises as temperature rises. A value set in a cool garage can change in a hot vehicle or direct sun, so the maximum still needs margin.
Do not use a percentage of maximum
Rules such as “use 75% of the sidewall maximum” ignore rider load, tyre width, rim width, construction, and surface. Older manufacturer material sometimes gives broad percentages for example riders, but that is not a universal minimum-pressure formula.
The printed maximum is a ceiling for specified conditions. It is not necessarily the fastest pressure, and it is not the input to a safe-minimum equation.
When to stop and ask the maker
Do not conduct a low-pressure experiment when:
- tyre and rim compatibility is uncertain;
- the rim is hookless and the tyre approval is unclear;
- the casing, bead, rim, or tape is damaged;
- the rider and cargo approach a system-weight limit;
- the route includes high-speed impacts or remote terrain;
- the gauge is unreliable;
- you need a legally or competitively mandated value;
- neither maker will support the combination.
Changing to a wider approved tyre or stronger wheel may create the pressure window you need. Pressure cannot fix a system that is undersized for its load.
Your next step
Photograph the tyre markings and rim label, find both manuals, and write down every limit. Then calculate a starting point with total system weight and test one short familiar route. If the minimum remains undocumented, send the exact setup and wheel loads to both manufacturers before going lower.
Sources and further reading
- Continental: tyre/rim combinations and using the lowest applicable maximum
- Schwalbe: why load, width, setup, and published limits determine pressure
- SRAM/Zipp: inputs used to calculate a tyre-pressure starting point
- r/bikewrench reader context: finding a minimum when a tyre page appears to list only a maximum — used as a current documentation problem signal; pressures in replies were not treated as limits.