Do road-bike shift cables need to cross under the down tube?
Understand when exposed mechanical shift cables may cross intentionally, when crossing is wrong, and how to verify routing without guessing.
 Field guide / do-road-bike-shift-cables-need-to-cross
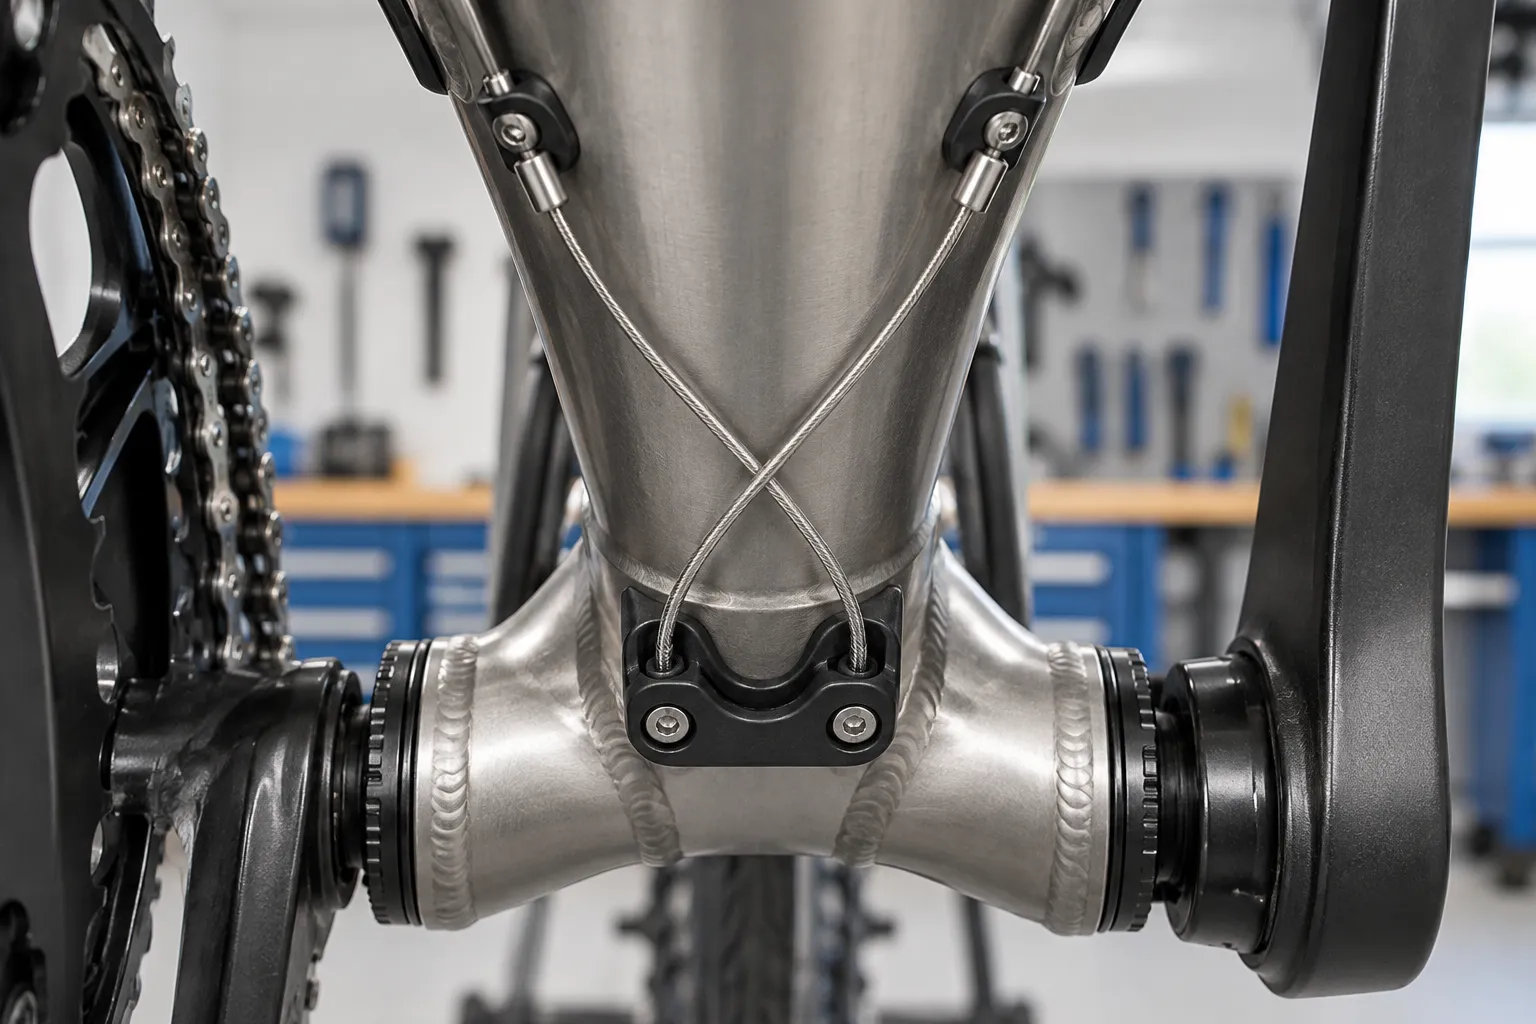
Two exposed mechanical shift cables under a road-bike down tube may cross once by design. Crossing can let each housing leave the handlebar area in a broader curve before the inner cables swap sides on the open down-tube run. But many bikes route the cables straight, and internal frames may use fixed ports or guides. The correct answer comes from the exact frame’s routing diagram and a friction-free inspection—not appearance alone.
The short answer: a clean single crossing is not automatically wrong. Leave it alone if it matches the manufacturer routing, both cables run in their intended guide channels, the handlebar turns freely, and there is no rubbing, fraying, kinking, or poor shifting. Reroute if the documentation disagrees or any cable contacts a moving part or sharp frame edge.
Why some builders cross the cables
A current r/bikewrench question showed two shift cables crossing and asked whether they should. The visual can look like an assembly error, but routing is a geometry problem.
On some externally routed road bikes, sending the right-hand shifter housing toward the opposite-side down-tube stop creates a gentler sweep around the head tube. The exposed inner cables then cross once before reaching the bottom-bracket guide and separate again toward the derailleurs.
Park Tool’s cable-housing guidance explains the underlying principle: routing around the side opposite a shifter will often produce a more gradual bend, though some bicycles require same-side routing. It also says housing should enter its stop in a straight line and remain long enough for full handlebar movement.
That principle does not prove your bike should be crossed. Frame ports, bottom-bracket guides, cable stops, head-tube shape, shifter exits, and front-derailleur pull direction vary.
Four routing patterns you may see
Straight external routing
Each shifter housing enters the stop on the same side, and the exposed inner cables continue without crossing. This is simple and correct when it gives smooth bends.
Crossed external routing
The housings approach opposite-side stops and the two exposed inner cables cross once on the down-tube run. It can be correct when the crossing is open, smooth, and documented.
Full-length housing
Outer housing runs nearly all the way from shifter to derailleur. There may be no exposed down-tube inner wires to compare. Do not strip housing just to imitate another bike.
Internal routing
Housing, liner, bare cable, hydraulic hose, or electronic wire may pass inside the frame. Internal guides can cross in ways you cannot see. Preserve the existing path when replacing parts; do not pull an internally routed cable without a guide.
Run the routing audit
1. Find the exact diagram
Search the frame or complete-bike manual using model, model year, size, brake type, and groupset generation. A photo from a different year is not enough. Look for an exploded diagram of frame grommets and the bottom-bracket cable guide.
If documentation is unavailable, photograph the routing before touching it and ask the frame maker or a qualified shop.
2. Follow one control at a time
Operate the front shifter and watch which exposed cable moves. Repeat for the rear. Trace each cable from lever housing to down-tube stop, bottom-bracket guide, and derailleur pinch bolt.
Never assume left lever always means front derailleur in every market or custom setup.
3. Turn the bars fully
Lift the front wheel or support the bike securely. Turn from full left to full right without pulling levers.
The housing should not:
- tug a derailleur or cause a ghost shift;
- kink at the lever or frame stop;
- rub sharply across another housing;
- catch a light, bag, computer, or brake hose;
- limit steering before the frame’s normal stop.
Shimano’s road-shifter installation guidance requires enough outer-casing length for the handlebar to turn fully in both directions.
4. Inspect the crossing
A deliberate crossing should be one smooth intersection, not a twist. Check for polished cable strands, grooves in paint, cut frame protectors, rust, or black debris. Bare inner cables can touch lightly in some documented layouts, but they must not saw against a frame tube, port edge, tyre, chainring, crank, or brake part.
5. Check the bottom-bracket guide
Each cable must sit in its intended channel. A cable riding over the separator or exiting at an angle adds friction and can damage the guide. Confirm the guide is secure and not cracked or deeply grooved.
6. Test shifting under safe conditions
Use a work stand or a traffic-free test area. Shift one gear at a time and confirm the derailleur responds consistently. Crossing does not excuse hesitation, heavy lever force, lost indexing, or chain rub.
If rear indexing is the only symptom, start with rear-derailleur barrel adjustment. For front noise, use front-derailleur chain-rub diagnosis. Do not reroute both cables while diagnosing one adjustment.
When to reroute or replace
Reroute when the exact diagram shows a different path, steering pulls the cable, a housing makes a tight bend, the wire misses its guide, or the path contacts a hazard. Replace parts if you find corrosion, broken strands, crushed housing, a split liner, or a deeply worn guide.
Use shift-specific compressionless housing and the ferrules required by the component. Park Tool warns that wound brake housing and shift housing are built differently; do not substitute one for the other. Cut housing with the correct tool, open the liner cleanly, and follow the derailleur maker’s cable-clamp groove and torque.
This is also a good time to inspect hidden failure at the lever. A frayed shift cable inside a road shifter can look normal along the down tube until strands begin breaking at the head.
Your next step
Photograph the cable path from both sides, locate the exact frame routing diagram, and perform the full-steering and guide-channel checks. If the documented route is smooth and undamaged, its crossed appearance is not a repair job.
Sources and further reading
- Park Tool: sizing and routing shift-cable housing
- Shimano: road shift-lever cable installation manual
- r/bikewrench reader context: whether two visible shift cables should cross — used as an editorial question signal, not as the routing authority.