Cold feet while cycling: will shoe covers fix frozen toes?
Choose cycling shoe covers by separating wind, rain, and insulation, while preserving shoe space, cleat function, grip, and cold-weather stop signs.
 Field guide / cold-feet-cycling-shoe-covers
Shoe covers can make a major difference when moving air is stripping heat from vented cycling shoes, but they cannot rescue wet socks, a shoe that crushes thick layers, or a ride that has exceeded your safe cold exposure. Choose the cover for the actual problem: wind, rain, insulation, or some combination.
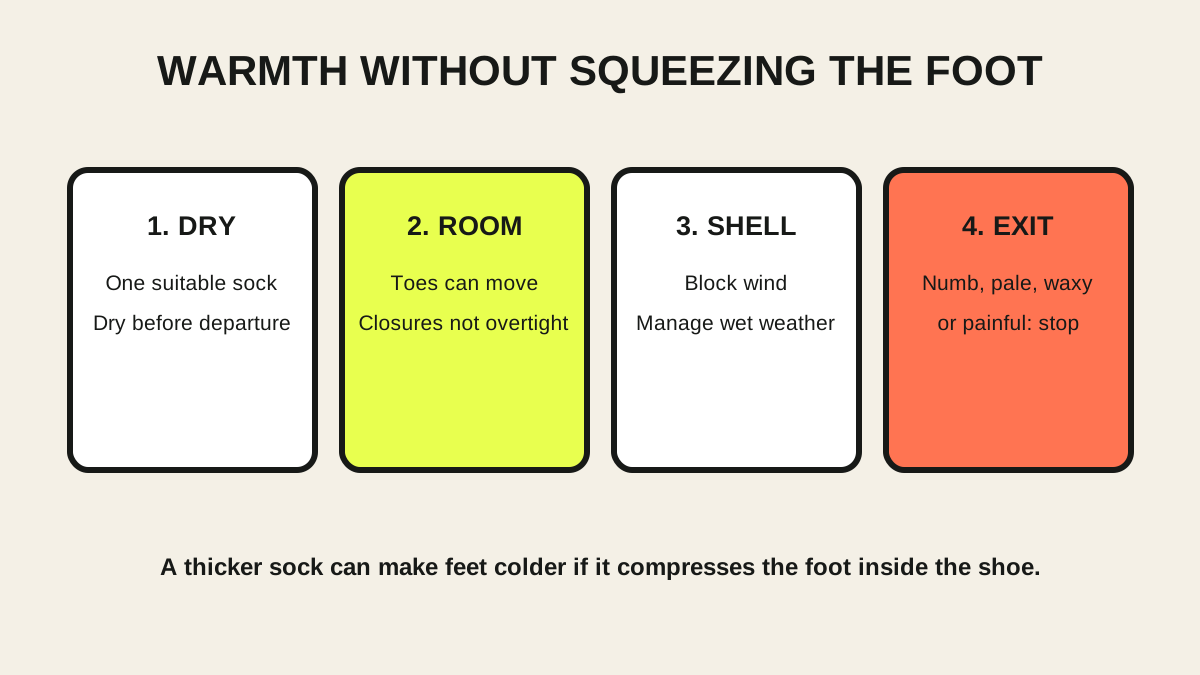
The short answer: begin with one dry sock that leaves toe room, loosen shoe closures slightly if needed, and add a wind-resistant cycling overshoe that fits the shoe and cleat system. Add water resistance for wet roads and more insulation for colder conditions. If toes become numb, painful, unusually pale, firm, waxy, or clumsy, stop and get warm.
Why thicker socks can make the problem worse
A current r/cycling thread asked for shoe-cover recommendations after thick merino socks still left toes very cold. That question exposes a common trap: adding material inside a fixed-volume shoe.
If the sock makes the shoe tight across the toes or instep, the foot loses the insulating air space and freedom it had before. Overtightened dials, straps, or laces add more pressure. The rider may then blame the sock material when the system is simply crowded.
Run this stationary check:
- Put on the exact sock and shoe combination.
- Close the shoe only as firmly as needed to hold the foot securely.
- Confirm every toe can move and the forefoot is not squeezed from the sides or top.
- Sit for 10 minutes, then stand and check for tingling, pressure lines, or numbness.
- Repeat after fitting the shoe cover; it must not crush the shoe upper or interfere with its closures.
Two thin socks are not automatically better than one. Use layers only when the shoe has room for them.
Match the cover to the source of cold
“Shoe cover” describes several different products.
| Main problem | Useful starting feature | Limitation to remember |
|---|---|---|
| Cool, dry wind through vented shoes | Thin wind-resistant toe cover or full overshoe | Open sole and cuff can still admit air |
| Colder dry riding | Insulated full overshoe | Warmth varies and sweat can accumulate |
| Wet roads or rain | Water-resistant upper, sealed seams, close cuff | Most cycling covers are not permanently waterproof at the cleat and heel openings |
| Short transition-season rides | Removable toe cover | Less coverage around the ankle and heel |
| Regular near-freezing riding | Winter cycling shoe with room for insulation | More expensive and still requires dry socks and a safe route |
A cover made mainly for aerodynamics may block some airflow but provide little insulation. A thick neoprene-style cover can slow wind and water entry but may trap sweat. Product temperature claims cannot account for wind, rain, shoe ventilation, circulation, effort, route exposure, or individual cold sensitivity.
Check fit around the cleat, heel, and crank
An overshoe must not create a control or walking hazard.
With the bike stationary:
- clip in and out several times on both sides;
- confirm fabric does not sit between cleat and pedal;
- check the heel opening does not pull the cover under the shoe;
- rotate the cranks backward and inspect clearance from crankarms and chainrings;
- walk a few steps on a dry, non-slippery surface;
- confirm zips, hook-and-loop closures, and cuffs stay closed.
Road-shoe covers are consumable items because walking can abrade the toe and heel. Do not assume a damaged sole opening is merely cosmetic if loose material can contact the pedal or drivetrain.
Keep water from entering at the top
In rain, water often enters through the cuff, runs down tights or socks, and collects inside the cover. The best overlap depends on the cover and clothing design, but the objective is to avoid creating a funnel.
Before a wet ride:
- Inspect seams, zip, sole openings, and cuff.
- Put the full tights-and-cover system on, then bend the knee as it will move while pedalling.
- Check whether the trouser or tight sheds water over the cuff rather than into it.
- Pack dry socks when a long or remote ride would otherwise leave no safe option.
Water resistance is not a promise that feet will stay dry indefinitely. Shorten the route when wet feet and falling temperature would combine into an exposure problem.
Warm the whole rider, not only the toes
Cold feet can be an early sign that the whole clothing system is losing the battle. Protect the torso from wind and rain, keep hands capable of braking, and avoid sweating heavily in the first part of the ride.
Use layers that can be adjusted before they become soaked. The 10°C cycling clothing guide offers a moderate-cold starting point, while the cold-hands guide applies the same control-first logic to gloves.
Eat and drink appropriately for the duration, but do not treat food, caffeine, or riding harder as a cure for unsafe cold exposure. Harder work also creates more sweat, which can chill during a descent or stop.
Use a short comparison ride
Do not first test a new overshoe on a remote three-hour route. Pick a familiar 20–30 minute loop near shelter.
Record only useful observations:
- air temperature, wind, and whether roads were wet;
- sock, shoe, and cover combination;
- whether closures felt tight;
- time when toes first felt cool, numb, or painful;
- whether sensation and colour returned normally after warming.
Change one variable for the next test. A different sock plus tighter shoe plus new cover gives you no clear result.
Know the medical stop signs
The CDC lists redness or pain as possible early frostbite signs and warns about white or grayish-yellow skin, firm or waxy skin, and numbness. Hypothermia signs can include shivering, exhaustion, confusion, fumbling, slurred speech, and drowsiness.
On a bicycle, numb feet also reduce feedback and walking stability. End the ride before a medical threshold when you cannot feel or control the foot normally.
Move into shelter, remove wet clothing, and seek medical care when frostbite or hypothermia is possible. Do not rub possibly frostbitten feet or warm them with a heating pad, radiator, stove, or other intense direct heat. Recurring numbness in mild conditions, major colour change, or symptoms that persist after warming deserve assessment by a qualified clinician.
Choose a practical first system
For cool, dry conditions, start with:
- one clean, dry sock of moderate thickness;
- the normal cycling shoe with room to move every toe;
- a wind-resistant toe cover or full overshoe;
- a short test route and warm bailout.
For wet or colder conditions, add coverage only if the shoe remains uncompressed and the cover is compatible with the cleat. If you regularly ride in sustained cold, a purpose-built winter shoe may solve the volume and sealing problem more cleanly than stacking layers over a summer race shoe.
Your next step
Put on the sock and shoe you currently use, loosen the closures, and confirm toe movement. Then identify whether your real gap is wind, water, insulation, or shoe volume. Buy or borrow the lightest cover that addresses that gap and test it on a short route with shelter nearby.