How to choose a low-maintenance first road bike
Choose a first road bike that is easy to own by prioritising fit, local service, common wear parts, sensible tyres and gearing, and documented systems.
 Field guide / choose-low-maintenance-first-road-bike
Before you view or pay
Check fit, condition, and starter gear first
Use the buying checklist to choose the right path: used-bike viewing, first-bike fit and type, hidden repair costs, or starter gear.
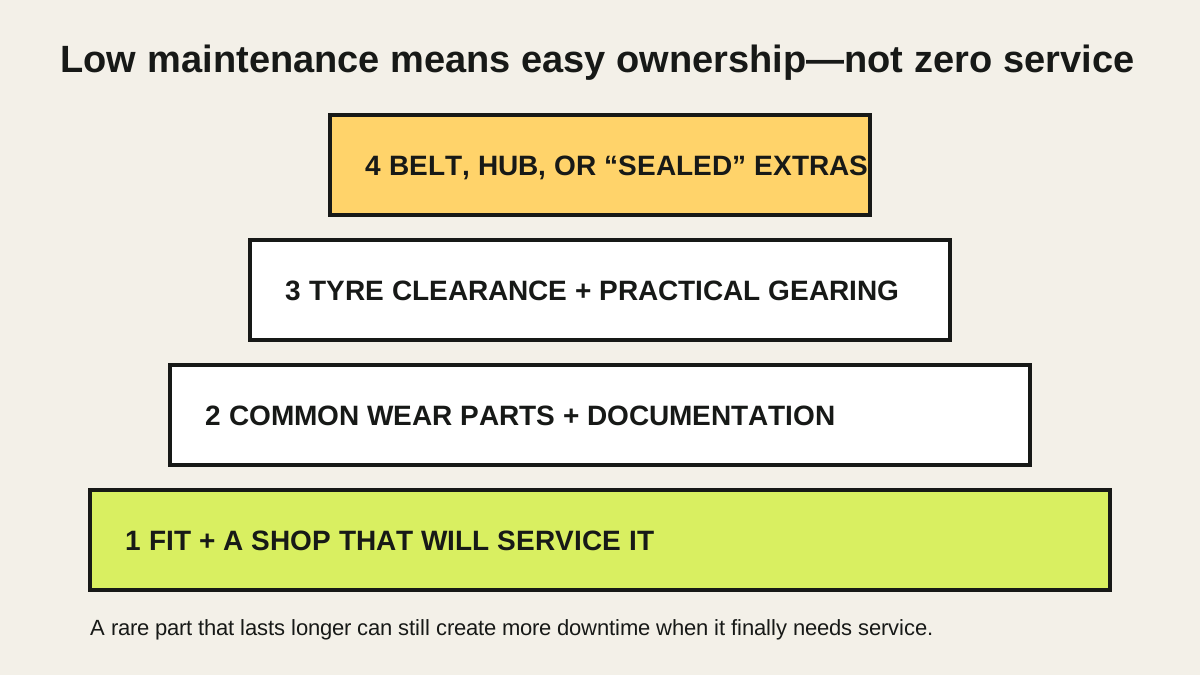
No road bike is maintenance-free. A genuinely easy-to-own first bike is one that fits, uses parts you or a nearby shop can identify and obtain, tolerates your roads and weather, and does not turn every wear item into a proprietary project.
The short answer: prioritise a sound fit, common drivetrain and brake parts, adequate tyre clearance, simple external adjustments, complete manufacturer documentation, and a shop willing to service the exact bike. Belt drives and internally geared hubs can reduce routine drivetrain cleaning, but they are not automatically the best road-bike choice or free from specialist service.
Define low maintenance for your life
“Low maintenance” can mean several different things:
- less cleaning after wet commutes;
- fewer drivetrain adjustments;
- easy puncture repair at the roadside;
- inexpensive annual workshop service;
- long intervals between component replacement;
- minimal specialist tools at home;
- short downtime when something breaks.
Rank those needs before comparing bikes. A sealed or exotic system may need less frequent attention but create longer downtime or fewer repair options. A conventional derailleur drivetrain needs regular chain care, yet almost every bike shop understands it and common wear parts are widely stocked.
For a recreational road rider, serviceability often matters more than the smallest possible maintenance interval.
Start with the shop and parts, not the frame material
Before buying, send the exact model and specification to the shop you expect to use. Ask:
- Will you service this brand and its brake, drivetrain, wheels, and cockpit?
- Which routine parts are normally stocked?
- Does any job require a brand-only tool, software account, or proprietary part?
- Are replacement derailleur hangers, seatposts, headset parts, axles, and cockpit pieces available?
- What routine service does the manufacturer specify?
This is especially important for direct-to-consumer and used bikes. A lower purchase price can still be good value, but include shipping, initial assembly, fault diagnosis, and warranty logistics in the decision.
Read online shop versus local bike shop for the broader tradeoff.
Choose boring, identifiable wear parts
For simple ownership, common standards are a feature.
Look for:
- tyres and inner tubes in a size stocked locally;
- brake pads identified by an exact, available model;
- a chain and cassette that do not require rare stock;
- a replaceable derailleur hanger you can order now;
- ordinary stems and handlebars rather than a one-piece cockpit, unless you accept the cost;
- clearly documented wheel axles, freehub, bearings, and spoke requirements;
- service manuals and exploded diagrams from the component makers.
Do not assume a premium groupset is lower maintenance. Higher price can buy weight savings, more gears, electronic features, or refined operation without reducing every service need. For a first bike, correct gearing, reliable braking, and available parts usually matter more than the logo tier. The Claris, Tiagra, and 105 guide explains where an upgrade may actually help.
Tyres can reduce maintenance more than glamour parts
Choose enough tyre volume and clearance for your real roads. A bike that accepts practical 28–32 mm road tyres—or wider where surfaces demand it—can let you use appropriate pressure without running a fragile, narrow setup. Leave clearance for debris and manufacturer tolerances; a tyre’s labelled width is not its guaranteed installed width.
For the simplest roadside repair, conventional clincher tyres with butyl tubes remain easy to understand and widely supported. Tubeless can seal some small punctures but adds sealant checks, valve maintenance, seating requirements, and mess when a puncture does not seal. TPU tubes save space and weight but need compatible installation and inflation practices.
There is no universal winner. Choose the system you will actually inspect and learn. Compare them in tubes vs TPU vs tubeless.
Mechanical or hydraulic brakes?
Rim brakes are mechanically visible and can be straightforward to service, but rim wear, wet performance, tyre clearance, and wheel compatibility matter. Hydraulic discs provide strong, consistent operation and automatic pad-wear compensation, but eventually need the correct fluid, bleed procedure, pad and rotor inspection, and contamination control.
Cable-actuated disc brakes avoid hydraulic fluid but need cable and pad adjustment, and designs differ in performance and service method. “Mechanical” does not automatically mean less maintenance; “hydraulic” does not mean unserviceable.
Choose based on your weather, hills, hand strength, local service, transport habits, and comfort with the actual system. Confirm pad availability before buying. Do not choose a brake category from a maintenance slogan.
Does 1× mean lower maintenance?
A 1× drivetrain removes a front derailleur, shifter mechanism, cable or wire, and one chainring. That reduces the number of front-shift parts and can simplify cleaning. The tradeoff may be larger jumps between gears, a different low/high range, more chain angle at the cassette extremes, and model-specific chainring needs.
A 2× road drivetrain offers close steps and broad range but adds front-shift setup. A correctly installed 2× system is not inherently troublesome. Choose the gearing that lets you ride your terrain without grinding or running out of top gear, then learn its modest routine care.
Use the 1× or 2× guide and write down the actual smallest and largest ratios rather than counting components alone.
Belt drive and internal gears: useful, but not magic
A belt drive does not require chain lubricant and can reduce routine grime. It needs a compatible frame, sprockets, correct alignment, and correct tension. Gates warns that too little tension can cause tooth skipping, while too much can damage hub bearings, add drag, and increase wear. Its instructions also warn against twisting, crimping, or back-bending the belt.
An internally geared hub protects gear mechanisms inside the shell and can pair well with a belt for commuting. It still has model-specific lubrication or service requirements, a shifting interface, axle hardware, and wheel-removal procedures. Gear range, efficiency, weight, local expertise, and replacement-wheel work may differ from a derailleur road bike.
For an all-weather utility bike, that trade may be excellent. For a light recreational road bike used near conventional bike shops, a common derailleur drivetrain may produce less total ownership friction. Decide from the complete use case rather than the phrase “virtually maintenance-free.”
Avoid features that create hidden downtime
Ask how each clever feature is repaired five years later.
Potential friction points include:
- fully internal cables through the headset;
- proprietary seatposts and clamps;
- integrated bar-stem units;
- unusual wheel or axle standards;
- press-fit or model-specific bearing arrangements without documentation;
- electronic-only shifting when local diagnostics are limited;
- house-brand brakes with uncertain pad supply;
- a used carbon frame with unknown damage or missing small parts.
None of these automatically makes a bad bike. They simply need to earn their complexity for your riding. A feature you value can be worth servicing; one you do not notice can become pure ownership cost.
Budget for the first year
Keep money aside for a helmet, lights, pump, spare tube or repair kit, tyre levers, chain lubricant if applicable, and a first service. A well-fitting lower-spec bike with this support budget is usually easier to own than a discounted higher-spec bike that consumes the entire budget.
If buying used, add a repair reserve for tyres, chain, cassette, cables, brake pads, bearings, and labour. Use the complete first-road-bike budget and the used-bike test ride before comparing sticker prices.
Your next step
For each shortlisted bike, identify the tyre and tube, chain, cassette, brake pad, derailleur hanger, wheel axle, headset, seatpost, and cockpit. Confirm that manuals and parts exist and that a local shop will service them. Then choose the bike that fits and keeps the most common jobs ordinary—not the bike with the boldest maintenance claim. Run the final candidate through the road-bike buying checklist.
Sources and further reading
- Gates Carbon Drive: belt handling and tension requirements
- Gates and Shimano system manual: pre-ride adjustment and security checks
- r/Biking discussion: a returning adult rider asking for an affordable, light and low-maintenance bike — used as an editorial demand signal, not a product endorsement.
- r/cycling discussion: a first-road-bike shopper balancing budget, fit, components and learning maintenance — used as an editorial question signal, not buying evidence.