Cassette spacer will not sit flat on the freehub: stop before tightening
Identify the cassette, driver, spacer, spline orientation, and stack order before a lockring turns a small gap into damaged parts.
 Field guide / cassette-spacer-will-not-sit-flat
A cassette spacer should not be forced flat with the lockring. A visible gap may mean the spacer’s internal tabs are sitting on top of a freehub spline, the spacer is unnecessary, the wrong part is being used, or the cassette and driver standards have been misidentified.
The short answer: remove the stack and identify the exact cassette, freehub or driver, and spacer requirement from the manufacturer chart. Clean the interface, align every keyed spline, and make sure each required part seats by hand. Only then install and torque the lockring by the cassette maker’s instructions.
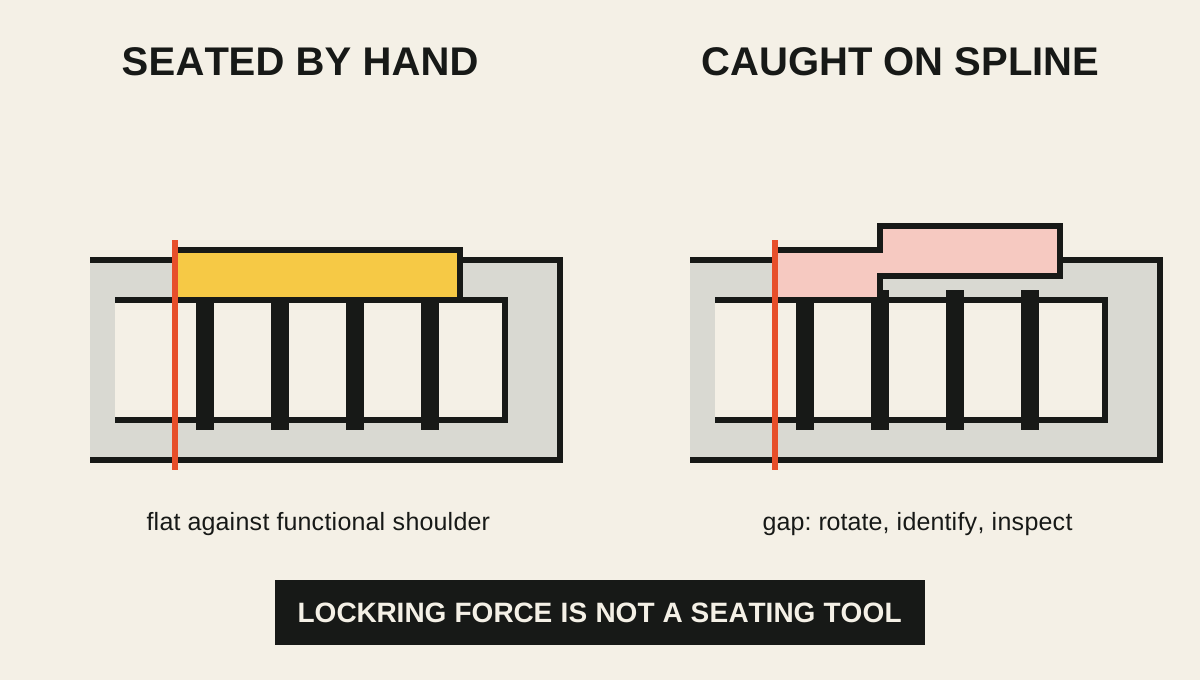
Do not begin with the gap
Begin with part identity. Record:
- wheel or hub make, exact model, and year;
- fitted freehub or driver body type;
- cassette make, model, speed, and tooth range;
- every loose spacer and where it came from;
- whether the cassette is one-piece, clustered, or individual sprockets;
- the lockring model and required tool.
“11/12-speed compatible” on a wheel does not say that every 11- or 12-speed cassette uses the same spacer. Shimano HG road, shorter HG variants, SRAM XD/XDR, Campagnolo, and newer proprietary systems have different interfaces and rules.
The cassette-versus-freewheel guide is the first stop if the rear cluster does not have a separate cassette lockring.
Identify which spacer you are holding
Several thin rings can appear in the same job:
- a low spacer behind the entire cassette;
- a cassette-supplied spacer required for a particular cassette family;
- spacers between individual sprockets;
- a lockring washer at the outer end;
- a hub end cap or axle spacer that does not belong under the cassette.
Do not classify a ring only by thickness or colour. Find it in the exploded diagram for the exact model. Shimano’s manuals show that even within road systems, some 10-speed cassettes use both a wheel-supplied 1.85 mm low spacer and a cassette-supplied 1.0 mm spacer, while other combinations do not.
For the common question “does an 11-speed cassette need one?”, use the 11-speed spacer guide before installation.
Why a required spacer may not sit flat
A keyed tab is on top of a spline
Many HG-style parts use one narrow spline as the orientation key. Rotate the spacer gently until all tabs enter their grooves. Some thin spacers are easy to tilt, especially on a greased driver.
The spacer is backwards
Some are functionally flat; others have grooves, reliefs, or a shaped face. Follow the diagram. Do not assume flipping is harmless.
Dirt or a burr is under it
Remove old grease lumps and debris with a clean cloth using a cleaner approved by the hub maker. Inspect for a raised burr where a cassette has marked a soft aluminium spline. Do not file the driver unless the manufacturer or qualified wheel technician approves the repair.
It is the wrong diameter or standard
A ring can slide partway onto a driver it was not designed for. “Almost fits” is not compatibility evidence.
It is not required
Adding an unnecessary spacer can leave too little thread for the lockring, move shifting alignment, or prevent the smallest sprocket engaging correctly. Use the compatibility chart, not the desire to eliminate an unexplained leftover part.
Rebuild the stack without force
- Remove the cassette and lay every part in order.
- Clean and inspect the driver splines and threads.
- Place only the required low spacer on the driver.
- Rotate it until it seats squarely by hand against the shoulder.
- Install each cassette cluster, sprocket, and internal spacer in the published sequence.
- Align the narrow spline on every keyed part.
- Confirm the smallest sprocket is fully engaged, not perched on a spline.
- Start the correct lockring by hand for several turns.
- Tighten with the specified tool and torque from the exact cassette manual.
- Check the cassette for axial play and turn the wheel before shifting.
Shimano publishes 30–50 N·m for several current 12-speed road lockrings, but do not borrow that number for an unidentified product. SRAM likewise tells users to identify both cassette and driver before deciding whether its 1.85 mm spacer is required.
Interpret the remaining gap correctly
Look at the contact surfaces, not an arbitrary cosmetic edge. A spacer may sit against the driver’s functional shoulder while a chamfer, recess, seal clearance, or unused spline section remains visible elsewhere.
The installation passes only when:
- every specified part is in the documented order;
- the spacer and cassette sit squarely;
- the lockring has normal thread engagement;
- final torque is reached without binding or cross-threading;
- the cassette has no axial play;
- the freehub turns normally;
- shifting can be adjusted without an extreme derailleur position.
A photograph on a forum cannot always reveal the internal seating face. The wheel and cassette makers’ drawings decide what contacts what.
Stop when the evidence conflicts
Do not continue if:
- the wheel maker and cassette maker charts disagree;
- the model number is missing or unreadable;
- a spacer must be hammered or lockring-forced into place;
- the lockring catches fewer threads than expected;
- the smallest sprocket spins independently after tightening;
- there is cassette play at the specified torque;
- the driver has cracked, rolled, or heavily gouged splines;
- the wheel binds after the axle is secured.
Take the wheel, cassette, lockring, and every loose spacer to a mechanic as one set. Leaving a “mystery washer” at home removes useful evidence.
Your next step
Photograph every model marking and find the two primary documents: the wheel or freehub compatibility chart and the cassette exploded view. Build the stack on a clean bench and require each spacer and sprocket to seat by hand before the lockring is installed.
Sources and further reading
- Shimano road-wheel manual: cassette-specific 1.0 mm and 1.85 mm spacer rules
- Shimano 105 cassette manual: model-specific sprocket and spacer order
- SRAM cassette manual: identify driver style and spacer requirement
- r/bikewrench reader context: a required-looking spacer leaving a visible freehub gap — used as a current installation signal; conflicting visual diagnoses in replies were not treated as specifications.