Does an 11-speed road cassette need a spacer?
Match the exact cassette and freehub before fitting a spacer, then check spline seating, lockring engagement, play, and indexing.
 Field guide / does-11-speed-road-cassette-need-spacer
Some 11-speed cassettes need a spacer on an 11- or 12-speed road HG freehub, but most standard-width 11-speed road cassettes do not. The decision belongs to the exact cassette model and freehub—not simply the number of sprockets.
The short answer: identify the model code stamped on the cassette and the freehub standard. Shimano CS-HG700-11 and CS-HG800-11 11–34 cassettes use a 1.85 mm low spacer on an 11-speed road freehub because their carrier is narrower. Typical 11-speed road cassettes such as CS-R8000 fit the 11-speed road body without that low spacer. Verify your own parts in the current manual.
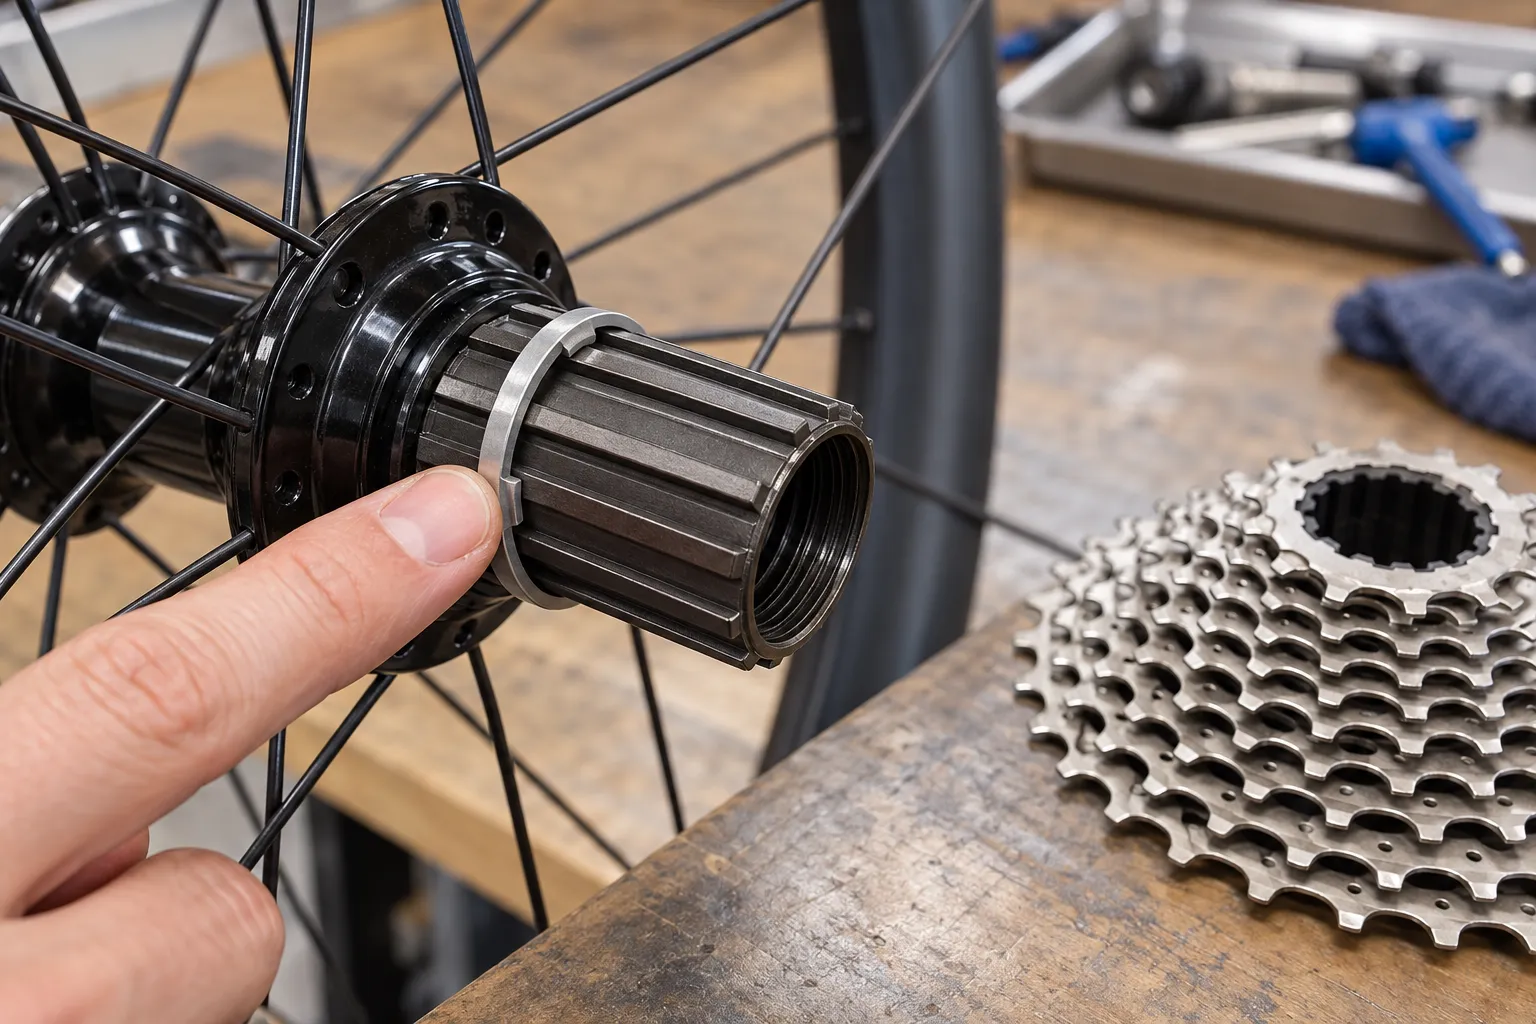
Why the speed count does not settle it
A current repair thread asked whether a visible gap behind a cassette spacer was normal. The discussion shows the common trap: riders search “11-speed cassette spacer” without first naming the cassette and wheel.
Several dimensions get mixed together:
- an 11-speed road HG freehub is wider than older 8/9/10-speed road HG bodies;
- some 11-speed 11–34 cassettes use the shorter mounting width associated with mountain-style HG compatibility;
- many 10-speed road installations use a 1.85 mm low spacer, and some cassette families add another 1.0 mm spacer;
- 12-speed road systems may use a different spline or compatibility rule;
- internal sprocket spacers are part of the cassette stack and are not substitutes for the low spacer behind it.
That is why leftover rings from another wheel are not a useful starting point.
Find both model numbers
Remove the wheel and clean only enough dirt to read markings. Look for a cassette code such as CS-R7000, CS-R8000, CS-HG700-11, or CS-HG800-11. Record the tooth range too. Then identify the wheel or hub model and freehub-body type.
Do not infer the cassette model from the rear derailleur or shifter. Mixed groupsets are common, and a previous owner may have changed the gearing.
Use Shimano’s exploded view for the exact cassette. The CS-HG800-11 parts diagram, for example, lists a 1.85 mm low spacer as part of the 11–34 assembly. The standard CS-R8000 diagram does not list that low spacer for its ordinary road-width ranges.
A practical compatibility table
| Cassette on an 11-speed road HG freehub | Typical low-spacer requirement | What to verify |
|---|---|---|
| Standard 11-speed road cassette | No 1.85 mm low spacer | Exact cassette and hub manual |
| Shimano CS-HG700-11 or CS-HG800-11 11–34 | 1.85 mm low spacer | Spacer listed in cassette diagram |
| Many 10-speed road cassettes | 1.85 mm low spacer; some also use a cassette-specific 1.0 mm spacer | Exact cassette family instructions |
| 8- or 9-speed cassette | Often 1.85 mm low spacer on a compatible road HG body | Freehub and cassette compatibility |
| 12-speed cassette | System-specific | Spline type, hub and cassette documents |
This table is a routing guide, not permission to install. “HG” covers several generations and body lengths.
Seat the spacer before judging the gap
Some low spacers are keyed or shaped to pass only when aligned with the freehub splines. A spacer caught on a spline can look almost installed while remaining visibly proud.
With the cassette removed:
- Clean the freehub enough to see the spline shoulders.
- Inspect the spacer for a keyed section, burr, bend, or wrong orientation.
- Slide it on by hand without forcing it.
- Confirm it rests flat against the freehub’s inner stop.
- Check that no seal, end cap, spoke guard, or unrelated ring is being mistaken for the seating surface.
Do not hammer the spacer or use the lockring to crush it into place. If it will not seat by hand, stop and identify why.
Install the cassette as a complete stack
Align the cassette’s narrow spline with the freehub key. Install sprocket units and their internal spacers in the documented order. The smallest sprocket must engage the splines; it should not merely perch on the end.
Start the lockring by hand for several turns. If it resists immediately, back it out and inspect the thread and stack. Tighten only with the specified tool and the torque printed in the current cassette or hub instructions. Shimano manuals place dealer procedures with trained mechanics for a reason; use a shop if you lack the holding tool, lockring tool, or torque control.
Check the result, not just the visual gap
After installation and wheel refitting:
- the cassette should have no side-to-side play as a stack;
- the lockring should be properly engaged, not barely catching;
- the wheel must be fully seated and secured;
- the smallest sprocket and chain must clear the frame;
- shifting should index across every sprocket without the derailleur entering the spokes;
- the chain should not rub an unexpected spacer or freehub shoulder.
A small designed clearance between stationary hub parts can be normal. A loose cassette is not. Do not keep adding thin spacers until play disappears; that can mask an incomplete stack, wrong freehub, reversed sprocket, or unseated cassette.
Common mistakes
- Copying the spacer arrangement from a different cassette model.
- Leaving the 1.85 mm spacer behind when changing from a 10-speed to a standard 11-speed road cassette.
- Omitting the low spacer from an HG700/HG800 11–34 cassette on a road body.
- Confusing an internal sprocket spacer with the low spacer.
- Assuming an “11/12-speed” product label describes every compatible cassette.
- Tightening a lockring against a sprocket that has not engaged the splines.
If the gears click after a wheel change, use the wheel-swap indexing guide only after the cassette is mechanically correct.
Your next step
Photograph the cassette code, tooth range, hub or wheel code, freehub splines, and every loose spacer. Open the official exploded view for those exact models and build the stack from that evidence. If any part remains unidentified, take the wheel and cassette to a mechanic before applying lockring torque.