Broken bike spoke protector: remove it or replace it?
Remove a loose or cracked spoke protector before it jams, then inspect derailleur alignment and limits before deciding whether to fit a replacement.
 Field guide / broken-bike-spoke-protector-remove-or-replace
Remove a cracked, loose, or rattling spoke protector before riding. Then check why it failed and verify that the rear derailleur, hanger, cable, wheel, and low-limit adjustment cannot guide the chain beyond the largest sprocket. Replace the protector if you want the extra guard or if the bicycle’s required specification calls for one; do not leave broken plastic to find its own way out.
The short answer: the clear disc behind the cassette is a spoke protector, sometimes nicknamed a “dork disc.” Its job is to reduce the chance of a dropped chain reaching the spokes. A sound, correctly fitted protector can stay. A broken one must come off. Removing it does not make derailleur alignment and limit adjustment optional.
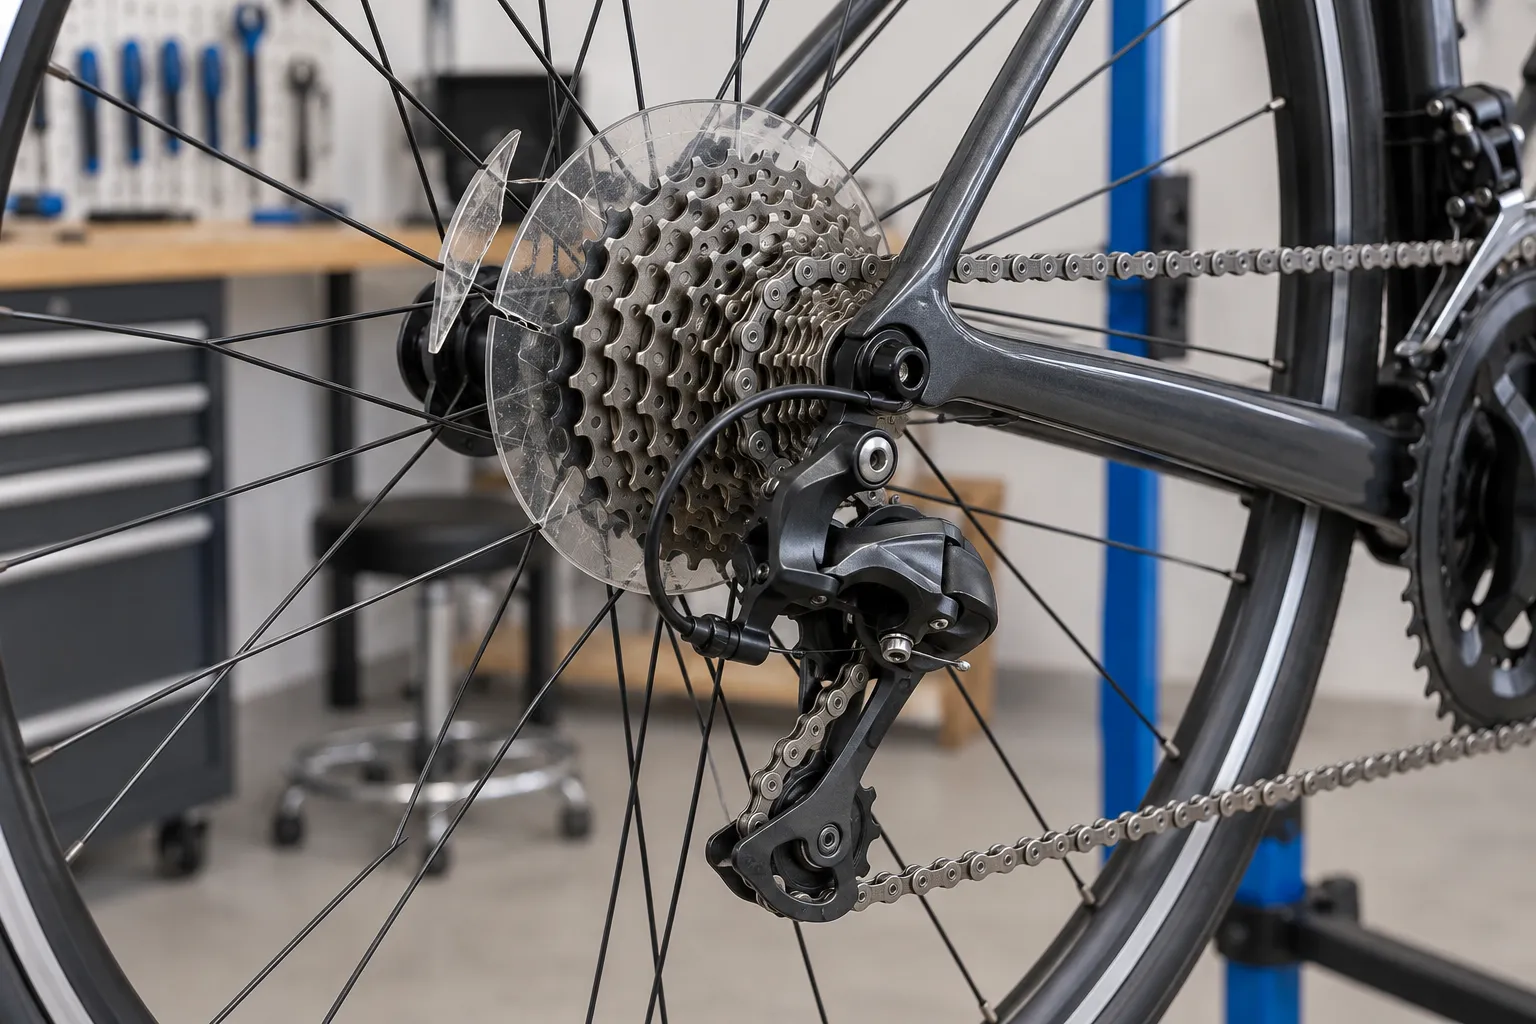
What the protector actually does
The disc provides a physical barrier between the chain and spokes if the chain shifts inward beyond the largest rear sprocket. That overshift can happen after poor adjustment, a bent derailleur hanger, crash damage, a loose wheel, or movement in the derailleur system.
In the United States, the federal bicycle regulation says derailleurs must be guarded so improper adjustment or damage does not let the drive chain interfere with or stop the wheel. A spoke protector is a familiar way manufacturers address that requirement on complete bicycles. Regulations and required original equipment vary by market, so do not convert an online nickname into legal advice for every bike and country.
The protector does not correct a bent hanger or misadjusted low limit. It is a last barrier, not a tuning method.
Stop first and inspect the damage
Do not pull at the plastic while the wheel is turning. Support the bicycle securely and look for:
- plastic touching the cassette, spokes, hub shell, or derailleur;
- missing pieces that may be trapped near the hub;
- damaged, bent, loose, or abraded spokes;
- a chain mark between the largest sprocket and spokes;
- a derailleur cage leaning toward the wheel;
- a bent hanger after a fall or impact;
- a rear wheel that is loose or incorrectly seated.
If the wheel stopped suddenly, the chain entered the spokes, or spokes show damage, do not treat removal of the plastic as the complete repair. The wheel, derailleur, hanger, frame, and chain all need inspection.
Remove it without creating more damage
The clean removal method depends on how the disc is retained and whether the hub uses a cassette or threaded freewheel. Often the cassette or freewheel must come off so the protector can be removed intact. That requires the correct remover, and a cassette usually requires a chain whip and lockring tool.
Avoid hacking at the disc beside tensioned spokes, a tyre, a carbon rim, or a brake rotor. Cut fragments create sharp edges and can disappear into the hub. If you do not already have the correct removal tools and method, a bike shop can remove it while checking the derailleur setup.
After removal:
- account for all loose pieces;
- rotate the wheel by hand and listen for trapped plastic;
- inspect both sides of every spoke near the cassette;
- confirm the wheel is secured correctly;
- test shifting in a stand before applying riding load.
Check the low limit and alignment
The low-limit screw restricts how far the rear derailleur can move toward the wheel. Shimano’s dealer instructions for a road derailleur, for example, align the centre of the guide pulley with the centre of the largest sprocket during low-limit adjustment. Your exact derailleur may use a different procedure, screw location, or electronic setup, so use its manual.
Do not blindly turn both limit screws. First identify the correct low-limit control. Make small changes, turn the cranks by hand, and approach the largest sprocket carefully. The chain should reach the largest sprocket cleanly without trying to move past it.
A correct limit setting cannot compensate for a bent hanger. If the derailleur looks tilted relative to the cassette, shifting changed after an impact, or several gears cannot be indexed together, read how to tell if a rear derailleur hanger is bent and use a mechanic’s alignment check.
Replace it when the extra guard is useful
A replacement is reasonable when:
- you want another layer of protection on a utility or beginner bike;
- the bicycle is frequently transported, dropped, or handled by several riders;
- the derailleur is exposed to trail or parking damage;
- the original equipment or applicable rules require it;
- a qualified mechanic recommends it for the setup.
The replacement must fit the hub, sprocket size, and spoke geometry without rubbing or interfering with service. A mismatched protector that floats loose is not protection.
Leaving an intact protector fitted is also a valid decision. Yellowing plastic may be unattractive, but appearance alone does not make a secure part dangerous. Inspect it during wheel and drivetrain maintenance and remove or replace it when it cracks, loses its retainers, or touches moving parts.
Do not use appearance as the safety test
Current Reddit discussions often divide into “remove it immediately” and “leave it forever.” That misses the actual decision:
- Sound and secure: it may stay.
- Broken or loose: stop and remove it safely.
- Chain or derailleur damage present: diagnose the system, not just the disc.
- Removed: verify low limit, hanger alignment, wheel security, and shifting.
- Uncertain requirement: check the maker, seller, or local rules.
There is no performance prize for exposing the spokes. There is also no benefit in preserving cracked plastic because it was original.
Your next step
Do not ride the rattling bike. Photograph the protector and drivetrain, support the bike, and determine whether clean removal requires cassette or freewheel tools. After it is removed, inspect the spokes and run a careful low-limit and hanger check. If any chain contact or alignment doubt remains, take the bike to a mechanic before the next ride.
Use when a road bike needs a mechanic if the diagnosis exceeds a simple secure-part check.
Sources and further reading
- US eCFR: 16 CFR §1512.9, derailleur guarding requirement
- Shimano road rear-derailleur dealer manual: low-limit alignment
- r/cycling reader context: a newly broken spoke protector
- r/bikewrench reader context: repeated questions about broken spoke protectors
Reddit supplied the recurring terminology and question. Mechanical and regulatory claims are based on the cited primary sources.