Aftermarket thru-axle ticks after installation: what did matching the spec miss?
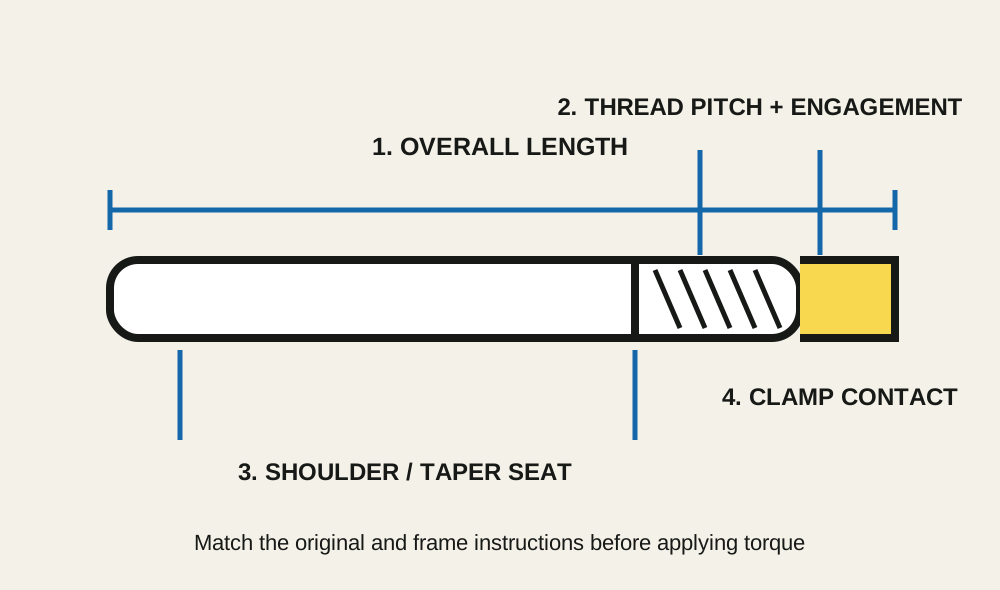
A matching diameter, pitch, and length may still miss the axle seat, shoulder, thread engagement, hub contact, or installation requirements. Check the full interface.
 Field guide / aftermarket-thru-axle-ticks-after-installation
An aftermarket thru-axle can match the headline numbers—12 mm diameter, stated length, and thread pitch—yet tick under load. Those numbers do not describe every contact surface. The head or shoulder may seat differently, the threaded section may bottom before the frame clamps, or the wheel may not be fully seated.
The short answer: reinstall the original axle. If the noise disappears repeatedly, compare the complete geometry and installation instructions, not just three catalogue fields. The replacement must match the thread, effective length, shoulder or taper, head contact, required spacers, thread engagement, and clamping behaviour approved for the frame.
Prove the axle changes the symptom
Do a controlled A/B test before disassembling unrelated parts:
- Clean the dropout, hub end caps, axle, and threads as the frame maker permits.
- Install the original axle using its specified preparation and torque.
- Confirm the wheel is fully seated and the brake operates normally.
- Reproduce the load that caused the tick on a short safe ride.
- Repeat with the aftermarket axle using its approved instructions.
- Repeat once more with the original.
If original–replacement–original gives quiet–tick–quiet, the replacement interface deserves attention. If the tick remains with both, continue with the pedalling-creak localisation guide rather than blaming the axle.
Do not perform ride tests if either installation leaves movement, brake misalignment, binding, damaged threads, or uncertain retention.
Compare more than the printed dimensions
Remove both axles and place them beside each other without threading either into the frame.
Thread diameter and pitch
The threads must match exactly. M12×1.0, M12×1.5, and M12×1.75 are not interchangeable. Never use resistance from a wrong pitch as proof that the axle is “tight.”
Effective length
Brands may measure length from different reference points. Compare the shaft from the clamping seat to the relevant end, and follow the replacement maker’s method. Robert Axle Project’s current instructions for one of its systems require the same pitch and original length within its stated ±2 mm allowance, using only the supplied spacers and matching taper.
That tolerance belongs to that named product and instruction—not every bicycle axle.
Shoulder, taper, and head seat
The axle head may bear on a flat face, a conical seat, a captive washer, or a shaped recess. A different seat can create a tiny moving contact even when the shaft length matches. It can also concentrate load where the frame was not designed to accept it.
Threaded-section length
The replacement needs enough correct engagement without the threaded end bottoming in a blind insert. An axle that stops turning because it ran out of thread travel may not have clamped the dropout and hub.
Shaft steps and clearances
Check any change in shaft diameter, unthreaded land, handle clearance, lever shape, and contact with the derailleur hanger or dropout insert. Compare manufacturer drawings rather than removing material.
Inspect the wheel and frame interfaces
A new axle can expose a pre-existing seating issue. Check:
- wheel fully seated in both dropouts;
- correct hub end caps with no missing adapters;
- no dirt, paint ridge, burr, or damage on approved contact faces;
- dropout insert and derailleur hanger secure by the maker’s method;
- no lateral hub play;
- rotor centred without using the brake caliper to pull the wheel into place;
- frame threads clean and undamaged;
- no crack, fretting mark, or polished moving spot.
Do not sand a carbon dropout, chase frame threads, or lubricate every surface by habit. The frame and axle instructions decide what stays dry and what receives grease.
Install in the correct order
Support the bicycle so the wheel can settle fully into the dropouts. Insert the axle by hand and turn it gently. It should engage smoothly for the expected thread length.
Use only the specified lubricant, washer, or spacer. Tighten to the bicycle or axle maker’s stated value and method. A generic internet torque is not a substitute; even a replacement-axle instruction may defer to the bicycle manufacturer.
The road-bike thru-axle torque guide explains why clean threads, preparation, and the correct torque source matter.
After installation:
- apply the brake and rock the bicycle gently;
- check the hub has no play;
- spin the wheel and operate the brake;
- verify the axle head is seated as designed;
- confirm no threaded section protrudes or bottoms contrary to the instructions;
- recheck after the maker’s specified bedding period, if any.
Why adding torque is a bad diagnostic
A tick can come from microscopic movement, but “more torque” does not identify the moving interface. It can damage frame threads, crush a seat, overload a bearing system, or conceal a geometry mismatch temporarily.
Likewise, adding an arbitrary washer changes effective length and contact geometry. Use a spacer only when the replacement system explicitly supplies and approves it for the exact axle and bicycle.
When the replacement is simply not compatible
Return or replace the axle when:
- the maker cannot verify the exact frame model and year;
- dimensions use ambiguous reference points;
- the head or taper does not match;
- approved spacers cannot reproduce the original effective length;
- thread engagement differs materially from the original;
- it binds, bottoms, or requires force;
- correct installation repeatedly produces noise or movement absent with the original;
- documentation does not state the torque or defer clearly to the frame maker.
“Fits most 12 mm road bikes” is not enough. Thru-axles are not universal fasteners.
Your next step
Photograph both axles beside a ruler and record the frame model, year, axle diameter, pitch, effective length, threaded length, and seat shape. Send that set to the frame and axle makers. Until both the geometry and clamping behaviour are verified, use the undamaged original axle rather than trying another torque value.
Sources and further reading
- Robert Axle Project: example installation instructions requiring pitch, length, taper, and clamping checks
- r/bikewrench reader context: a spec-matched aftermarket thru-axle producing a repeatable tick — used as a current troubleshooting signal; replies were not treated as compatibility approval.