Tubeless sealant seeping through the tyre sidewall: normal pores or a failed setup?
Separate harmless initial sidewall seepage from bead, valve, tape, cut, and compatibility faults in a road or gravel tubeless tyre.
 Field guide / tubeless-tyre-sealant-seeping-through-sidewall
Before you buy
Check the starter kit first
Print the one-page buying brief for helmet, lights, water, phone, and repair compatibility before comparing upgrades.
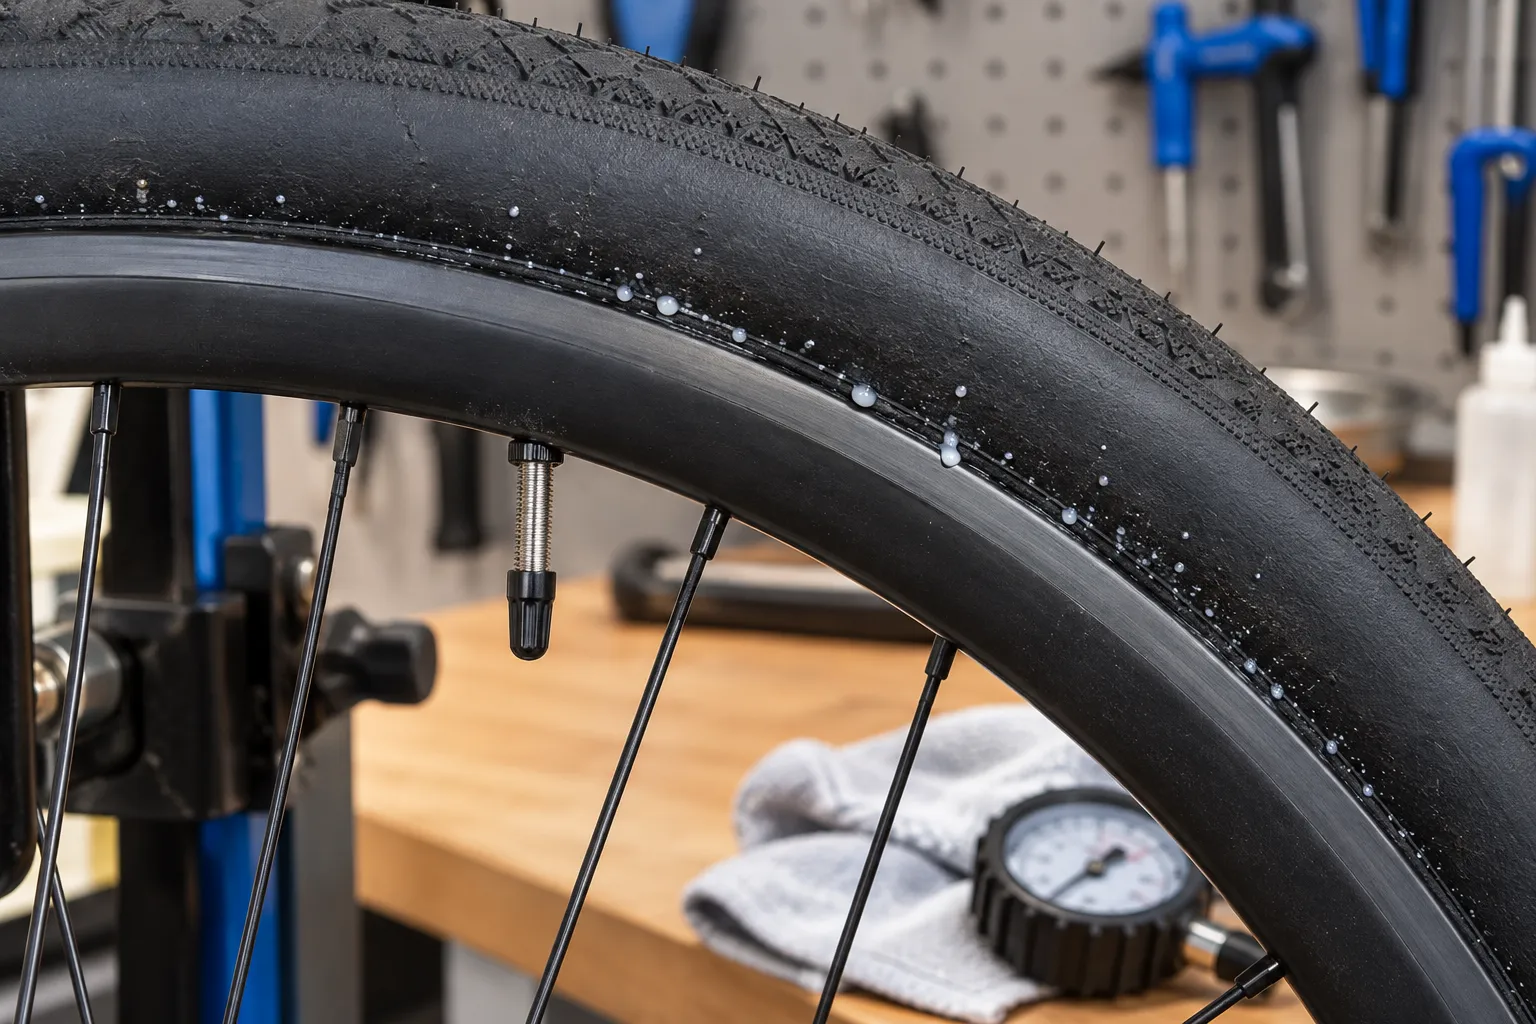
A few pinprick wet spots can occur while sealant closes the porous casing of a compatible tubeless-ready tyre. A continuous leak at the bead, bubbles from spoke holes, a wet valve, a visible cut, a bulge, or rapid pressure loss points somewhere else. Locate the leak before adding more sealant or pressure.
The short answer: confirm that the exact tyre and rim are tubeless-compatible, stay within the complete system’s pressure limits, and map where air actually escapes. Distributed pinholes through an undamaged sidewall may seal after the correct amount of fresh sealant is worked around the casing. A leak concentrated at the bead, valve, rim joint, or spoke holes needs a different repair.
First confirm this is a real tubeless system
“Tubeless-ready” must apply to the complete combination, not just one label. Verify:
- The tyre model and size are approved for tubeless use.
- The rim is tubeless-compatible and its internal width suits the tyre.
- Hooked or hookless requirements are satisfied.
- Tape width, valve, and sealant are suitable for the system.
- The pressure is below the lowest maximum stated by the tyre, rim, wheel, and bicycle makers.
Continental explains that its tubeless-ready tyres rely on sealant for the required sealing performance. Schwalbe similarly states that its Tubeless Easy casings are not inherently airtight and require sealing fluid. That makes some early casing seepage plausible; it does not make every leak acceptable.
Map the leak instead of guessing
Clean and dry the wheel, inflate only to a safe working pressure, then brush a mild soapy-water solution over one area at a time. Look for new bubbles rather than old sealant stains.
| Where bubbles begin | More likely area |
|---|---|
| Many tiny points spread across an intact sidewall | Porous casing still being sealed |
| One line along the tyre-rim boundary | Bead seating, contamination, damage, or compatibility |
| Around the valve base or core | Valve seating, core, nut, or tape at the valve hole |
| From spoke holes or rim drain openings | Air entered the rim cavity, often through tape or valve sealing |
| One cut, thread, bulge, or abrasion | Tyre damage rather than ordinary casing porosity |
| At the rim joint | Rim or tape issue requiring exact manufacturer guidance |
Air can enter the rim cavity at one location and emerge somewhere else. Bubbles at a spoke hole do not mean the spoke hole itself should be plugged from outside.
If it is distributed sidewall seepage
Use only the sealant type and quantity approved by the tyre or sealant maker. Check that the sealant is still liquid and within its useful service life. Then:
- Inflate within the system limit.
- Rotate and gently shake the wheel so sealant reaches the whole casing.
- Lay the wheel on one side for a short period, rotate it, then repeat on the other side if the manufacturer’s process permits.
- Recheck pressure after the specified settling period.
- Test with soapy water again.
Continental notes that flexing and moving the tyre while riding helps sealant reach leakage points. That advice assumes the bead is correctly seated, the tyre is undamaged, pressure loss is slow, and the system is otherwise safe. Do not use a ride to “test” a questionable bead or a tyre that cannot hold working pressure.
If the leak is at the bead
Deflate the tyre and inspect the bead-seat line around both sides. It should run evenly relative to the rim. Look for dried sealant, debris, a folded bead, local high spot, bead damage, or an incompatible combination.
Do not keep adding pressure to force an uncertain bead into place. Use the tyre and rim makers’ mounting procedure, approved lubricant if specified, and a controlled inflation source. The guide to a road-bike tyre that is too tight explains the centre-channel technique without treating pressure as a substitute for correct installation.
If air appears at the valve or spoke holes
Check the removable valve core first if fitted. At the valve base, inspect whether the rubber foot matches the rim bed and whether tape was damaged when the valve hole was opened. The retaining nut should secure the valve according to its instructions; extra force can deform parts without fixing displaced tape.
Bubbles at spoke holes strongly suggest that pressurised air has reached the rim cavity. Deflate, remove the tyre safely, and inspect the entire tape path, overlap, edges, valve hole, and rim bed. Do not pour sealant into the rim cavity or cover individual spoke holes from outside.
Know when the tyre is not salvageable
Stop treating the leak as porosity if you find:
- a sidewall cut or exposed casing threads;
- a bulge, distorted bead, or bead that will not remain seated;
- sealant erupting from one damaged point;
- rapid loss that returns after correct setup;
- evidence that the tyre was run flat or the rim struck hard;
- a tyre/rim combination the manufacturers do not approve.
A plug is generally for certain tread punctures, not a universal sidewall or bead repair. Use the sidewall-cut safety guide and replace the tyre when structural integrity is uncertain.
Your next step
Clean the wheel, note cold pressure, and use soapy water to label the leak as casing, bead, valve, tape/rim cavity, or damage. If it is only fine distributed seepage from an approved system, follow the sealant maker’s distribution process and recheck. For any concentrated or structural fault, deflate and repair the actual layer before riding.
Sources and further reading
- Continental: tubeless-ready setup, sealant quantity, and sealing behaviour
- Schwalbe: why tubeless-ready tyres need sealing fluid
- Schwalbe: tubeless installation and bead-seat checks
- r/bikewrench reader context: new tubeless sidewall leakage — used as an editorial demand signal; compatibility and safety claims come from manufacturer guidance.