Why won't a quick-release front wheel drop out of the fork?
Identify fork retention tabs or axle clips, remove a quick-release front wheel in the correct order, and reinstall it without defeating a safety feature.
 Field guide / quick-release-front-wheel-retention-tabs-clips
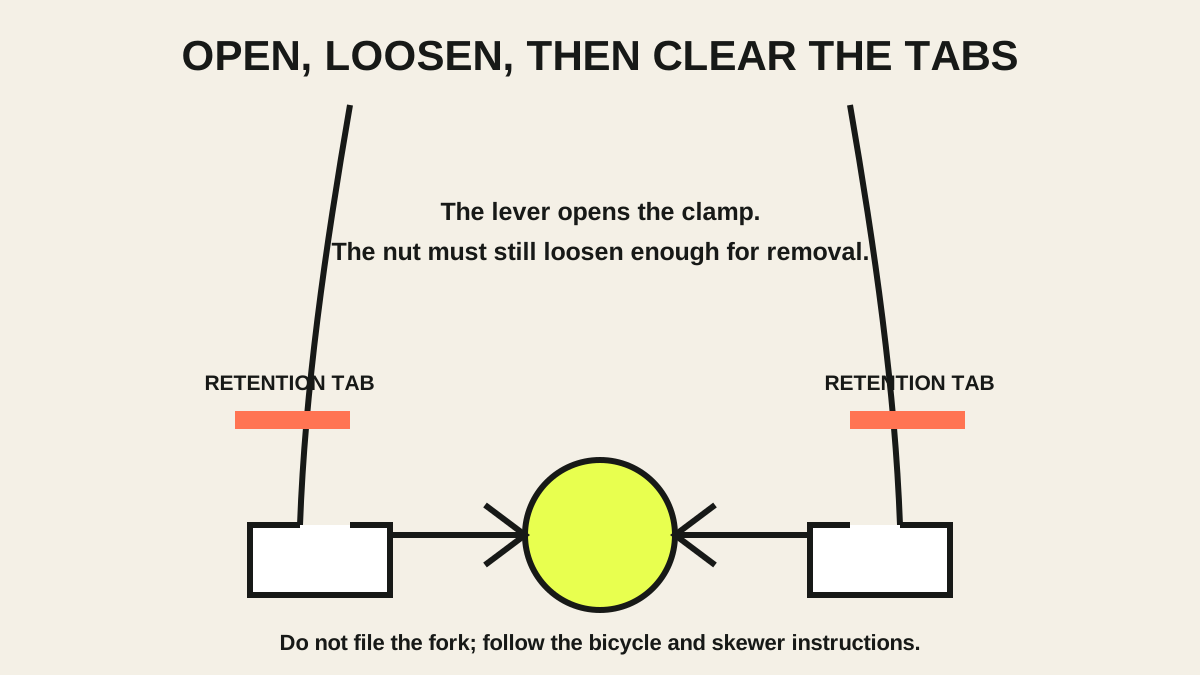
Opening a quick-release lever does not always let the front wheel fall straight out. Many forks have raised retention tabs at the dropout, while some older bikes use a separate metal clip or bracket around the axle. These are secondary retention features. Use the release sequence the bicycle was designed for; do not cut or bend the feature away.
The short answer: support the bike, open the quick-release lever fully, release the rim brake if the inflated tyre cannot pass it, then loosen the skewer’s adjusting nut enough for the axle to clear the fork tabs. If the bike has a separate retention clip, follow its manual-specific release action. Never force the wheel or treat the clip as the primary wheel fastener.
First identify what is holding the wheel
A current r/bikewrench question asked about an unfamiliar bracket that must be squeezed before an older front wheel can drop. The exact hardware matters. Do not copy a removal motion from a different bicycle.
Look at both fork ends and the axle:
- Raised fork tabs: small cast, forged, or moulded lips around the open end of each dropout. The quick-release adjusting nut must be loosened enough to pass them.
- Separate retention clip or washer: a metal part attached around the axle that hooks into or around the fork end. Some designs require a deliberate squeeze, push, or rotation after the primary fastener is loose.
- Closed thru-axle fork: the fork has round holes, not downward-facing slots. The axle must be unthreaded and withdrawn; there is no quick-release skewer adjusting nut.
- Solid threaded axle: nuts on both sides secure the wheel. Use the correct wrench and the manufacturer’s tightening specification.
If the parts do not match the bicycle’s manual or appear improvised, corroded, cracked, or bent, stop. A photo of both fork ends, the axle, and the open/closed lever can help a shop identify the system.
What the retention feature does
The primary wheel attachment is the correctly adjusted and fully closed quick-release skewer, axle nuts, or thru-axle. A secondary feature can help retain the front wheel when the primary fastener has been loosened, but it is not permission to ride with that fastener open.
In the United States, federal bicycle rules require wheel-locking devices and describe positive front-hub retention for relevant designs. The CPSC’s public bicycle guidance also explains that a quick-release lever must visibly indicate whether it is locked or unlocked. Requirements and designs vary by date and market, so identify the actual bicycle rather than assuming every tab exists for the same legal reason.
Do not call every system “lawyer lips” and then remove it. The nickname does not tell you how the mechanism works, whether the fork manufacturer permits modification, or whether the fork remains safe afterward.
Remove a tab-equipped quick-release front wheel
Use the bicycle manual if it gives a different sequence.
- Make the bike stable. Use a repair stand, ask a helper to steady it, or place it so the fork cannot fall sideways when the wheel releases.
- Shift attention to the brake. For a rim brake, operate its intended release if the inflated tyre is too wide to pass between the pads. For a disc brake, do not pull the brake lever after the rotor leaves the caliper unless the correct pad spacer is installed.
- Open the quick-release lever fully. Move it from the closed position through its full arc. Do not merely spin the lever.
- Hold the lever and loosen the adjusting nut. Turn the nut on the opposite side several rotations—only enough for both axle ends to clear the retention tabs.
- Guide the wheel out. Lift the fork or guide the wheel downward while keeping the rotor, if present, aligned with the caliper slot.
- Keep the skewer parts together. Do not lose the small conical springs or reverse their orientation. The quick-release skewer spring guide shows how they fit.
If the axle still catches, stop and inspect both sides. More loosening, a brake release, or a specific clip action may be required. More force is not a diagnostic method.
Remove a wheel with a separate clip or bracket
Older retention clips vary. The part may hook over a fork projection or sit under an axle nut. Some release when squeezed; others rotate or lift only after the primary fastener is sufficiently loose.
Use this decision order:
- Find the bicycle, fork, or hub manual by model and approximate year.
- Confirm the clip is original and complete on both sides where applicable.
- Release the primary fastener first.
- Apply only the clip motion described by the manual.
- If the clip is distorted, seized, or requires prying, stop and ask a shop.
Do not replace the clip with a random washer. Its shape, orientation, and relationship to the fork are part of the retention system.
Reinstall the wheel without relying on the tabs
The secondary feature does not clamp the hub. Reinstallation must make the primary attachment correct.
- Check that the skewer passes through the hollow axle and that its lever is on the bicycle’s intended side.
- Guide the rotor cleanly between disc-brake pads, or centre the tyre between rim-brake pads.
- Seat both axle ends fully and evenly at the top of the fork slots.
- Tighten the adjusting nut with the lever open until the lever begins to meet firm resistance partway through closing.
- Close the lever fully into a position that cannot catch a wheel, object, or rider. It should not point forward.
- Reconnect or close the rim brake, if released.
- Lift the front slightly, spin the wheel, apply the front brake, and rock the bike gently to confirm seating and braking before riding.
The exact closing force and lever position belong to the skewer and bicycle instructions. Follow the complete quick-release wheel tightening guide before the road test.
Stop when any of these are true
Do not ride if:
- the lever closes with almost no resistance or cannot close fully;
- the axle will not sit equally in both fork ends;
- a retention clip is missing from a system designed to use one;
- either dropout or tab is cracked, deeply gouged, spreading, or bent;
- the skewer is bent, corroded, or has damaged threads;
- the brake rotor rubs heavily or the rim brake was not reconnected;
- the wheel shifts when the front brake is applied and the bike is rocked.
Never test a questionable front-wheel installation at speed. A competent mechanic can usually identify the system faster and more safely than repeated trial and error.
Your next step
Before removing the wheel, photograph both fork ends and the complete skewer. Identify tabs, a separate clip, a thru-axle, or axle nuts. Then use the matching manual and finish with a deliberate wheel-seating and brake check.