New shift cable will not release to smaller sprockets: what did you miss?
Separate shifter, cable-head, housing, liner, anchor, and derailleur friction when a newly installed road-bike shift cable sticks during release shifts.
 Field guide / new-shift-cable-will-not-release-smaller-sprockets
Before you buy
Check the starter kit first
Print the one-page buying brief for helmet, lights, water, phone, and repair compatibility before comparing upgrades.
When a rear derailleur shifts toward larger sprockets but hesitates on the way back to smaller ones after a cable change, friction or incorrect seating is often preventing the derailleur spring from pulling cable back through the system. More barrel-adjuster tension usually makes that release problem worse.
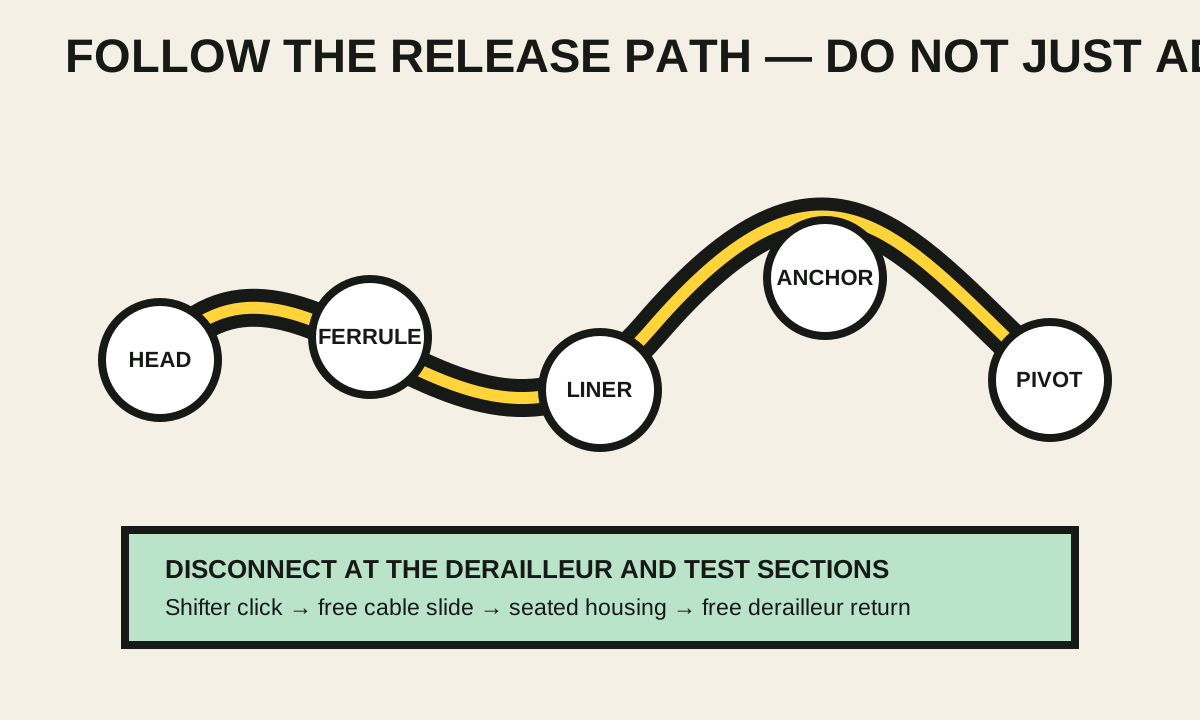
The short answer: disconnect the cable at the rear derailleur, then test the derailleur, inner cable, housing sections, and shifter separately. Check the cable head is fully seated, every ferrule is correct and seated, housing bends are gentle, internal liners meet the stops cleanly, and the cable follows the exact lever and anchor path.
The current problem pattern
A recent r/bikewrench post described a new SRAM Rival shift cable whose head appeared to stick while releasing toward smaller sprockets. The useful general question is how to locate friction after a cable replacement without damaging the lever or compensating with random adjustments.
On many conventional rear derailleurs, the shifter pulls more cable to move the chain toward larger cassette sprockets. A shift toward a smaller sprocket releases cable and the derailleur spring provides the return force. If the cable is pinched, kinked, misrouted, or poorly seated, that spring may not overcome the friction.
First rule out a dangerous adjustment problem
Put the bicycle in a stable workstand and rotate the cranks by hand only. Check that the derailleur cannot move the chain beyond the largest sprocket into the spokes or beyond the smallest sprocket toward the frame. Limit screws are not the likely cause of cable-head friction, but unsafe limits make testing risky.
Inspect for:
- a frayed cable at the lever or anchor;
- a cable head that sits sideways or outside its pocket;
- split housing or a ferrule that has pulled through a stop;
- a crushed housing bend under handlebar tape;
- a kink at the frame entry or derailleur;
- an incorrectly clamped cable;
- a bent derailleur hanger after an impact.
Stop if the cable is shedding strands inside the lever. The frayed-cable guide explains why pulling harder can strand the head inside the mechanism.
Reset the controls before diagnosing
With the rear wheel stationary, operate the release control until the shifter is fully in its smallest-sprocket position. Wind the barrel adjuster fully clockwise, then use only the model’s specified starting offset. Do not force more clicks after the shifter reaches its end position.
SRAM’s mechanical road instructions tell the installer to put the rear shifter in the highest-gear position before passing a new cable, and show the shift housing seated in the factory ferrule and routed through the lever’s intended channel. Follow the document for your exact model; different generations are not interchangeable just because the hood says “Rival.”
Disconnect the cable and split the system
Mark the current anchor route, then release the cable from the rear derailleur using its manual.
Test the derailleur by hand
Move the derailleur carefully through its range without the cable. It should return under spring force without a sticky point. A stiff pivot, damaged derailleur, obstructed clutch mechanism, or bent hanger will not be fixed by a new cable.
Test the inner cable
Hold light tension on the free cable end while operating one shifter click at a time. The cable should move in and out predictably. If the head catches at the lever even with the downstream system free, stop and verify its seating, cable diameter, and routing against the lever manual.
Do not probe a loaded mechanism with a metal pick. A tool can score the cable, dislodge a strand, or damage the lever’s small internal surfaces.
Test each housing section
Slide the inner cable through each removable housing section by hand. Resistance points to a crushed end, burr, contamination, wrong ferrule, tight bend, or damaged liner. A fresh housing cut needs a clean round opening; reform the liner only with the appropriate tool.
For internal routing, confirm the liner or guide tube terminates where the frame maker intends. A guide that overlaps a ferrule badly, folds inside a stop, or pulls out of position can grip the inner cable only when the system bends.
Common installation faults
The cable head is not fully home
The head may look seated while resting on an edge of its pocket. It can then rotate or bind as tension changes. Compare the head shape and cable diameter with the component specification and inspect with the hood positioned as the manual shows.
Housing is too short or sharply bent
Housing needs gentle curves and enough length for full handlebar movement. SRAM’s road manual specifically instructs users to leave a gentle bend that permits the handlebar to turn freely. Turn the bars both ways during the test; a shift fault that appears only at one steering angle strongly implicates housing length or routing.
A ferrule is wrong, missing, or half seated
Some ports use a ferrule; others accept bare housing or a proprietary stop. Adding a ferrule where none belongs can prevent full seating. Omitting one where required can let strands or the liner catch.
The cable is on the wrong side of the anchor
The anchor groove controls cable pull geometry. A cable clamped on the wrong side can produce poor indexing and an awkward bend. Route it exactly as the derailleur manual shows and tighten to the published value.
Handlebar tape pinches the housing
If shifting worked before the bars were wrapped, unwrap enough tape to inspect the lever exit and first bend. Do not use tighter tape as a cable-retention method.
Reassemble before indexing
Replace any kinked, frayed, contaminated, or incorrectly specified part. Seat every housing end while holding the system together, route the cable at the anchor, and tighten to the exact component specification. Turn the bars fully left and right and confirm that nothing pulls or releases cable.
Only then index the derailleur in small barrel-adjuster steps. The adjacent-sprocket clicking guide covers indexing once the cable moves freely. If an individual shift still fails with a free cable path, use the maker’s shifter service route or a qualified shop rather than opening an unsupported lever mechanism.
Your next step
Disconnect the cable at the derailleur and record three results: whether the derailleur returns freely, whether the cable slides freely through each housing section, and whether the shifter moves the bare cable cleanly for every click. The first failed test identifies the part of the system to correct.
Sources and further reading
- SRAM 1× mechanical road systems user manual
- SRAM Rival 22 mechanical shifter service page
- Reddit demand signal: a new Rival shift cable sticking during release shifts — used to identify the fault pattern, not as the service authority.