Hydraulic or mechanical disc brakes for your first road bike?
Choose between hydraulic and cable-operated disc brakes by comparing lever effort, control, maintenance, travel repair, total bike price, and upgrade cost.
 Field guide / hydraulic-vs-mechanical-disc-brakes-first-road-bike
Before you view or pay
Check fit, condition, and starter gear first
Use the buying checklist to choose the right path: used-bike viewing, first-bike fit and type, hidden repair costs, or starter gear.
If two otherwise suitable first road bikes cost about the same, hydraulic disc brakes are usually the easier choice: they normally need less hand force, offer finer control, and compensate automatically for pad wear. Mechanical disc brakes remain reasonable when price, simple cable service, or remote repair matters more—provided the specific system is correctly set up and stops you confidently.
The short answer: prefer hydraulic discs for frequent hills, wet riding, smaller or tired hands, and everyday ease. Consider good mechanical discs for a lower purchase price or field-service priority. Do not buy the wrong size, poor gearing, or a compromised frame merely to get hydraulic brakes.
The buying question behind the comparison
Recent Reddit discussions ask whether hydraulic discs are worthwhile on a roughly $1,000 first bike and whether mechanical discs are easier to live with for travel and remote riding. Another longer discussion tries to separate real mechanical-disc tradeoffs from blanket “hydraulic is better” advice.
Those threads show demand, not a universal verdict. Brake feel depends on the lever, caliper design, rotor size, pad compound, cable and housing quality, hose condition, installation, tyres, rider and terrain. “Disc brake” on a product page is not enough information.
What actually differs
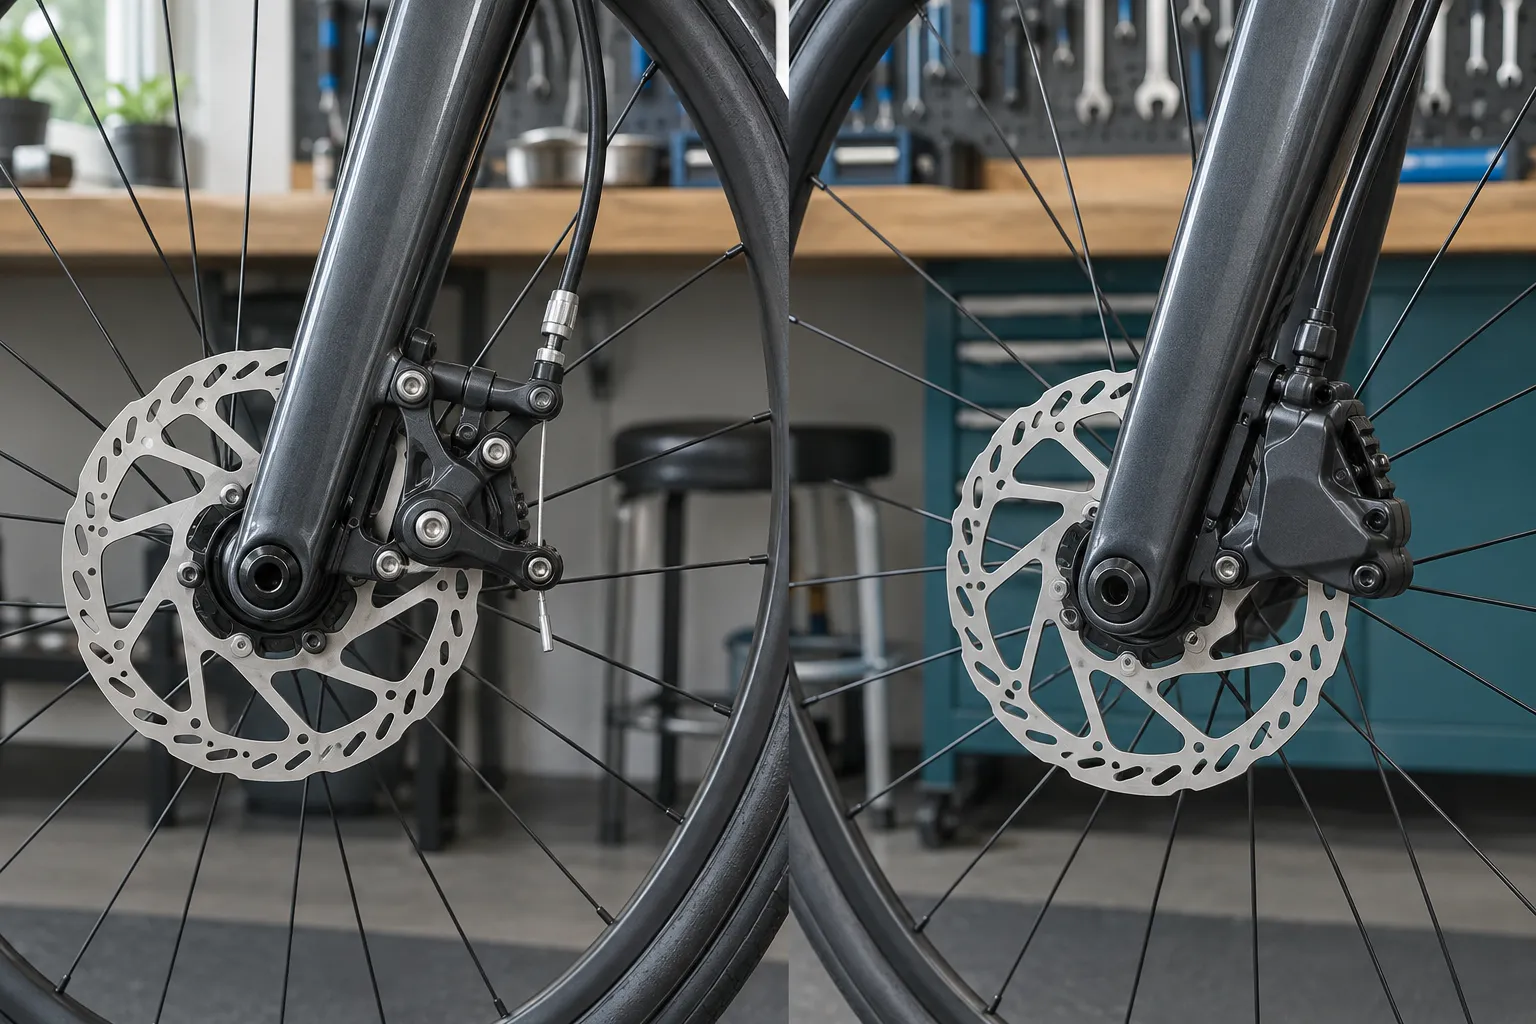
Both systems squeeze pads against a rotor at the wheel hub. The difference is how the lever sends force to the caliper.
Mechanical disc brakes pull a steel inner cable through housing. Depending on the caliper, one or both pads move. Pad clearance and cable tension need periodic attention as parts wear and cables settle.
Hydraulic disc brakes press brake fluid through a sealed hose. Pistons move the pads, and current systems generally compensate for pad wear. Servicing a hose or fluid circuit requires system-specific tools, fluid, procedures, and cleanliness.
| Decision factor | Hydraulic disc | Mechanical disc |
|---|---|---|
| Lever effort | Usually lower | Usually higher for comparable braking |
| Modulation | Usually finer and smoother | Depends strongly on caliper and cable setup |
| Pad-wear compensation | Typically automatic | Usually requires pad or cable adjustment |
| Routine exposed cable care | None | Cable and housing can corrode, drag, or fray |
| Fluid service | System-specific bleeding or hose work | None |
| Remote repair | More specialised | Cable replacement can be simpler |
| Purchase price | Often raises complete-bike price | Common on lower-cost drop-bar bikes |
| Upgrade later | Can require new levers, calipers, hoses and labour | Parts may be simpler, but compatibility still matters |
This is a tendency table, not a quality guarantee. A well-designed mechanical caliper with compressionless housing can work very well. A poorly installed hydraulic system can rub, leak, feel soft, or perform badly.
Hydraulic is most valuable when hand force matters
Hydraulic systems’ practical advantage is not permission to descend faster. It is easier access to controlled braking. That can matter when:
- routes include long or steep descents;
- rain and dirty roads are routine;
- the rider has smaller hands or limited grip strength;
- braking from the hoods already feels difficult;
- repeated braking causes hand fatigue;
- the bike carries luggage.
Tyre grip and road conditions still limit how much braking force reaches the ground. Either system can skid a tyre. The useful goal is predictable control at the lever, not maximum theoretical power.
Before assuming a brake type solves downhill fear, learn progressive braking and speed choice with how to descend steep hills safely. Equipment and skill solve different parts of the problem.
Mechanical discs make sense for specific priorities
Mechanical discs deserve consideration when:
- they make a correctly fitting complete bike affordable;
- you already understand cable adjustment and value simple field replacement;
- the bike is for extended travel where compatible hydraulic service may be unavailable;
- the particular caliper has independent pad adjustment or moves both pads;
- compressionless brake housing is specified and correctly installed;
- a real test confirms comfortable lever effort and strong, repeatable stops.
Do not translate “field serviceable” into “maintenance free.” Park Tool’s mechanical-disc procedure includes checking cable slack, pad position, caliper alignment, rotor truth and lever travel. Cycling UK notes that cable disc calipers do not self-adjust for pad wear.
Cheap mechanical discs can still be the right route into cycling, but budget for a proper setup. A brake that reaches the bar, rubs heavily, or cannot stop the bike firmly is not an acceptable beginner compromise.
Maintenance is different, not absent
With mechanical discs, expect to inspect the inner cable and housing, compensate for pad wear according to the caliper design, and correct alignment when necessary. Contaminated pads and damaged rotors remain possible.
With hydraulics, normal riding may require only pad inspection and occasional alignment for a long period. Eventually the system may need a bleed, hose work, piston service, or fluid replacement under the maker’s instructions. Never mix mineral oil and DOT fluid systems, improvise fluid, or assume two brands share a procedure.
Both systems need clean rotors, compatible pads, adequate pad thickness, secure fasteners and heat-aware descending technique. Start with how to check disc-brake pad wear rather than waiting for metal-on-metal noise.
Test the complete bike, not the category label
On a shop test ride, use the same hand position you will use outside—usually the hoods on a road bike. In a safe area, check that:
- Both levers are reachable without rotating your hands awkwardly.
- Each brake builds resistance well before the lever reaches the bar.
- Light pressure trims speed smoothly rather than doing nothing and then grabbing.
- A firm progressive squeeze produces a controlled stop.
- The pads release without heavy continuous rub.
- The lever feel remains consistent after several stops.
Ask the shop to identify the lever, caliper, rotor and pad models. “Hydraulic” or “mechanical” is not a component specification. Also ask what the first pad replacement, cable service or bleed costs locally.
Do not plan an easy hydraulic conversion later
Changing a drop-bar mechanical-disc bike to full hydraulics often means replacing the integrated brake-and-shift levers as well as calipers, hoses, fittings and fluid. Routing may require bar tape removal and internal frame work. Drivetrain compatibility can narrow the choices.
Price the complete conversion before buying. The apparently cheaper mechanical bike plus a near-term hydraulic upgrade can cost more than the hydraulic version from the start.
Conversely, do not stretch the budget so far for hydraulic brakes that there is no money left for a helmet, correct pedals, repair kit, fit corrections, or replacement of poor stock tyres. Use the complete first-road-bike budget guide to compare ride-ready totals.
A practical decision rule
Choose the bike in this order:
- Correct size and an adjustable position you can operate safely.
- Sound frame, fork and wheels.
- Gearing low enough for your terrain.
- Brakes that you can reach and operate confidently.
- Tyre clearance and mounting points that match your use.
- Service access and total cost.
If both finalists pass those checks and the price gap is manageable, choose hydraulic. If the hydraulic option compromises fit, gearing, condition, or the whole budget, buy the sound mechanical bike and have its brakes set up correctly.
Your next step
Take both candidate bikes to the same safe test area and perform the six brake checks from the hoods. Record lever reach, control, hand effort, included service, and total ride-ready price. Then run the winner through the road-bike buying checklist before paying.