How to set road-bike brake hood position and lever reach
Align road-bike brake hoods for secure hands and reliable brake access without hiding a reach, handlebar, or bike-size problem.
 Field guide / how-to-set-road-bike-brake-hood-position
Your road-bike hoods should support a secure, repeatable hand position while leaving the brake levers easy to reach. They do not need to be perfectly level with the ground or copied from a professional’s bike. Start with symmetry and control, then make small changes within the lever and handlebar manufacturers’ permitted positions.
The short answer: first set the handlebar rotation, then position both hoods at equal height and angle. From your normal hood grip, your wrists should not be forced into an extreme bend and you should be able to brake decisively without sliding your hands to a new position. Use the lever’s reach adjustment for finger access; do not rotate the whole bar upward to disguise a bike that is too long.
Separate the four adjustments
Several changes that feel similar at your hands do different things:
- Handlebar rotation changes the angle of the tops, ramps, drops, and bar ends together.
- Hood position on the curve changes each lever body’s height and effective reach.
- Hood inward angle changes wrist and forearm alignment when viewed from above.
- Lever reach adjustment moves the brake blade closer to or farther from your fingers without relocating the whole hood.
Treat them separately. Rotating the bar to bring the hoods closer can make the drops awkward or unsafe. Sliding hoods far up the curve can create a steep “shelf,” extend cable or hose routing, and move the brake blade away in the drops.
Record the starting point
Before loosening anything:
- Photograph the cockpit from directly in front, above, and each side.
- Put removable tape at the bar-to-stem boundary and beside each hood.
- Measure each hood from the same fixed handlebar reference.
- Record handlebar rotation using the bar’s alignment marks or the angle of the lower drops.
- Note which hand position causes the problem: tops, hoods, drops, or all three.
This baseline lets you reverse a worse change. It also reveals an existing left-right difference that your eyes missed.
Set handlebar rotation before moving the hoods
Use the handlebar manufacturer’s setup guidance. As a neutral starting point, the lower section of many modern compact drops is near level or slopes slightly toward the rear, but bar shapes differ. Printed alignment marks near the stem can indicate the intended range.
Loosen the stem faceplate bolts only according to the stem manual, keeping an even gap where the design requires it. Rotate in tiny increments, then retighten using the stated sequence and torque. On carbon bars, never assume a generic torque or assembly paste rule.
Check that the drops remain usable: you should be able to hold them securely, reach the brake blades, and steer without the bar curve forcing your wrist into an extreme angle.
Match the hood height and angle
You may need to roll back the rubber hood cover and loosen the hidden clamp bolt. Consult the exact lever manual before doing so; bolt location, tool, torque, and permitted mounting range vary.
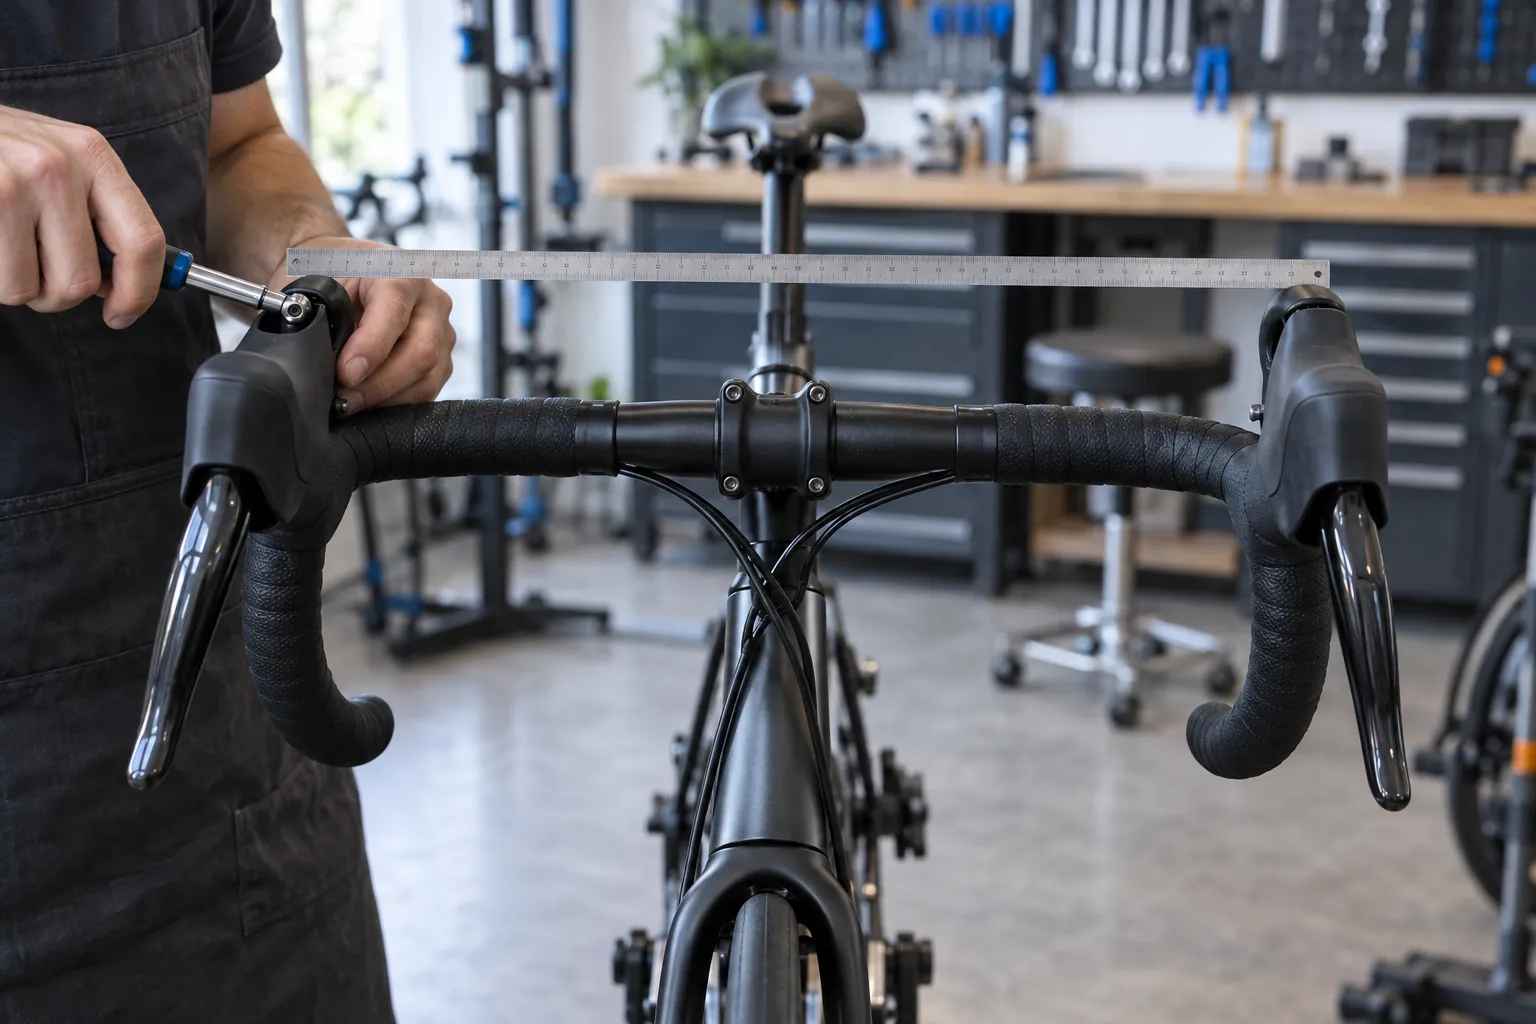
Move one hood only a few millimetres, then use a ruler, straightedge, or repeatable measurement from a bar feature to match the other side. Do not measure from the floor unless the bike itself is level.
From the front, a modest inward angle may follow the natural line of some riders’ forearms. Extreme inward rotation can reduce leverage, interfere with safe braking, or fall outside the maker’s intended setup. The goal is not a fashionable silhouette; it is neutral wrists and immediate control.
Shimano’s road lever instructions require installation where braking and shifting are not obstructed and specify that the appropriate torque must be verified with the handlebar or bicycle maker, especially on carbon. Apply that principle regardless of brand.
Use reach adjustment for finger access
Many modern levers have a reach-adjust screw that brings the brake blade closer for smaller hands. This can improve access from both hoods and drops, but it is not a cure for excessive brake free stroke or a hydraulic system that needs service.
After changing reach:
- squeeze each lever hard while stationary;
- confirm it does not bottom against the bar;
- confirm the brake fully releases;
- check shifting operation if controls are integrated;
- test access from the hoods and drops.
If the lever still pulls close to the bar, use our brake-lever travel safety guide rather than dialling in more reach adjustment and hoping.
Judge the position by tasks, not appearance
On a short, traffic-free test ride, ask:
- Can you settle onto both hoods without constantly re-gripping?
- Can your index and middle fingers reach the brake blades while the remaining fingers control the hood?
- Can you brake firmly from the drops?
- Do your wrists stay close to their natural line instead of bending sharply inward, outward, up, or down?
- Can you look ahead and steer without locking your elbows?
- Does either hand carry clearly more pressure?
Test normal riding, a controlled stop, gentle climbing, and rougher pavement. A ten-second pose on a trainer cannot reveal every control problem.
Know when hood adjustment is the wrong fix
Moving hoods cannot fully correct:
- a frame with excessive reach;
- handlebars that are too wide or have unsuitable reach and drop;
- a stem length or height far outside your usable range;
- a saddle position pushing too much weight onto the hands;
- brake blades poorly suited to your hand size;
- persistent numbness, weakness, or pain.
If both hoods must sit at an extreme point on the curve to feel reachable, reassess the complete cockpit. Read how to tell if a road bike is too big or too small and our guide to numb hands and fingers. Do not use saddle fore-aft as a casual reach adjuster; it primarily affects the pedalling position.
Finish the job safely
Tighten each lever clamp to the exact requirement for that lever and handlebar combination. Refit hood covers without folds that obstruct the lever. Confirm cables and hydraulic hoses are not stretched, kinked, rubbed, or pulled when steering fully left and right.
If moving a hood leaves exposed bar, bunched tape, or compromised hose routing, rewrap or reroute correctly rather than hiding it under the rubber. Fully internal hoses, integrated bars, and unfamiliar hydraulic work are good reasons to use a qualified shop.
Your next step
Take three baseline photos and identify the single problem you want to solve: wrist angle, hood symmetry, or brake-blade reach. Make one small, measured change, torque it correctly, and complete a quiet-road control test before adjusting anything else.