Full-length or clip-on mudguards for a road bike?
Choose road-bike mudguards by comparing spray coverage, frame mounts, tyre clearance, group riding, removal, safety-release features, and maintenance.
 Field guide / full-length-vs-clip-on-road-bike-mudguards
Choose full-length mudguards when your road bike has the mounts and clearance and you regularly ride wet roads: they protect more of you, the bike, and the rider behind. Choose close-fitting clip-on guards when the frame lacks eyelets, has tight clearances, or you need fast removal—provided the exact system fits safely.
The short answer: coverage wins when the bike can accept it; compatibility wins when it cannot. A short saddle flap keeps some spray off your back but does not perform the same job as a front-and-rear system.
Start with what you want to keep dry
Current Reddit winter-riding discussions repeatedly recommend mudguards, but “fit mudguards” hides several different products. A thread from a new rider asking how to make cold outdoor riding easier highlighted full-size guards, while another about sub-zero bicycle delivery work showed why keeping feet and clothing dry matters during long stop-start use.
Decide whose spray matters:
- Your face and torso: rear-wheel coverage behind and above you.
- Your feet and drivetrain: front coverage extending low behind the wheel.
- A following rider: a long rear guard and flap that interrupts the rearward plume.
- Only an emergency wet patch: a small saddle-mounted flap may be enough.
The smaller the target, the smaller the guard can be. Do not expect a minimalist flap to protect shoes, drivetrain, and companions.
Compare the three main types
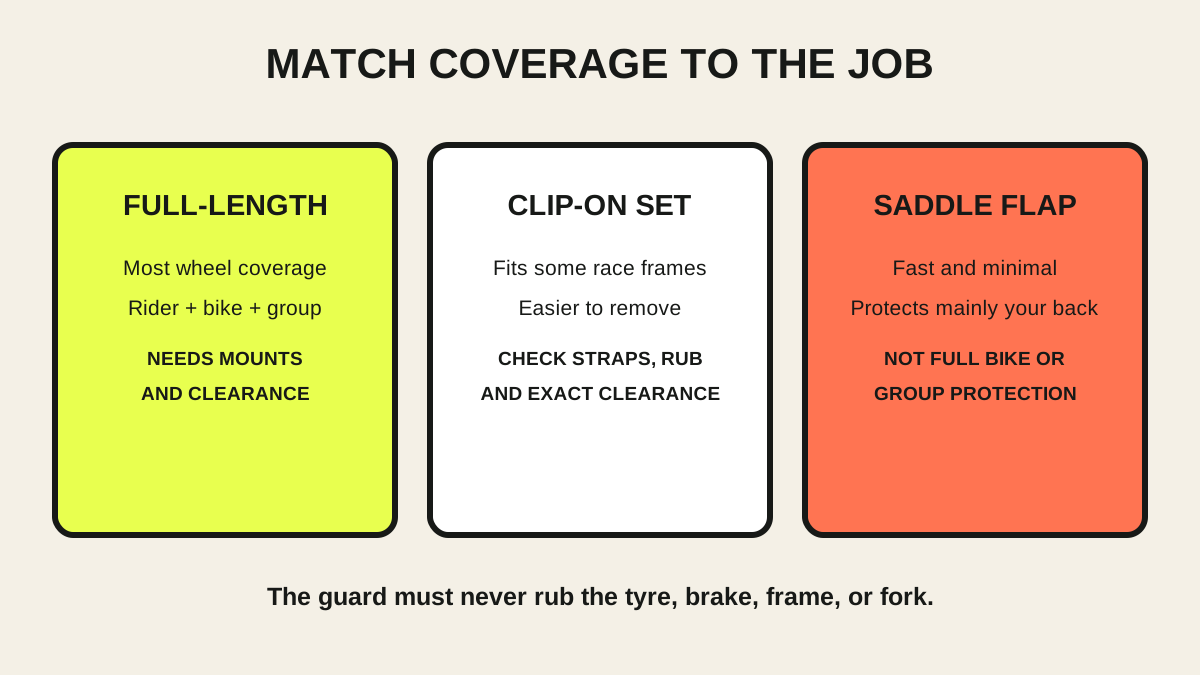
| Type | Best at | Main limitation |
|---|---|---|
| Full-length, stay-mounted | Maximum road-spray coverage and regular wet riding | Needs clearance, secure mounting points, careful installation |
| Close-fitting clip-on set | Race-style frames without conventional eyelets | Less universal than “clip-on” sounds; straps and frame contact need checks |
| Saddle or seatpost flap | Quick, minimal protection for the rider’s back | Little or no protection for feet, bike, or following rider |
Full-length does not always mean permanently bolted, and clip-on does not always mean short. Judge actual wheel coverage and mounting, not the marketing category.
Full-length guards are the default for regular wet roads
British Cycling recommends full-length guards for winter because they help keep the rider’s backside and feet drier, reduce spray on the bicycle, and improve conditions for a companion behind. Cycling UK’s independent guidance similarly notes that greater wheel coverage provides more protection and that a long front guard protects feet better.
Choose them when:
- the frame and fork have approved mounting points;
- the tyre, brake, fork crown, bridges, and frame leave the required space;
- wet commuting or winter training is routine;
- group etiquette requires a long rear flap;
- removal for transport is infrequent.
Installation takes patience. Stays may need sizing, fasteners must use the correct interfaces, and the guard must follow the wheel without wandering toward the tyre.
Clip-ons solve a real compatibility problem
Race-oriented road bikes often lack eyelets or the space for a traditional guard under the fork crown and brake. A model-specific or compatible clip-on system can attach at the fork legs and stays without those eyelets.
Choose clip-ons when:
- the maker permits them on the frame and fork;
- conventional mounts are absent;
- you remove the guards often;
- the close-fitting product clears the measured tyre and every moving part;
- frame-contact areas can be protected and kept clean.
Rubber straps age, grit can mark paint or carbon, and a guard can shift after a pothole or wheel removal. SKS instructs users of one popular clip-on system to check positioning before every ride, maintain the specified clearance, protect frame contact points, and replace damaged tensioning rubbers. Follow the manual for the exact product; its clearance may differ.
Clearance is a system measurement
The tyre size printed on the sidewall is not its guaranteed installed width. Rim width, pressure, tyre model, and manufacturing variation affect the real shape. Measure the tyre on the bike and inspect the tightest points:
- under the fork crown;
- between tyre and brake hardware;
- at the seatstay bridge;
- near the chainstays and bottom-bracket area;
- beside any cable, hose, sensor, or light mount.
Allow the clearance required by both bicycle and guard makers. Include normal wheel flex, debris, wheel removal and refitting, and the possibility of fitting a larger replacement tyre later. Use our road-bike mudguard clearance guide before ordering.
Front-guard safety deserves special attention
An object trapped between a close front guard and tyre can arrest or disturb the wheel. Look for the safety-release feature required by the guard maker, install it in the stated orientation, and never defeat it to stop a rattle. Cycling UK specifically recommends breakaway stay clips for flexible full-length front guards.
After installation:
- Turn the handlebar fully both ways.
- Compress the bike normally without forcing the fork.
- Spin both wheels and operate both brakes.
- Check toe, crank, cable, and tyre clearance.
- Ride slowly, then recheck every fastener and strap.
Stop immediately for rubbing, a shifted stay, a broken bracket, trapped debris, or a new noise.
Make the buying decision
Choose full-length if the bike safely accepts them and wet-road use is regular. Add a suitable flap if group spray is a concern.
Choose clip-on if a compatible system provides safe clearance on a bike without normal mounts, or frequent removal matters more than maximum coverage.
Choose a small flap only when the limited job is acceptable: keeping the worst stripe off your back on an occasional wet road.
If no guard fits safely with the current tyre, do not force one. A narrower approved tyre may create room, but reassess rim compatibility, pressure, handling, and the bicycle maker’s limits before changing size.
Your next step
Photograph the four tight-clearance areas, measure the installed tyre, and identify every mounting point. Compare those facts with the guard manual before buying. After fitting, add guard alignment and strap condition to your normal pre-ride check.
Sources and further reading
- British Cycling: winter riding and full-length mudguards
- Cycling UK: coverage, mounting, rigidity, and safety-release clips
- SKS Raceblade Pro manual: positioning, clearance, straps, and frame protection
- r/cycling reader context: a beginner asking how to make cold outdoor riding easier
- r/bicycling reader context: extended sub-zero riding and keeping spray off