Why does the front of your bike shudder under braking?
Diagnose front-brake judder by checking wheel retention, headset play, rotor or rim condition, caliper security, friction surfaces, and when to stop riding.
 Field guide / front-brake-judder-bike-shudder
Front-end shudder during braking is an oscillation, not proof of one specific failed part. Uneven friction at the brake can excite movement in the fork and frame, while looseness at the wheel, headset, caliper, rotor, or rim-brake hardware can make that movement worse. Because the front brake and steering system are safety-critical, inspect retention and structure before cleaning or adjusting anything.
The short answer: if the vibration occurs only while the front brake is applied, start with the front wheel, axle, headset, brake fasteners, and braking surface. If it also happens while coasting, look beyond the brake to the tyre, wheel, hub, headset, and fork.
Record exactly when the shudder starts
A highly discussed r/bikewrench post showed dramatic front-end oscillation after landing and applying the brake. The comments offered many confident diagnoses from one video. That disagreement is the useful editorial signal: similar-looking vibration can have several causes, and remote footage cannot certify a bicycle as safe.
Before touching the bike, note:
- front brake only, rear brake only, or either;
- light braking, hard braking, or one speed range;
- once per wheel revolution or rapid continuous vibration;
- dry, wet, hot, or recently washed conditions;
- after wheel removal, pad replacement, crash, transport, or a hard impact;
- felt at the lever, handlebar, fork, or whole frame;
- present while coasting without braking.
Do not recreate violent judder to collect better evidence. One controlled low-speed observation is enough to stop and inspect.
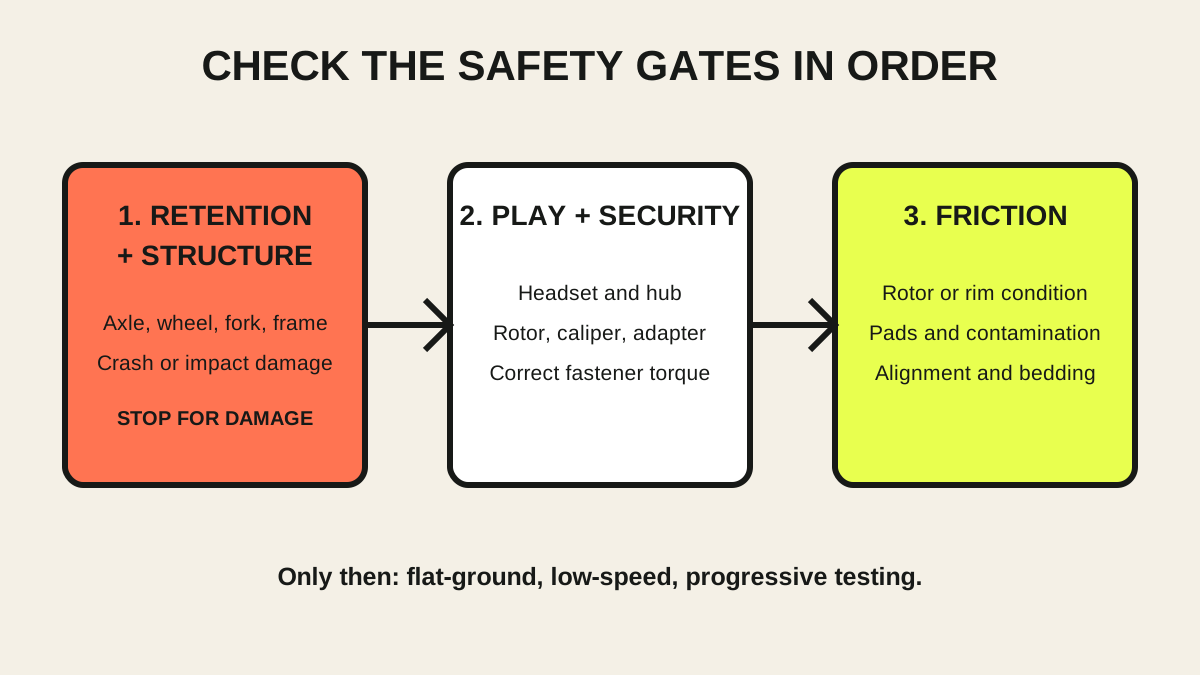
Gate 1: rule out retention and structural faults
With the bicycle stationary, check the front axle or quick release using the bike maker’s procedure. Confirm the wheel is fully seated and the tyre has safe clearance. If the wheel was recently removed, follow the front-wheel installation guide.
Inspect the fork crown, blades, dropouts, steerer area, head tube, handlebar, and stem for cracks, separation, sharp dents, or movement. Do not use tapping or a “coin test” to clear a carbon part; a normal sound cannot prove internal integrity.
Stop and use a qualified inspection if:
- the bike had a crash or heavy impact;
- a carbon surface is cut, crushed, soft, bulged, or delaminating;
- the axle will not secure normally;
- any brake mount or structural fastener moves;
- the cause remains uncertain after a violent event.
Gate 2: check for play
Apply the front brake and gently rock the bicycle fore and aft while placing fingers near the headset interfaces. A knock can come from a loose headset, but brake-pad movement can imitate one. Repeat carefully with the front wheel turned and, if you know the safe procedure, isolate the brake from the headset rather than guessing.
Our loose-headset guide explains the checks and why tightening the top cap alone is not a universal solution.
Also check for hub-bearing play, a loose rotor or lockring, loose caliper or adapter, rim-brake caliper movement, and spoke or rim damage. Use model-specific torque values. “Extra tight” can damage a fork, frame, rotor, or mount.
Gate 3: inspect the friction system
Once the complete front end is secure, inspect the brake.
Disc brakes
Look for a visibly deformed or cracked rotor, uneven rub, pad contamination, glazing, severe wear, or an inconsistent surface deposit. SRAM notes that improper bedding can leave an inconsistent layer of pad material on the rotor and cause persistent noise; MAGURA describes low-frequency jerking as vibration that can arise from alternating static and dynamic friction.
That mechanism is often called stick-slip: the pad alternately grips and releases, exciting other components. The visible fork movement can be the response, not proof that the fork alone is defective.
Do not put oil, general cleaner, or abrasive residue on the brake. Follow the brake maker’s approved cleaning, replacement, alignment, and bed-in instructions.
Rim brakes
Check that the rim braking track is clean and undamaged, the wheel is seated, the caliper is secure, and pads contact the track correctly without touching the tyre. Uneven deposits, a rim joint, a damaged track, loose headset, or poorly aligned pads can all contribute to pulsing or chatter.
Do not sand a carbon rim or change pad toe-in without the wheel and brake manufacturers’ instructions.
Use the frequency as a clue, not a verdict
If the lever or front end pulses once per revolution, suspect a local change around the rotor or rim: deformation, thickness variation, a rim joint, damage, or uneven friction material. If vibration is rapid and continues through a range of wheel positions, system resonance, looseness, contamination, alignment, or technique may be involved.
These patterns narrow the inspection; they do not identify a safe repair by themselves.
What not to do
- Do not repeat curb drops or panic stops to reproduce the video.
- Do not assume visible frame flex means the frame is broken—or safe.
- Do not hold the front brake and tighten every nearby bolt indiscriminately.
- Do not touch disc braking tracks with bare fingers.
- Do not straighten a rotor while it is hot or installed unless the manufacturer permits the method.
- Do not replace only the pads when the rotor, rim, mount, headset, or wheel is the fault.
After a repair, test in stages
A qualified repair should end with a stationary retention and brake check, then a walking-speed test on level ground, then progressively firmer stops while seated. The response should be smooth and repeatable without looseness, pulsing, rubbing, or changing lever feel.
If shudder returns as the brake warms, note that timing and stop. Heat-dependent recurrence is evidence for the mechanic, not permission to continue to a descent.
Your next step
Write down the trigger and frequency, photograph the wheel, brake, fork, and any damaged area, then ask a mechanic to check the complete front system—not only the pads. Bring the history of wheel removal, impacts, and recent brake work.