How to check a bike wheel after a truing service
Check wheel installation, tyre seating, lateral and radial runout, dish clues, spoke problems, and brake clearance before accepting a truing job.
 Field guide / check-bike-wheel-after-truing-service
Before you buy
Check the starter kit first
Print the one-page buying brief for helmet, lights, water, phone, and repair compatibility before comparing upgrades.
A trued wheel should be checked as a complete system, not judged from one gap beside the rim. Confirm the wheel is installed securely, the tyre is seated, the rim runs acceptably straight and round, the brake has clearance, and no spoke or rim damage remains. Ask the mechanic what was achievable and what was prioritised.
The short answer: inspect before the first full-speed ride. Spin the wheel slowly while using a fixed pointer at the bare rim, then check tyre seating, brake clearance, centring in the bike, hub play, and every spoke visually. A small residual deviation can be acceptable; loose spokes, recurring movement, structural damage, or an unexplained major offset needs a return conversation.
What a truing job is balancing
A recent r/bikewrench discussion asked how to judge a wheel that still appeared imperfect after paid truing. The thread is a useful demand signal because “true” is often treated as one yes-or-no property.
In practice, wheel work considers several related results:
- lateral trueness: side-to-side rim movement;
- radial trueness: whether the rim runs round rather than rising and falling;
- dish: whether the rim sits in the intended position relative to the hub and bike;
- spoke tension: absolute tension within rim limits and reasonable balance among related spokes;
- structural condition: whether the rim, hub, nipples, and spokes are fit to adjust at all.
Park Tool’s wheel-service guidance explicitly treats trueness, dish, and tension as connected checks. Making one reading look perfect can worsen another, especially on a damaged or heavily used wheel. A good handover should explain any compromise.
First confirm the wheel is installed correctly
Before judging the service:
- Confirm the correct wheel is fitted in the correct direction.
- Seat the axle fully in the dropouts or frame interfaces.
- Secure the quick release or thru-axle using the bicycle and axle instructions.
- Confirm the brake is not deliberately opened or mispositioned.
- Check the tyre pressure is appropriate and below all applicable tyre and rim limits.
A wheel sitting incorrectly in the frame can appear off-centre and cause brake rub even if the rim was accurately trued in a stand.
Separate rim movement from tyre movement
Secure the bike so the wheel can rotate without fingers, clothing, or tools entering the spokes. Place a zip tie or another non-scratching visual pointer close to the rim, not the tyre. Spin slowly and observe side-to-side movement, then reposition the pointer to observe up-and-down movement.
Now inspect the tyre’s moulded bead line around both sides. It should remain evenly visible relative to the rim. A tyre seated deeper in one section can wobble while the rim remains straight. Use the wheel-or-tyre wobble guide if the two movements differ.
Do not press a metal tool against a moving carbon or alloy rim. The aim is a visual reference, not a new scratch.
Check brake clearance and wheel position
For rim brakes, confirm both pads contact only the braking surface and clear the rim when released. For disc brakes, listen for persistent rotor rub, but remember the rotor and rim are separate components; a straight rim does not guarantee a straight rotor.
Look at clearance between tyre and frame or fork. Similar gaps are a useful clue, not a precision dish measurement. Frame alignment, tyre shape, and installation can affect the view. A dishing gauge or a controlled wheel-reversal test is more informative, and some asymmetric frames or wheels require model-specific interpretation.
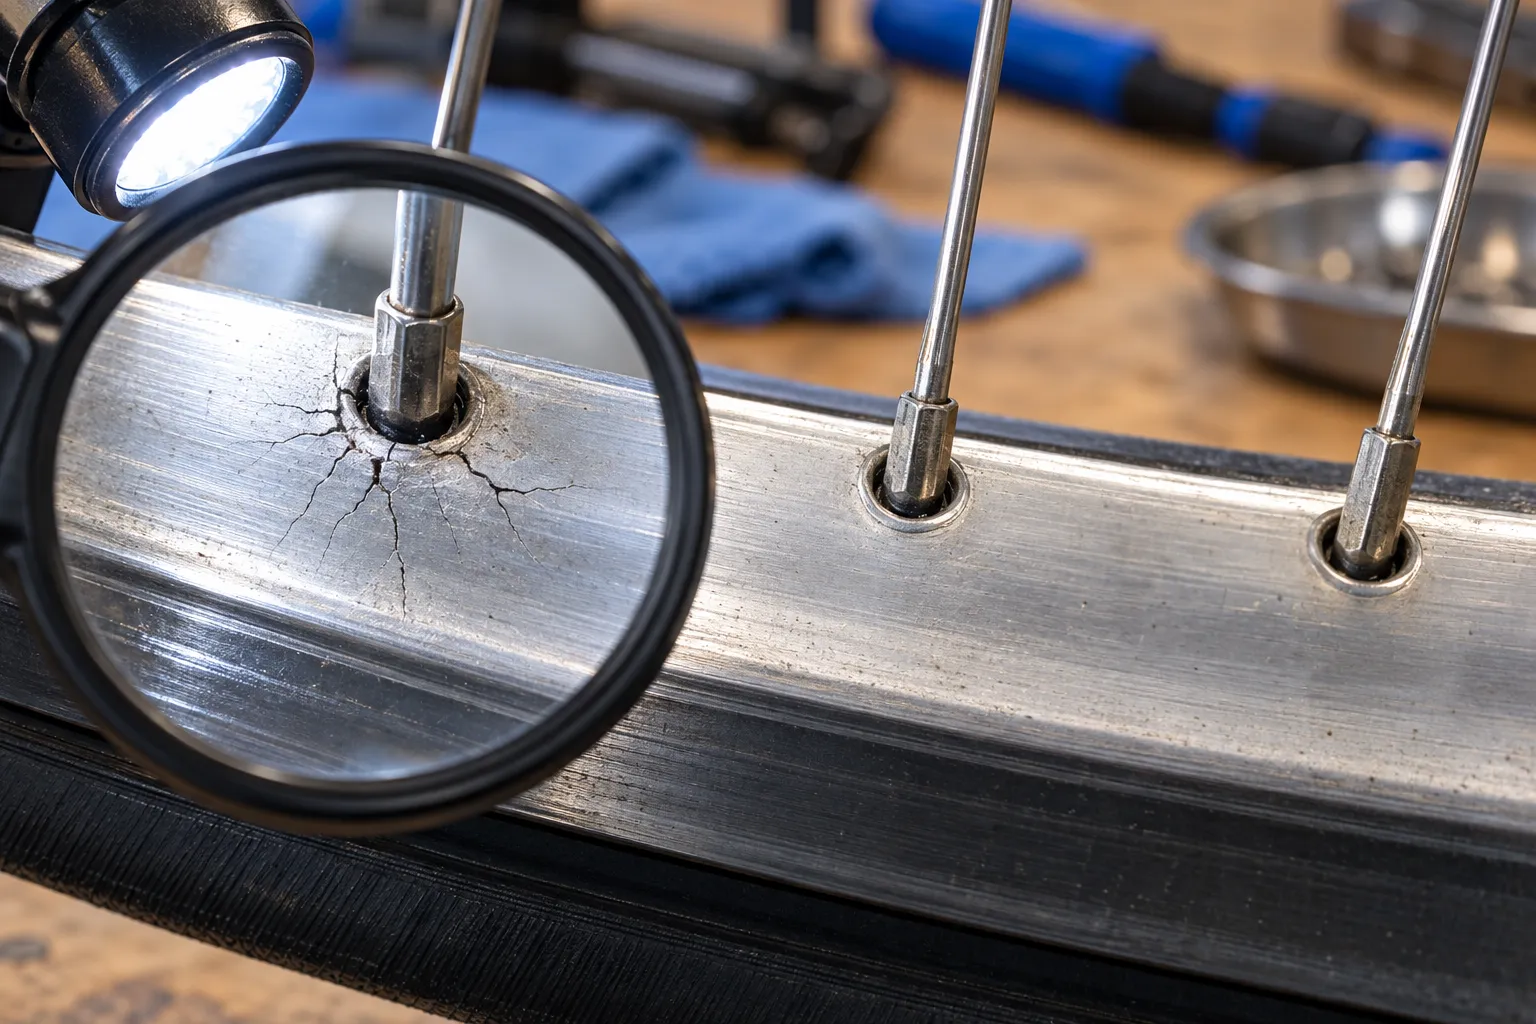
Inspect every spoke and the rim
With the wheel stationary, look for:
- a broken, bent, or visibly slack spoke;
- a nipple sitting at an unusual angle or pulling through the rim;
- cracks around spoke holes;
- a sharp flat spot or crease in the rim;
- spoke rub marks that suggest movement;
- a valve hole or rim joint that has opened or cracked.
Do not use random spoke plucking or squeezing as a substitute for measured tension. Tone changes with spoke length, gauge, lacing, and wheel side. A large outlier may justify asking the mechanic, but a tensiometer and the rim maker’s limits are the proper technical references.
Ask four specific handover questions
If the result seems uncertain, avoid “Is it perfect?” Ask:
- What fault did you find?
- Were lateral runout, radial runout, dish, and tension all checked?
- Is any remaining deviation intentional or limited by damage?
- Is the wheel safe for normal use, and does it need a follow-up after riding?
Bring the receipt and show the movement with the tyre and wheel installed as returned. A clear video can help, but do not demand a made-up universal millimetre tolerance. Acceptable limits depend on the rim, brake system, tyre clearance, manufacturer specifications, and the service agreed.
Test in stages
After the stationary checks pass, ride slowly near home. Brake progressively, listen for a new tick or rub, and stop after a few minutes to recheck wheel retention and visible spoke condition. Do not begin with a fast descent or standing sprint.
If the wheel moves out of true again, a spoke becomes loose, or a noise appears once per revolution, return it promptly. Recurrence can indicate unresolved tension imbalance, a damaged rim, a failing spoke, or another problem that visual straightening did not solve.
Your next step
Run the installation, rim, tyre, brake, and spoke checks before your next normal ride. If anything material is unclear, photograph it and ask the service provider the four handover questions while the work is still recent.