How to buy a safe first bike on a very small budget
Prioritize a sound frame, usable fit, working brakes and affordable repairs when brand names and ideal specifications are out of reach.
 Field guide / buy-safe-first-bike-small-budget
Before you view or pay
Check fit, condition, and starter gear first
Use the buying checklist to choose the right path: used-bike viewing, first-bike fit and type, hidden repair costs, or starter gear.
When your entire first-bike budget is very small, the goal is not to find the most impressive specification. It is to buy a correctly sized, structurally sound bicycle that stops, steers, rolls, and can be repaired with locally available parts.
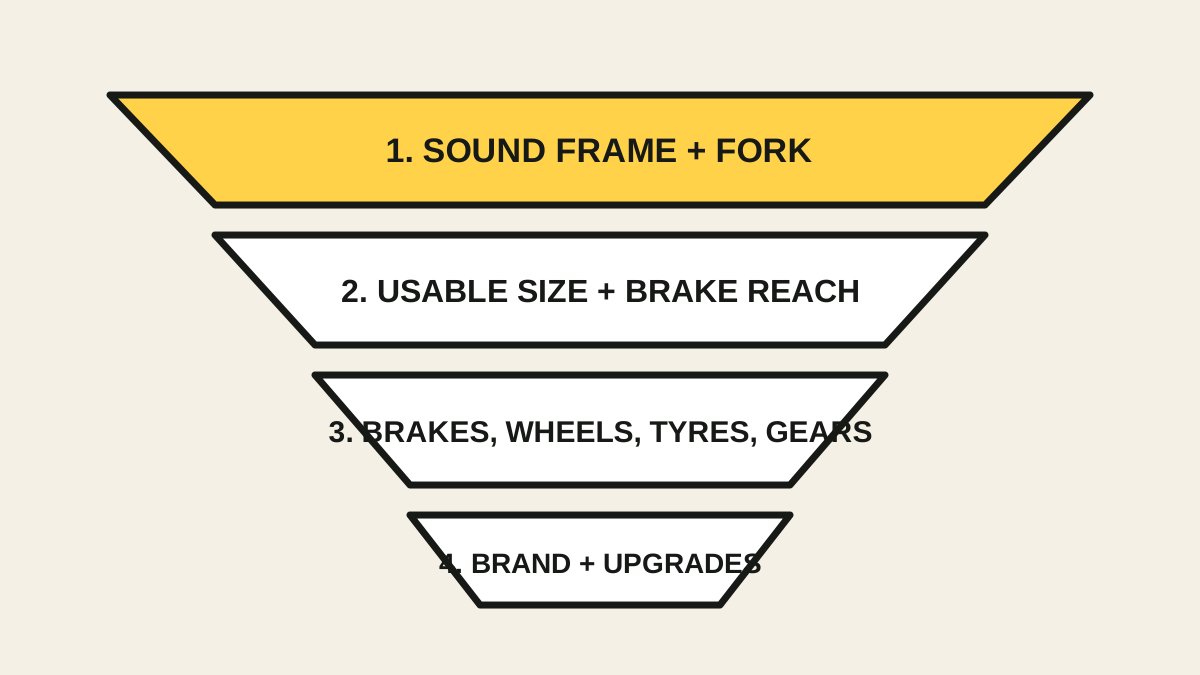
The short answer: spend first on safety and fit, then on function, and only then on brand or upgrades. A plain used hybrid, rigid mountain bike, or older road bike in good condition is a better start than a prestigious but unsafe project. Keep part of the budget for immediate repairs, a helmet, lights where needed, and a way to inflate and repair a tyre.
Define the ride before searching by brand
A recent beginner-bike discussion centred on a modest budget, casual paved riding, and uncertainty about brands, gears, brakes, and used bikes. That combination is common, but a brand list does not solve it. Used availability and repair costs vary too much by country and city.
Write down the real job instead:
- paved errands, fitness rides, or both;
- flat, rolling, or steep terrain;
- normal ride distance;
- luggage or mudguard needs;
- safe storage;
- parts and mechanics available locally.
For relaxed paved riding, a simple rigid hybrid is often easier to inspect and cheaper to service than a suspension bike. An older road bike can work when it fits and local roads suit narrow tyres. Do not buy unwanted suspension, extra gears, or unusual components merely because they look more valuable.
Reserve money before choosing the bike
Do not let the advertised price consume the whole budget. Make three envelopes:
- Bike: the bicycle itself.
- Immediate safety work: tyres, tubes, brake pads, cables, or a basic inspection.
- Ride essentials: an approved helmet, visibility equipment required locally, a pump, and a simple puncture solution.
If there is no repair reserve, a cheap bike with two dead tyres and worn brakes is not affordable. Ask a local shop for rough labour prices before browsing listings. The complete first-bike budget guide covers costs that are easy to forget.
Inspect in the right order
1. Frame and fork
Clean enough to inspect is a requirement. Use a light around welds, tube junctions, the fork crown, dropouts, and clamping areas. Look for cracks, sharp dents, buckling, deep corrosion, or a fork that does not align with the frame.
Paint chips are not automatically structural damage, but you should not guess about carbon damage or a crash-distorted metal frame. At this budget, uncertainty is a reason to choose another bike.
2. Size and controls
You must be able to mount and dismount safely, pedal without an extreme saddle position, reach both brake levers, and steer without your knees colliding with the bars. A size label such as “medium” is not universal.
Adjust the saddle only within its marked limits. Do not use an extra-long stem or an unsafe seatpost position to rescue a frame that is clearly unsuitable. Use the too-big-or-too-small checks before accepting “you will grow into it.”
3. Brakes, wheels, and tyres
The US Consumer Product Safety Commission’s bicycle check instructs riders to inspect braking, wheel security, tyre condition, and inflation. For a viewing:
- squeeze each brake separately and push the bike;
- confirm the levers do not bottom out on the bar;
- lift and spin each wheel, watching for severe wobble or rubbing;
- hold each wheel at the rim and check for obvious side play;
- inspect tyres for bulges, exposed casing, splits, and deep cracking;
- confirm quick releases, axle nuts, or thru-axles secure the wheels.
A small wheel wobble may be serviceable. A cracked rim, damaged hub, unsafe tyre, or non-working brake belongs in the repair budget before the first ride.
4. Drivetrain and bearings
Shift through every available gear during a controlled test. Listen for skipping under gentle load. Turn the cranks and check whether the chain is badly rusted, stiff, or falling off. Apply the brakes and rock the bike to feel for looseness at the headset; check the cranks for side-to-side play.
These faults are not all deal-breakers, but they are prices. Write them down and cost them rather than trusting “it only needs an adjustment.”
Prefer common, complete parts
A basic bike becomes expensive when it needs obsolete or proprietary parts. Before paying, identify:
- wheel and tyre size printed on the tyre sidewall;
- brake type and pad availability;
- number of rear sprockets;
- shifter and derailleur type;
- seatpost diameter if it needs replacement;
- any missing battery, charger, key, axle, or special hardware.
Avoid incomplete bikes unless you already know the exact replacement parts and total cost. A complete three-by-seven drivetrain that works can be more useful than a newer system missing one costly control.
Check provenance, not just condition
Ask for the serial number, proof of purchase when available, service history, and a simple written receipt with seller details. Compare the seller’s story with the bike and listing. An implausibly low price, removed serial number, refusal to meet safely, or inconsistent ownership story is a stop signal.
Use the full stolen-bike avoidance checklist and the used road-bike viewing checklist before exchanging money. Cycling UK’s second-hand guidance also recommends seeing the bike in person, checking bearing play and modifications, and asking about crash and service history.
Use a simple pass, price, or walk-away decision
After the inspection, put every finding in one of three columns:
- Pass: safe, suitable, and working now.
- Price: repairable, with a known part and labour cost.
- Walk away: structural uncertainty, unsafe test conditions, unsuitable size, questionable provenance, or repair costs beyond the budget.
Do not let sunk travel time turn a walk-away bike into a purchase. There will be another bicycle.
Your next step
Build a local shortlist by type, size range, and total ready-to-ride cost—not by logo. Take the used-bike checklist to every viewing and get a mechanic’s inspection when you cannot confidently assess the safety-critical parts yourself.
Sources and further reading
- Reddit: a recent very-low-budget beginner-bike question — editorial demand signal only; anecdotes were not treated as verified facts.
- US CPSC bicycle inspection checklist
- Cycling UK: how to buy a second-hand bike