Black dust on a rim-brake wheel: normal grime or a brake problem?
Clean and inspect the brake pads, aluminium braking track, tyre edge, pad alignment, and rim wear before deciding whether black dust is ordinary.
 Field guide / black-dust-on-rim-brake-wheel
A light black film on an aluminium rim-brake wheel can be ordinary brake-pad material mixed with road grime. Heavy dust, rapid pad loss, metallic fragments, deep scoring, or dust returning immediately after cleaning is not something to dismiss. Inspect the complete pad-and-rim pair.
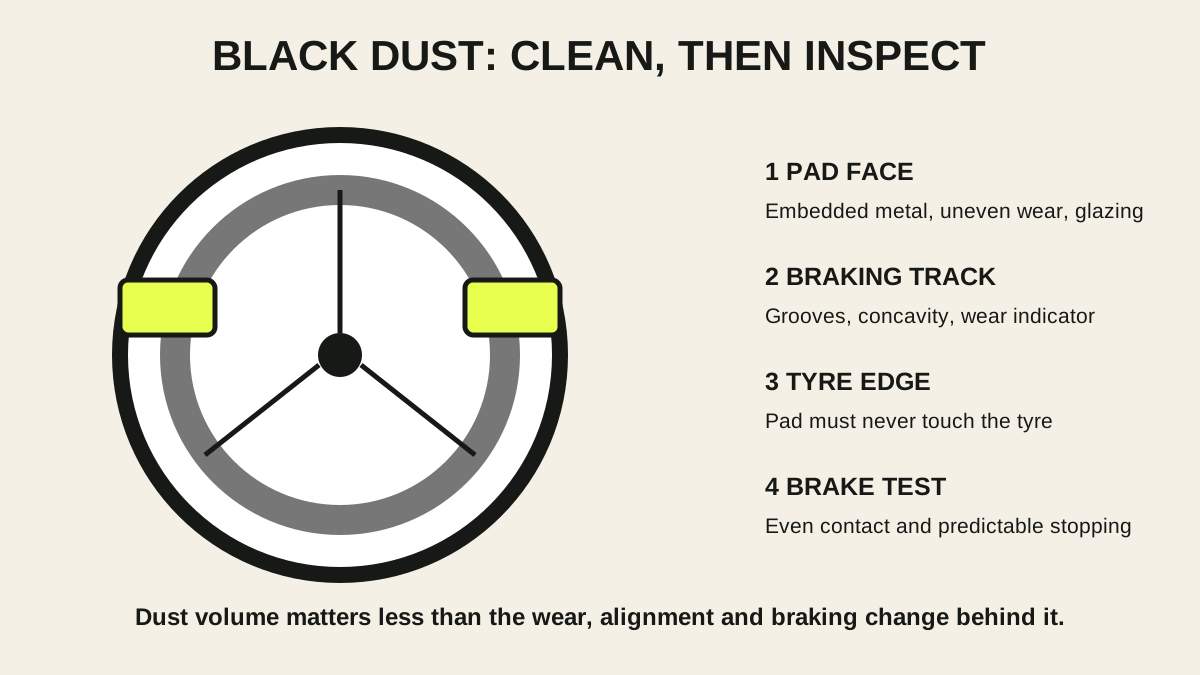
The short answer: clean the braking track with the method approved by the wheel maker, remove the wheel, and inspect both pad faces under bright light. Confirm that each pad contacts only the braking track, has no embedded debris, and remains above its wear limit. Then check the rim’s wear indicator and surface. Do not repeatedly sand the rim to make it look silver.
Why a road wheel can make black residue
A current r/bikewrench discussion asks whether heavy black grime appearing around a rim-brake wheel after ordinary rides is concerning. The rider had moved from disc-brake mountain bikes and was cleaning and sanding the braking track repeatedly.
Rim brakes use the wheel rim as the rotor. Pads shed material as they wear; water, road dust, aluminium particles, and grime can join it. Wet roads often make the residue more obvious. The colour alone cannot tell you whether the pad, rim, or road supplied most of it.
The rate and accompanying symptoms matter more:
- a light wipe after wet riding with normal braking is different from thick dust after every short dry ride;
- even pad wear is different from one pad disappearing quickly;
- a smooth track is different from deep grooves or metal flakes;
- ordinary sound is different from grinding, scraping, or newly weak braking.
Do not sand away the evidence
Routine aggressive sanding removes material from the braking track and can change its finish. A rim is a structural pressure vessel as well as a braking surface; it is not an unlimited sacrificial disc.
Do not use abrasive kitchen pads, coarse paper, metal tools, or strong solvents unless the exact wheel maker specifies them. Do not chase a permanently bright cosmetic finish. Some darkening will return because braking is a friction process.
First photograph the dust pattern, then clean according to the rim or wheel instructions. Shimano wheel guidance calls for neutral detergent on applicable wheel areas and says to check brake shoes for metal or foreign objects that could damage the rim. Continental’s bicycle care instructions require full, even pad contact on the rim without touching the tyre.
Remove the wheel and inspect both pads
Release the brake and remove the wheel using the bicycle’s axle procedure. Avoid operating a disconnected cable or moving parts unnecessarily.
Under bright light, inspect each pad for:
- the maker’s wear line or remaining grooves;
- glassy, hardened areas;
- angled or uneven wear;
- embedded aluminium, stone, glass, or grit;
- cracks or separation from the holder;
- incorrect left/right or directional installation;
- a holder or retaining screw approaching the rim.
Pick out debris only with the method allowed by the pad maker. Replace pads that are damaged, contaminated, worn beyond limits, or incompatible with the rim material. A pad intended for an aluminium track may not be approved for a carbon track, and material transferred between wheel types can damage the next rim.
Check where the pad lands
Reinstall and secure the wheel correctly before assessing alignment. Squeeze the brake gently and watch the pad approach.
The full pad face should contact the intended braking track. It must not:
- touch the tyre or climb above the track;
- hang below the track;
- contact a rim decal not designed as a brake surface;
- meet the rim at a severe angle;
- strike one side much earlier because the wheel or brake is mis-centred.
A pad touching the tyre can cut the casing and cause a blowout. Stop immediately. Use the exact caliper instructions or a qualified mechanic to correct pad position and torque.
Inspect the braking track and rim wear
Rotate the wheel slowly. Look and feel only after cleaning, with no sharp edge likely to cut a finger.
Check for:
- a wear-indicator groove or hole that has reached its replacement state;
- sidewalls becoming visibly concave;
- cracks around the braking track or spoke holes;
- deep continuous grooves;
- bulging or pulsing at one part of the rim;
- sharp burrs;
- heat damage or unusual discolouration;
- a brake track inconsistent with the wheel’s documented material.
Rim-wear indicators vary. Some disappear with wear; others become visible. Find the wheel manual rather than guessing. If no specification is available, ask the wheel maker or a competent shop to measure the rim.
Use braking performance as another signal
After cleaning and correct assembly, test the brakes in stages in a traffic-free area. Both levers should have predictable travel, the wheel should release, and stopping should build smoothly.
Investigate further if you get:
- grinding or a regular pulse;
- weak braking in dry conditions;
- a lever moving unusually close to the bar;
- one pad contacting before the other because the caliper remains off-centre;
- rapid dust return with visible pad loss;
- new vibration or tyre-sidewall marks.
Do not confuse “it stops eventually” with a completed test. Road braking must remain controllable when the surface is wet and on the steepest route you use.
Keep a simple wear record
After installing known compatible pads, photograph their wear grooves and the clean rim. Note the date and approximate distance. Recheck after a wet week or a few long descents.
This turns “there seems to be lots of dust” into measurable evidence:
- pad groove depth changed or stable;
- rim track smooth or developing damage;
- dust light, moderate, or heavy under similar conditions;
- braking normal or changing.
Frequent wet and gritty riding may require more cleaning and inspection. It does not justify ignoring rapid wear.
Your next step
Stop sanding the track. Clean it once with the wheel maker’s approved method, remove the wheel, and photograph both pad faces and the rim wear indicator. Correct any pad that touches the tyre or misses the track. Use the rim-brake pad replacement guide for the wear decision. If metal fragments, deep grooves, fast pad loss, or an uncertain wear indicator appears, have the rim and pads inspected before the next ride.
Sources and further reading
- Continental bicycle tyre and wheel care instructions: rim-brake pad contact and pre-ride checks
- Shimano wheel instructions: inspect brake shoes for embedded metal and use appropriate cleaning
- r/bikewrench reader context: heavy black residue on a rim-brake road wheel — used as a current problem signal; cleaning suggestions in replies were not treated as component instructions.