Bike will not secure to a direct-drive trainer: check the adapter stack
Identify the trainer revision, dropout width, axle, freehub, and drive-side and non-drive-side adapters before tightening a frame that will not clamp securely.
 Field guide / bike-will-not-secure-to-direct-drive-trainer
If a rear thru-axle lines up with a direct-drive trainer but will not tighten—or can be pulled straight back out—the answer is not more torque. One part of the support and thread stack is missing, reversed, incompatible, or not seated.
The short answer: remove the bicycle and identify the exact trainer generation, rear dropout spacing, bicycle axle specification, freehub, and every adapter by part number. Rebuild the arrangement from the current trainer manual. Both dropouts must sit flat against the correct supports and the axle must start by hand. If it does not, stop and ask the trainer and frame makers to confirm compatibility.
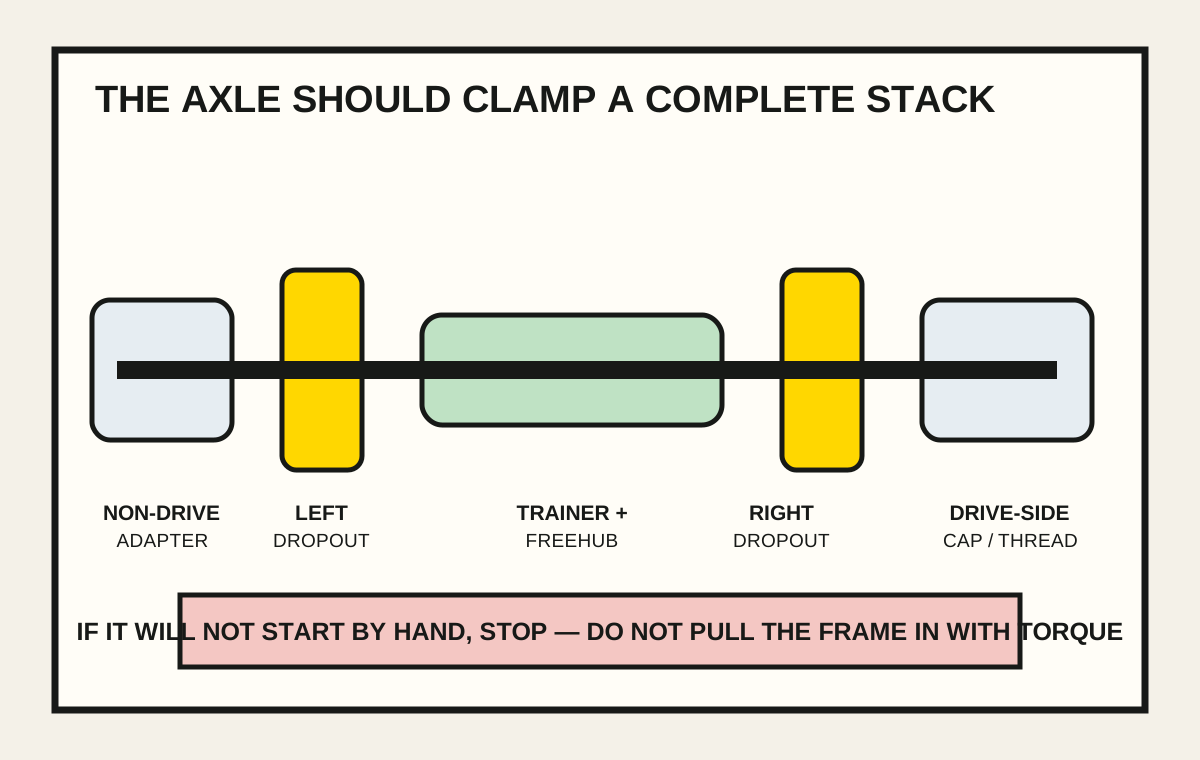
Separate four specifications people call “axle size”
Write down each item instead of relying on “12 mm thru-axle”:
- Axle diameter: commonly 12 mm on a modern road rear, but confirm it.
- Dropout spacing: often 142 mm for road and gravel or 148 mm for Boost, but measure or use the frame manual.
- Thread pitch and length: these belong to the frame’s axle system, not merely the hub width.
- Trainer adapter arrangement: the parts that support the frame and, depending on design, provide the receiving thread.
Also record the trainer model, hardware revision, serial number, installed freehub, and cassette. Trainer names can remain similar across generations while their adapter requirements change.
Wahoo, for example, documents revised KICKR and CORE adapters for selected frames and distinguishes drive-side parts by freehub type. That is why a bag marked “142/148” is not enough evidence by itself.
Remove the bicycle before diagnosing
If the axle has not captured a thread, support the frame and lift it off without dragging the dropouts across the trainer. If it is partly threaded or jammed, do not force removal; use the stuck trainer thru-axle guide.
Disconnect trainer power and place every loose adapter on a clean tray. Photograph both sides before moving anything. Check whether an adapter remained inside the bicycle dropout or fell behind the cassette.
Do not spread the rear stays to make them reach an adapter. Do not add washers from a hardware drawer. Do not clamp against the derailleur hanger unless the trainer and frame instructions explicitly show that interface.
Identify the failure pattern
The axle slides in and pulls back out
The receiving thread may be absent, on the wrong side, the wrong adapter may be fitted, or the frame’s axle may not be the axle the trainer system requires. A damaged thread can produce the same result.
The axle starts but stops after part of a turn
Stop. Likely causes include cross-threading, wrong pitch, an angled frame, an adapter not fully seated, or a dropout contacting the wrong shoulder.
The axle tightens but the frame still moves
The stack may be too narrow, an adapter may be reversed, or one dropout may not be supported. Torque cannot replace a missing spacer or end cap.
The frame clamps but touches the trainer
Frame, brake caliper, derailleur, cassette, or stay contact means the arrangement is not usable. Wahoo notes that compatibility depends on both frame fit and correct adapter installation and that not every frame is compatible.
Rebuild from the manual, one side at a time
Use the current support page for the exact trainer. Confirm:
- quick release, 12 × 142, or 12 × 148 configuration;
- correct non-drive-side adapter and orientation;
- correct drive-side cap for the installed freehub;
- any revised or frame-specific adapter requirement;
- whether the bicycle’s original axle is used;
- cassette spacers and lockring are unrelated to the frame clamp;
- no shipping protector or obsolete adapter remains installed.
Seat each adapter fully with no rocking. Lower the bicycle vertically so both dropout faces land flat. The rear derailleur should clear the trainer and the chain should sit on the cassette without pulling the frame sideways.
Insert the axle with fingertips. It should pass through the first dropout and supports without needing the tool as a lever. Align the threaded end and turn it backward slightly until the thread start is felt, then forward by hand.
If it cannot engage for several turns by hand, remove it. Do not use the axle to pull a gap closed.
Inspect the parts before a second attempt
Under bright light, check:
- flattened, torn, or contaminated axle threads;
- aluminium or paint transfer on adapter shoulders;
- burrs, cracks, corrosion, or deformation;
- a loose threaded insert or derailleur hanger;
- cassette, lockring, or freehub movement;
- frame marks showing it contacted the trainer body;
- adapter part numbers that do not match the manual.
Compare the bicycle’s rear wheel installation. If the original axle enters the frame and wheel smoothly but not the trainer arrangement, that points toward trainer setup or compatibility. It does not prove the frame is undamaged after force was applied.
Tighten only after compatibility is proven
Use the bicycle maker’s axle torque and thread treatment, not a generic trainer number. Watch both dropouts as the clamp closes. Neither stay should spring inward, bow outward, or slide across an adapter.
Before riding:
- Push the saddle gently side to side; the frame must not move on the trainer.
- Turn the cranks by hand and shift slowly through permitted gears.
- Check chain, derailleur, brake caliper, rotor if retained, and frame clearance.
- Confirm the trainer feet are stable and its height setting is correct.
- Begin with a short easy spin and stop for any movement, new noise, or rubbing.
When to escalate
Send support one complete evidence set: frame model and year, trainer model and serial, dropout spacing, axle markings, freehub type, photographs of every adapter, and one photo from each side with the bicycle resting—untightened—on the trainer.
Use a qualified shop when threads are damaged, the hanger or insert moves, carbon shows a new mark, parts have already been forced, or the instructions remain ambiguous. Do not ride the bicycle outside until the original rear wheel also secures correctly.
Your next step
Remove the bicycle and arrange the adapters in manual order. If one part number or orientation cannot be verified, stop there and send the evidence set to the trainer maker before another installation attempt.
Sources and further reading
- Wahoo: bike does not fit on KICKR troubleshooting flow
- Wahoo: revised KICKR and CORE thru-axle adapter installation
- r/cycling reader context: a previously used trainer setup whose rear axle would no longer secure — used as a current setup-failure signal; the exact missing or damaged part was not diagnosed from the post.