Why your road-bike crank has side-to-side play
Separate crank play from pedal, chainring, and frame movement, then choose the correct manual or mechanic instead of guessing with spacers or torque.
 Field guide / road-bike-crank-has-side-to-side-play
Visible side-to-side crank movement is not normal. It may come from incorrect bearing preload, a loose crank fixing, missing or incorrect spacers, worn bearings, an incompatible assembly, or damage. Park the bike until you identify the crank system and follow its exact procedure.
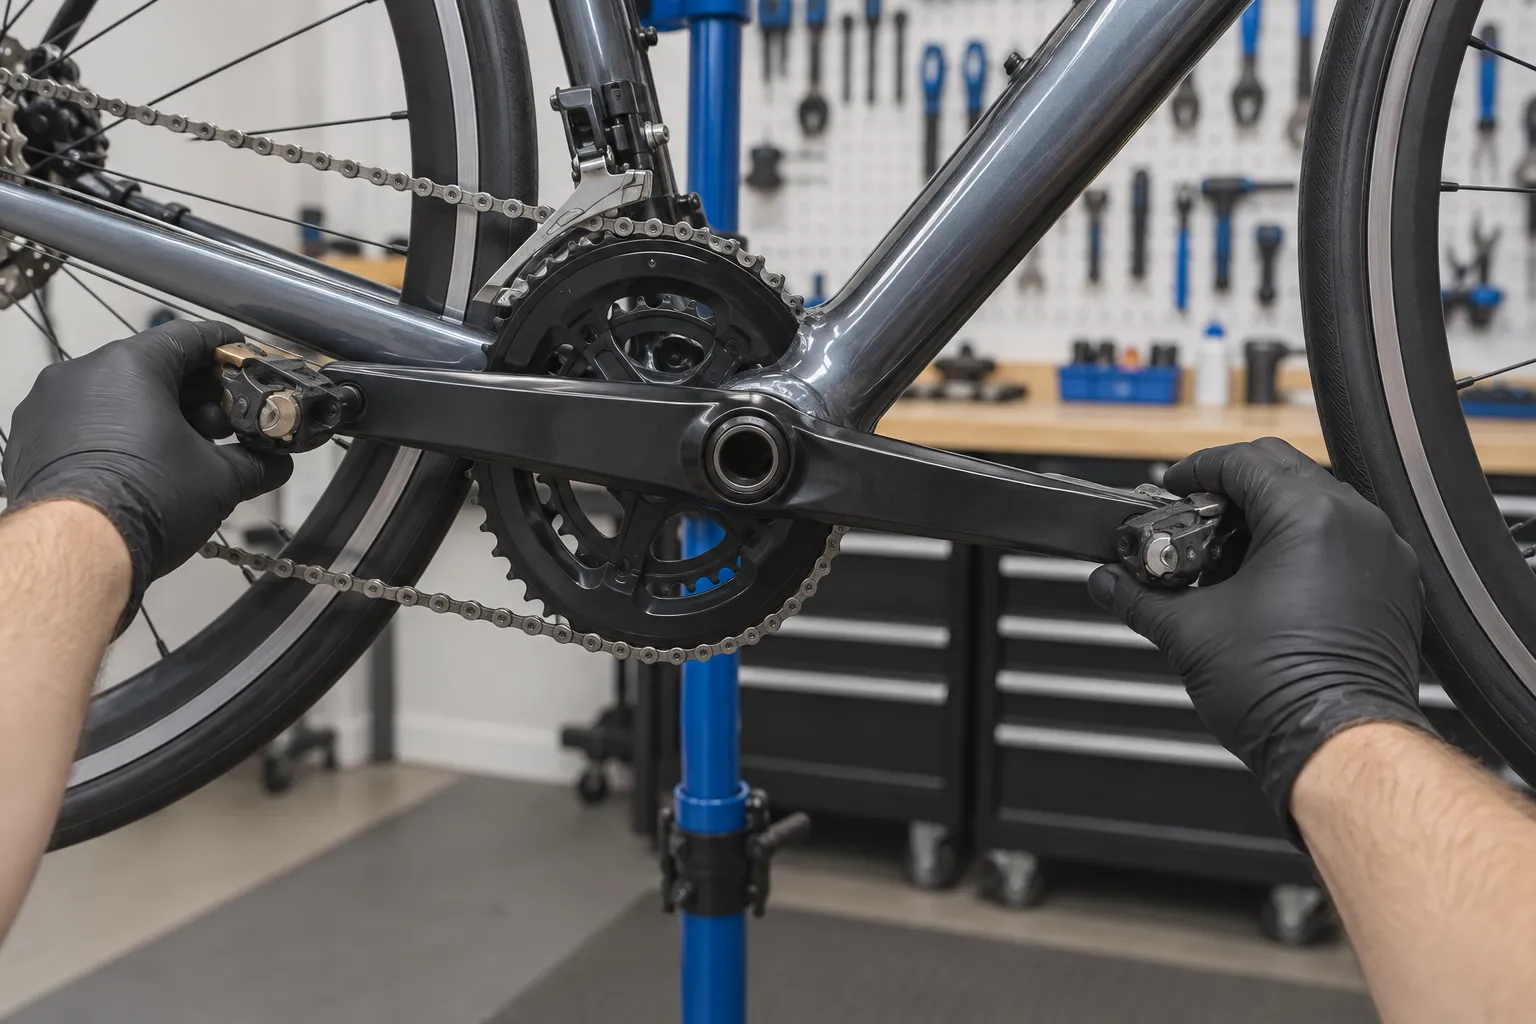
The short answer: first prove what is moving. Hold both crank arms and rock them laterally. Watch the spindle, bottom-bracket cups, frame, pedals, and chainrings separately. Do not “tighten everything,” add a homemade shim, or copy a torque value from another crank design.
Why “tighten the preload” is incomplete advice
A recent high-engagement repair thread showed large crank movement and conflicting repair suggestions. Another discussion involved play after a new bottom-bracket installation, while an earlier popular thread traced play to a loose preload arrangement after service.
Those threads show why the symptom recurs, but comments cannot identify a hidden interface or approve a repair. Shimano HOLLOWTECH II, SRAM DUB, square-taper, Campagnolo, one-piece, and specialist crank systems use different fixing, preload, spacer, and torque procedures. Some have no rider-adjustable bearing preload at all.
Confirm that the movement is real
With the bike stable and the drivetrain stationary:
- Put the crank arms roughly horizontal.
- Hold both arms near their ends, not the pedals.
- Push one toward the frame while pulling the other away, gently.
- Reverse the direction and feel for a knock.
- Watch where the spindle enters the bottom bracket.
- Repeat while another person watches, if possible.
Do not confuse these movements:
| What moves | More likely area to inspect |
|---|---|
| Both crank arms and spindle shift together | Bearing preload, spacers, bottom bracket, crank installation |
| One crank arm moves on the spindle | Crank-arm fixing, splines or interface damage |
| Pedal body rocks but crank stays still | Pedal bearing or pedal attachment |
| Chainrings move relative to the crank | Chainring or spider fixing |
| Bottom-bracket cup moves in the frame | Cup installation, thread or press-fit interface, frame issue |
| Rear of bike moves while crank looks stable | Wheel, axle, frame, stand, or another source |
Any visible frame crack, cup movement in carbon, damaged threads, or deformed crank interface belongs with a qualified mechanic or the manufacturer.
Identify the exact system
Look for the crank model number, usually on the inside of an arm, and the bottom-bracket model or frame specification. Photograph the markings before cleaning them.
Record:
- crank brand and complete model;
- bottom-bracket model and shell standard;
- frame model, year, and shell width;
- every installed spacer and its location;
- whether the crank was recently removed or serviced;
- whether the movement appeared suddenly or gradually.
Do not identify the system only by appearance. Similar black two-piece cranks can require different spacers, wave washers, preload rings, caps, and fixing torque.
What preload does—and does not do
Bearing preload removes designed axial clearance so the assembly runs without play, while avoiding excessive load on the bearings. It is not the same as the main crank fixing.
For example, Shimano’s HOLLOWTECH II road procedure uses a low-torque plastic cap to set the assembly before the left-arm clamp bolts are tightened in the specified sequence. SRAM’s DUB road procedure uses its preload adjuster after the main crank fixing is tightened, and warns against overtightening the adjuster because that can damage the bearing.
These examples are deliberately different. Neither is a generic method for your bike.
Too little preload may leave play. Too much may make the crank bind and shorten bearing life. A preload adjuster cannot compensate for a crank that is not fully seated, the wrong bottom bracket, missing required parts, damaged splines, a loose cup, or failed bearings.
Safe diagnosis order
- Stop riding. Do not use a harder test ride to confirm a loose crank.
- Locate the moving interface. Use the gentle stationary check above.
- Inspect for obvious damage. Look for gaps, backed-out fasteners, cracks, fretting dust, and cup movement without dismantling unfamiliar parts.
- Find the current manual. Match the full model number, not merely the brand.
- Check the parts list. Compare spacer, washer, cap, wave-washer, and fixing arrangement with the manual.
- Choose DIY or mechanic. Proceed only if you have the correct tools, torque information, and experience.
- Perform the complete procedure. Do not adjust one part while skipping the system’s removal, inspection, lubrication, seating, or tightening sequence.
- Recheck and test. Confirm no play or binding, then use a low-speed traffic-free check.
If the play began immediately after shop service, stop riding and return the bike with a short video of the movement. Give the shop the opportunity to inspect the whole assembly rather than changing it first.
Do not improvise with these fixes
- a wire loop, drink-can shim, or unidentified washer;
- a spacer location suggested for a different crank or shell;
- maximum hand force on a preload cap;
- threadlocker where the manual specifies grease or dry assembly;
- “tight enough” in place of a specified torque and sequence;
- riding until noise appears in every gear.
A random spacer may hide the movement while misaligning the chainline or preventing correct engagement. Overtightening can damage bearings, threads, or a crank interface.
If the bearings are worn
Roughness, binding, contamination, or bearing play may mean the bottom bracket needs service or replacement, but serviceability varies. Press-fit removal and installation often need frame-specific drifts and support. Threaded cups require the correct tool and direction.
Replacement must match the frame shell and crank spindle, not just the brand printed on the crank. If either standard is uncertain, bring the complete bike to a shop.
Your next step
Keep the bike parked. Record a short close-up video while gently rocking the crank, photograph every model marking, and download the exact crank and bottom-bracket manuals. If the system, spacer chart, damage state, or tools are uncertain, send that information to a qualified mechanic rather than guessing.
Sources and further reading
- Shimano dealer manual: HOLLOWTECH II crank installation and preload cap
- SRAM Road AXS manual: DUB crank installation and preload adjustment
- r/bikewrench reader context: large crank movement and DIY decision
- r/bikewrench reader context: play after bottom-bracket replacement
- r/bikewrench reader context: crank play after service